HOMEABOUT USSHOP HERECROPDATESCURRENT CHALLENGESTIPS&TUTORIALS

Monday, October 30, 2017

Fairytale Wish with Pink Paislee Turn the Page by Fiona Johnstone

Hi Everyone

This week I am sharing a layout created using the beautiful Turn the Page collection by Pink Paislee. We are also back to Disneyland photos! The colours in this collection are just stunning and I have teamed them up with the gorgeous new release colours from Dylusions Paints - Peony Blush and Rose Quartz. 

Fairytale Wish
To create my page I have started with the lighter Dylusions Paint, Rose Quartz and used a paint brush to swipe it across my cardstock, then I've used a mix of the two colours for the middle before finishing up with the darker Peony Blush. Once dry I've added some splatters of Dylusions Paints in White Linen. 

Once this was dry I focused on layering up some of the beautiful patterned papers in the Tune the Page collection , adding a doily for some softness. 

Embellishing with some of the flowers and the cute Magical arrow from the Turn the Page ephemera pack , I've added some 2Crafty chipboard stems which I've painted using the Dylusions Paints Slate Grey and Lemon Zest. 


I've dug into some of my older Simple Stories Enchanted collection for the crown brad and white sticker, some Echo park clouds and Fairytale sticker and then added the foam wish word. 


Thanks for stopping by
Till next week 
Fiona
x
Photobucket
Products Used:
Pink Paislee Turn the Page paper #2
Pink Paislee Turn the Page paper #15
Pink Paislee Turn the Page paper #18
Pink Paislee Turn the Page paper Ephemera
Dylusions Paint - Peony Blush 
Dylusions Paint - Rose Quartz
Dylusions Paint - White Linen
Dylusions Paint - Slate Grey 
Dylusions Paint - Lemon Zest 
White Bazzil Cardstock
2Crafty Chipboard - Shrub Set 1
Simple Stories Enchanted Enamel Brad & White Sticker
Echo Park Perfect Princes stickers 

Friday, October 27, 2017

Merry & Bright using Kaisercraft Letters to Santa by Kerryn Fry

Morning Everyone!
It's Kerryn here and today I'm sharing my last project for October.
This week I've gone back to the traditional Christmas collection
 from Kaisercraft, Letters to Santa. 
Every year at Christmas, Mr 13 and I head to a college nearby to visit their amazing 
Christmas light display with a choir and nativity scene.
Our boy may be getting older, but he still loves Christmas.

Starting with Kraft cardstock background, 
I have sponged Picket Fence Distress Ink through a 
6x6 Crafter's Workshop Template to decorate the background.
Once the ink was dry, I have added Diamond Stickles to the stencil pattern.


The flowers have been fussy cut from Letter to Santa Carolers and Dear Santa.
I've highlighted the flowers and added a faux stitched border with a gold gel pen.


The 2 Crafty title Merry & Bright has been painted with Tarnished Brass Distress Paint. 
I have covered the snowflakes in the title with Diamond Stickles.
The words have been given a coat of Glossy Accents.
 The 2 Crafty Holly Twig Branches were painted, coated with Glossy Accents 
and then added Dimensional Paint for berries.


I have created another layer to the flower arrangement by using some holly branches
from the Sticker Sheet and putting them around the edges.
More stickers have been used for a word cluster on the side of the photos.


That's my project for this week.
Thank you for dropping by the blog today.
I hope you have been inspired.
Please pop back on Monday to check out Fiona's next project.

Products Used:

 
Photobucket

Wednesday, October 25, 2017

"Beautiful Roses" by Amanda H

Hi everyone,
 
Welcome to my last page share for October!
 Today I was inspired by the flowers and colours in the Simple Stories - Beautiful Collection, especially when I found this lovely old photo of my Nana with her favourite white rose bush.
 
Here is my page.
Please find a full list of the products I used at the end of this post.
 

I started my page with a base sheet of Kaisercraft paper, then I used some pieces of the Simple Stories Beautiful Collection, in various layers. I cut and layered the papers, using my distressing tool on the paper edges. I focused my page down the centre of the page.

On either side of the photo, I created clusters. These clusters include:
* Chipboard stickers from the Simple Stories Beautiful Collection
* 2 Crafty chipboard leaves inked lightly in gold

Here are some close ups of these clusters:


For the title, I used a wood veneer wood from CVS Wild at Heart, which I painted white, using  Colour Blast White Heavy Gesso. I also gave it a coat of Dimensional Magic.
I combined this word with some gold letters from the Crate - Carousel Thickers set.


It is always lovely to scrap those older memories - why don't you dig out a photo and scrap it today?

Thanks for looking,
Amanda


Products used:

Papers:

2Crafty Chipboard:

Embellishments:
MME - Blush Puffy Stickers with Gold Foil Accents
Kaisercraft - Mini Paper Blooms - Sage
Kaisercraft - Mini Paper Blooms - Coconut
CV - Wild At Heart Wood Veneer
Colour Blast - White Heavy Gesso
Dimensional Magic
 
Photobucket

Monday, October 23, 2017

Pursue Magic with Pinkfresh Studio Escape the Ordinary by Fiona Johnstone

Hi everyone

This week I've had a play with the funky Escape the Ordinary collection by
 Pinkfresh Studios to create my layout:

Pursue Magic
When I first saw this paper it looked magical so I new it would be perfect for this photo I have had ready to scrap for a while, waiting on that perfect paper! The Pursue Magic hexagon in the ephemera pack really sealed the deal on this page!


I've used embellishments from the collection, both the ephemera and the puffy stickers. I've added a few puffy stars and some triangles to my design. I've popped a doily behind my title, so that it doesn't get lost amongst the busy paper. 


I've finished the page with a little phrase from one of the Simple Stories Say Cheese collection, an old wooden nickle and a sequin. 

Thanks for stopping by
Till next week
Fiona
x
Photobucket
Products Used:
Pinkfresh Studio Escape the Ordinary paper - Discover
Pinkfresh Studio Escape the Ordinary paper - Dare
Pinkfresh Studio Escape the Ordinary paper - Wander
Pinkfresh Studio Escape the Ordinary Ephemera Pack
Pinkfresh Studio Escape the Ordinary Puffy Stickers
Simple Stories Say Cheese 3 4x6 Stickers (for similar words)
Jillibean Soup Wooden Nickels
Studio Calico Sequins
Doily
Black Cardstock 

Friday, October 20, 2017

Sorry Not Sorry
using Pinkfresh Studio Boys Fort
by Kerryn Fry

Good morning to all!
I'm back to finish off the week with my Friday share.
My project this week features the cool collection from Pinkfresh Studio,'Boy Fort'.
The photos were taken on our recent family snow trip in Victoria,
Mr 13 with my big sister.

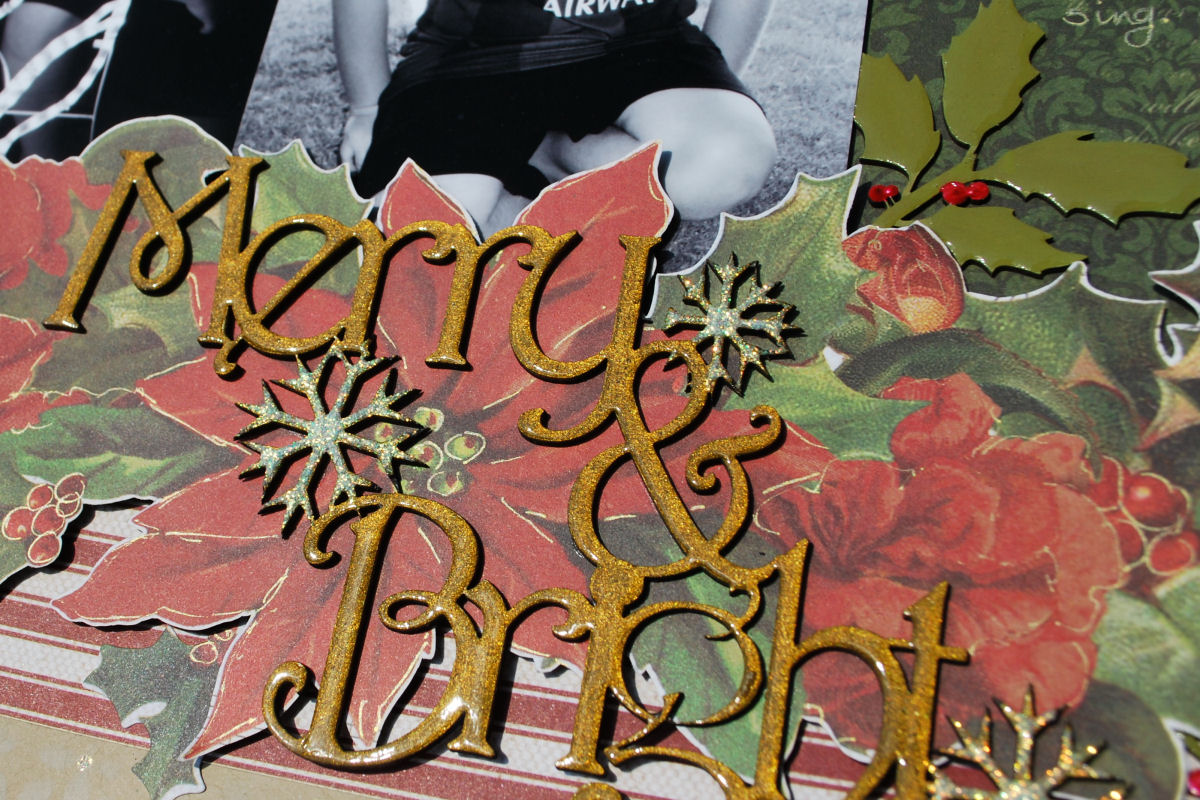
This week I have let the patterned papers be the centre of attention on the page.
The base is a layer of three different papers with torn edges on Kraft cardstock.
Then I have put my collection of snowflake dies, including some from Kaisercraft 
and Tim Holtz, to good use.
I have added a few pieces of patterned paper from Photo Play Freestyle
There is plenty of foam tape involved in the layers of the snowflakes.


The Pinkfresh Studio Ephemera Pack had a fabulous collection
of embellishments to decorate the page.
I tried to balance the colours of the snowflakes with the embellishments


The Phrase Stickers was excellent for adding words and description to the page.
There were so many perfect words for me to use.
The chipboard Alpha stickers were used to create the title.
I love the dimension that foam tape gives each element.


I have added some Diamond Stickles to the centre of some snowflakes, 
covered the smaller flakes and jazzed up the letters in the word 'Dare'.
Love to see a little sparkle!


That's all from me for this week.
I hope you have enjoyed my project, please check back on Monday
to see what Fiona has to share.
Have a fabulous weekend.

Products Used:
Kraft Cardstock

Photobucket

Wednesday, October 18, 2017

"Moments" by Amanda

Hi all,
 
Welcome to my Wednesday share!
 
Have you seen the new Crate Paper range by Maggie Holmes: "Carousel"?
 Some amazing papers and embellishments in this range!
 
I found a favourite paper and built my layout around that! 
Here's my page to share today!
 

I instantly fell in love with the florals on this Crate Paper: Belle. As it was a black and white paper, I decided to paint the designs. Using Colour Shimmer Pots (from Colour Blast), I painted some shimmery colours on the flowers and leaves. I chose colours in the teal and pink ranges to match the colours in the photo (and such a cute photo of my Mum and her newest grand-daughter, my niece).

I mounted the paper on White cardstock and machine stitched the edges in black thread.

And I mounted the photo on Black cardstock and the Romance paper in this Crate Paper range.
It is hard to photograph, but the Colour Shimmer Pots have bright colours and a shimmer and shine!
For the title, I used a sticker from the Puffy Sticker packet in this range.

More stickers from the Puffy Sticker packet in this range were added for small final touches: including the hearts, bows and the small "happy moments" banner.


Thank you so much for looking today!


Products used:

Papers:

Embellishments:

Mixed Media:
Colour Blast: Colour Shimmer Pots: Envy, Deep Water, Singing the blues, Blush,
 Lipstick and Snow White.
Other Colour blast products in the same colours can be found HERE.


Photobucket

Monday, October 16, 2017

YAY Sweet with Crate Paper Carousel by Fiona Johnstone

Hello Everyone

Another share with this fabulous collection, really can not get enough of it - love it! It's Crate Papers Carousel by Maggie Holmes.

YAY Sweet
I had to scrap this older photo of my two eating ice-creams together, lots of cute ice-cream themed ephemera in this collection begging to be used!


To start my page I've used a little bit of pink distress spray and water to add some splotches of pink to the white background. Next I have used a long strip of paper to centre my design on - the cute Ice-cream cart, my photo then my large title all going across the page together. 


Thanks for stopping by
Till next week
Fiona
xx

Photobucket
Products Used:
Crate Paper Carousel paper - Sprinkles 
Crate Paper Carousel paper - Uplifting
Crate Paper Carousel paper - Kaleidoscope
Crate Paper Carousel Ephemera Die Cuts
Crate Paper Carousel Thickers Cirque Puffy Stickers
White Cardstock
Distress Ink Spray - Picked Raspberry 

Friday, October 13, 2017

Believe with Kaisercraft Letters to Santa by Kerryn Fry

Good morning all!
This week I thought I'd start spreading some early Christmas cheer.
Today's project features Kaisercraft 'Letters to Santa'.
The photo is a reluctant then Mr 11, posing for 2015 Christmas snap.
I love the creating with the traditional Christmas colours.

The page was started with the wood panel paper Poinsettia Garland as the base.
I loved the garland already on the top of the paper. 
I have added some extra embellishments from the Sticker Sheet to the garland.


The 2 Crafty Dotted Bauble were the perfect addition to the garland.
They were covered with Tarnished Brass Distress Paint.
The dotted part has been given a little sparkle with Gold Stickles.


A little Stickles on a Christmas hat always looks amazing!
I have framed the photo with some photo corners for the Collectables pack 
to build a second garland at the bottom of the photo.


I have used a mixture of poinsettia stickers and poinsettias from the Collectables pack
to build a second garland at the bottom of the photo.
Also added berries, holly and Christmas tree from the pack.
Lots of foam tape used to build layers around the photo.


The Kaisercraft Collectables packs are an awesome addition to their collections.
They are a great way to build embellishment clusters on a page without any fussy cutting.
Such a simple way to decorate, sometimes you will even find the title.


That's my page for today, hope you've enjoyed a little sprinkle of Christmas.
Thank you for dropping by the blog.
Please pop back on Monday to see what Fiona has in store for you.

Products Used:
Kaisercraft Letters to Santa - Poinsettia Garland
Kaisercraft Letters to Santa - Christmas Poinsettia
Kaisercraft Letters to Santa - Dear Santa
Kaisercraft Letters to Santa - Carolers
Kaisercraft Letters to Santa - Sticker Sheet
Kaisercraft Letters to Santa - Collectables
2 Crafty - Dotted Baubles
Distress Paint
Photobucket

Wednesday, October 11, 2017

"Luge" by Amanda

Hello again!

Today I am sharing a page using the Pinkfresh - Escape the Ordinary collection.
With it's great colours and geometric shapes, this collection is very versatile.

Here is my page, and some close ups....

Starting with some white cardstock,  I cut two triangles from this Pinkfresh - Escape the Ordinary - Wander  paper and anchored them to opposite corners.
Taking the Pinkfresh - Escape the Ordinary - Observe paper - I cut smaller triangles and hexagons (the black/grey shapes) from the paper and layered them throughout the layout.
I also added some hand-doodling around these shapes on the page.
As I was finishing the layout, it looked too "clean", so I added some small splatters of  Colour Blast - Colour Shimmer Spray - Singin the Blues and Colour Blast - Colour Shimmer Spray - Steel.
To splatter I simply, unwind the lid and tap gently on the wand stick.
For the title, I used the Pinkfresh - Escape the Ordinary Leatherette Stickers. I know these white and black letters will be very useful on many layouts down the track!

I also layered some diecuts from the Pinkfresh - Escape the Ordinary Ephemera Pack, some of which I put on foam tape for a little dimension.

I used one of the pieces of paper I cut out, to write some journaling on.


I added the cute Pinkfresh - Escape the Ordinary Puffy Stickers, again adding some lovely detail and dimension.


Products used:
Papers:

Embellishments:

Mixed media:


Thanks for looking today,
Amanda
 
 
Photobucket