HOMEABOUT USSHOP HERECROPDATESCURRENT CHALLENGESTIPS&TUTORIALS

Friday, January 1, 2016

Graduation Book
by Tammy Klingner

Good morning everyone!
Happy New Year to you all! 
 Hope you were able to ring in the New Year with some of the people you love.
 
Well I thought I'd kick off by sharing a book I created for my son's graduation from Primary School.  Yep he's off to High School (middle school) this year! Eeek! 
 
He graduated from his Primary School last year, and to commemorate the occasion I created this book.  The school does a wonderful job of hosting a graduation ceremony. 
As part of this they ask the parents to write a card/letter which they secretly slip into
 their graduation pack.
Of course, I couldn't just do a card now could I?? Nope I just HAD to create a book. Something for him to look back on and reflect on those years/friendships created whilst at Primary School.
 
(I'm warning you....this blog post has lotsa  photos).


For this book I used Cocoa Vanilla's Made of Awesome range. 
 I love the mix of colours and also the 'star' theme.
Plus it has a real 'tween' feel about it.  Perfect!
I love that I have papers, stickers, die-cuts, flairs and alphas that all co-ordinate!
 
 
I created this book by cutting a 12x12 chipboard/cardboard sheet in half, and then trimming these two pieces to measure 6x8". This formed the covers.
 I then covered the front and back of these with co-ordinating papers.
I added embellishments, popping quite a few of them 'up' by using foam tape.
 
 
For the inner pages, I cut various sheets of 12x12 paper from the Made of Awesome range into the same size as the covers (6x8").  I like working with this size as it simply means trimming your sheet in half, then turning it and cutting again at 8".  I love that I have little bits of co-ordinating off cuts, which are perfect for embellishing, matting photos etc.
 
When creating a book, I like to add in patterned transparency sheets.  I like the different texture it creates and also that you can 'peek' through to the next page.  For this project, I just used a couple from my stash.  I don't measure when I add them - I just trim it to where I think it looks good.
 
 
Look at my son's cute little hands, turning the page!
 
 
This next page has a photo of myself and my son, and I created a pocket which holds a letter that I wrote for  him.
I like to wrap twine around the pockets before I stick them in so I can add a little tag to the front.  So cute and so very simple.
 
 
This next page houses a bunch of little notes in another pocket. 
These notes were written by some of his classmates, and they are just beautiful.  I had organised it all in secret (along with the help of one of my son's teachers), and I was so touched by what I received back. 
 
 Being boys, I wasn't expecting too much - maybe some pictures or a joke or something, but when the teacher tucked them in my handbag, and I sat and read them, I wept with pure joy. 
Such beautiful words right from the heart.  Words to treasure forever
 
 
On the right hand side, I created a flap using a Project Life Card from my stash, and included  photos of his classmates and friends. 
 
 
I love creating little flaps by just adding photos together with just a bit of washi tape. 
 
 
I do this technique often in my Project Life album, when I have multiple photos I want to include.


The following page features a mini book that I created with all of the 'mini's' from his school photos.  I simply used Raven Bazzill, and sewed down the centre with my sewing machine before adhering to  the page of the book.  By using the sewing machine, it is super strong, and won't fall apart after a couple of years.


 Also, before I adhered it to the book, I added some twine underneath the mini book, and a brad to the front cover.  Then I simply wind the twine around the brad as a way of keeping it closed.  Again, so simple, yet so effective.
 
On the right hand side of this page, I added another transparency sheet.  I popped a photo of my son and my daughter together, and when you turn the page, I have created a pocket with a precious letter from my daughter to her little bother......whoops brother!
 
 
The final page in the book, contains another Project Life Card, which I have turned into
 a flap with a bit of Washi tape.
 
 
Underneath this one there is a pocket containing little notes from a few of his teachers. 
 Again these little notes touched my heart.
 
 
To finish off this book, I used my Zutter to create the binding, and then just added some co-ordinating ribbons to this.
 
I really loved working with this range. 
The Die Cuts and the stickers made it super easy to add clusters of embellishments.  
 
I hope you've enjoyed looking at this book.  I really loved making it, and my son absolutely loves it!  I also know that it will become something even more important to him as he grows older.
 
I'll be back next week!
 
Products used:
Cocoa Vanilla Made of Awesome Lucky Star Paper
Cocoa Vanilla Made of Awesome Boys Rule Paper
Cocoa Vanilla Made of Awesome Mixed Up Paper
Cocoa Vanilla Made of Awesome Rock Star Paper
Cocoa Vanilla Made of Awesome Directions Paper
Cocoa Vanilla Made of Awesome Awesome Paper
Cocoa Vanilla Made of Awesome Flair Buttons
Cocoa Vanilla Made of Awesome Die Cut Ephemera
Cocoa Vanilla Made of Awesome Sticker Sheet
Cocoa Vanilla Made of Awesome Alpha Stickers
Raven Bazzill  
The Twinery Charcoal Twine
12x12 Chipboard
Assorted Transparencies 
Zutter
Ribbon
Washi Tape
2 x Project Life Cards
 
Photobucket

Wednesday, December 30, 2015

October Afternoon Summertime - Fun in the Sun by Fiona Johnstone

Hello

Well as the year comes to an end, we are enjoying some beautiful sunshine and summer holidays so what better than a summer layout to finish off with.  I have created my summer themed page using October Afternoons Summertime collection. 

Here is my layout Fun in the Sun


I've cut the rays individually from the Sunshine paper before layering them over the top of the text paper which has had a few sploshes of Dylusions inks sprinkled over it. I've used a white posca pen to lightly define the rays of sunshine as they spill outwards from my photo cluster. 

I've added some super cute photo stickers from the Simple Stories Summer Vibe collection, these are so fun and stick so nicely to the photos.

A couple of close-ups:


I've used some Thickers for the main words in my title and I which I have placed in a staggered fun pattern. The October Afternoon Mini Market stickers are fantastic for those fill in words. 

Some October Afternoon little label stickers and the fun pop drops complete my layout. 

Thanks for stopping by,

Wishing you all the very best for a wonderful 2016!!

Till next year!
Fiona
x

Photobucket
October Afternoon - Summertime Paper - Sunshine
October Afternoon - Summertime Paper - Swimming Pool
October Afternoon - Summertime Little Label Stickers
October Afternoon - Summertime Pop Drops
Simple Stories Summer Vibes Photo Stickers
October Afternoon Mini Market Stickers
American Crafts Thickers
Dylusions Ink Sprays - Assorted

Monday, December 28, 2015

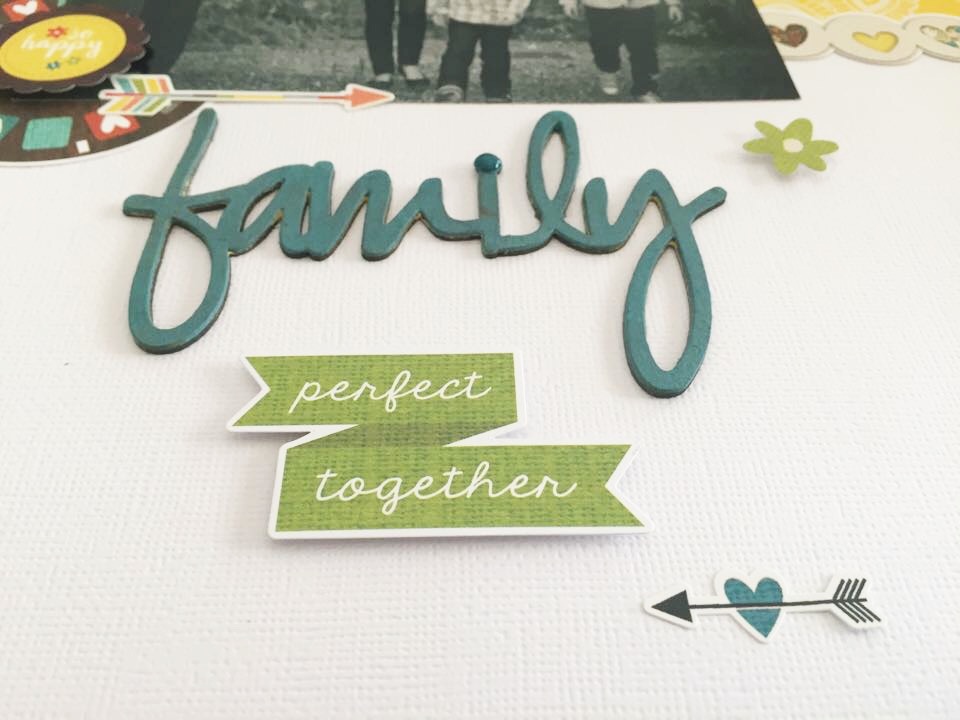
Simply Stories We Are Family by Rachel Lowe - Family Perfect Together:


Hello everyone, hoping you all had a wonderful Christmas spent with family and friends.
Hoping you all received some gorgeous scrapbooking supplies.

This collection is all about family and today I have two layouts for you.
I love the yellow, brown woodgrain with splashes of bright modern colours such as
 teals and pinks.


This layout is all about the photo.  I have kept in clean and simple, 'framing' my photo
 with embellishments. I have used 2Crafty chipboard word title 'Family' inked with teal
 versa mark ink and finished with an enamel dot.


Lots of foam tape has been used on the stickers to add layers.


I am a fan of florals and had to use this beautiful paper with the co ordinating 3x4 inch
 journal card to create this second layout varying the design of the first layout slightly.

 I wanted to show that you can easily create two different looking layouts using essentially the same design.


Again I have foam taped my sticker element. I love to create interesting titles and hence
 used the speech bubble 'you & me' and floated my heart stickers upwards for added
 interest to the layout. Don't be afraid to create 'out of the square' titles or feature elements.

I have also used 2Crafty chipboard Harlequin chipboard pieces which I firstly covered in
 gesso and then painted in teal. I have tucked them under my photo and journal card so 
they just peek through.


Thanks for looking and see you next week.
X


 2 Crafty Chipboard - Harlequin Set


Photobucket

Friday, December 25, 2015

Merry Christmas!!!!
by Tammy Klingner

Merry Christmas Everyone!
 
Yes I have pre-written this a couple of days ago.....I'm really not that clever that I could fit
 a blog post into this special day! 
 
I genuinely hope that everyone has a lovely Christmas and gets to spend some time with
the people they love.  There is such a big lead up to the big day, so much prepping and
 planning (which I genuinely love), so I hope you can take the time to relax and enjoy the
 precious moments of the day, and really feel the magic and truth of Christmas.
 
So, my share today had to be Christmas inspired right?  Of course!
I got to play with the Fancy Pants Wish Season Collection, (this range is full of gorgeous
 reds, teals, pinks and wood-grain teamed with script words, trees, deer and snowflakes)
 LOVE IT!
 
This is what I came up with:
 
 
This layout is about one of my absolute favourite parts of Christmas.....the Carols. 
 I absolutely adore watching them on television and sing my heart out every year, much to my families dismay. 
Ever since I was a little girl I have desperately wanted to be there. 
This year and last year I went along to the Elder Park Carols in Adelaide!!!
Just amazing! An absolute dream come true.
I adored everything about it, and its one of those moments that I want to remember forever - so the best way I know to capture this moment is to scrap it.
 
 
I used lots of layers underneath my photo, and the die cuts within this range made it
 easy to put together. 
 I also added some gorgeous chipboard snowflakes from 2 Crafty.  I applied white gesso to
 them and then added a clear/white glitter.  They look amazing.  The photo doesn't do 
them justice - they actually really look like snow in real life.  They give the layout
 texture and sparkle.
 
Well lots to do, so I'll be back next week. 
 Merry Christmas and lots of love, magic and joy to you!
 
Products used:
Fancy Pants Wish Season Ephemera Die Cuts
 Fancy Pants Wish Season Flair Buttons
Fancy Pants Wish Season Favorite Sweater Paper
Fancy Pants Wish Season Holiday Stripes Paper
Fancy Pants Wish Season - Season to Wish Paper
Fancy Pants Wish Season Snowed In Paper
2 Crafty St Nick's Snowflakes
Cocoa Vanilla Hello Lovely Sequins
White Gesso
Glitter
Brads
 
Photobucket

Wednesday, December 23, 2015

Crate Paper Shine - Party Hat by Fiona Johnstone

Hello everyone

Christmas is nearly upon us, I hope you are all organised at this stage and can relax and enjoy the festivities. 
Today I am sharing another layout created with the amazing Crate Paper Shine Collection. I am really loving this collection for birthday layouts, though it has so many fun colours it could be used for anything. 

Party Hat


Our pet Harry recently turned 2 and I decided to attempt to pop a hat on him to celebrate. This Thomas the Tank Engine Hat was the only one I could find, it's been a few years since the kids have worn party hats! As you can see, he wasn't too impressed - I was just happy he didn't try to eat it :)

The pinks and blues worked perfectly here and I've added some yellow which is always happy! These colours really pop off the Kraft cardstock base, to which I've added a few splotches of Dylusions Ink spray. 
Some triangles in sparkly gold to co-ordinate with the triangular party hat, then some round elements, the number 2 to represent his age and some self adhesive brads & enamel dots. 

This cute tag is from the ephemera pack, I've stolen the twine off a clothing tag!
Thanks for stopping by, I hope you've been inspired with this gorgeous collection. 

Wishing you a safe and Merry Christmas

Fiona
x
Photobucket
Products Used:
Crate Paper Shine - Cherish
Crate Paper Shine - Dazzle
Crate Paper Shine - Dreamy
Crate Paper Shine - Memento
Crate Paper Shine - Radiant
Crate Paper Shine Ephemera Cardstock and Acetate Shapes
Crate Paper Wonder Glitter Stickers Shapes
Crate Paper Confetti Thickers
Simple Stories I Am Collection Self Adhesive Brads
Simple Stories Expressions Sticker Sheet
Enamel Dots
Dylusions Ink Spray - Calypso Teal
Kraft Cardstock
Twine 

Monday, December 21, 2015

Bella BLVD Valentina Collection - Let's Kiss by Rachel Lowe:

Happy Monday everyone. 
 With Christmas so close I wish you all a safe and happy day.
Remember to take loads of photos.
Today I am sharing a layout using the gorgeous Valentina collection by 
Bella BLVD and it is all about LOVE.


I have layered the centre paper pieces and then foam taped my photo. Layering like this
 allows you to create a 3D effect that really gives you visual impact on your layout. 


The 2Crafty chipboard string hearts are just divine. I inked them in jet black and used
 Dimensional magic to create a high shine effect. I considered embellishing them in some
 way but decided against it as I didn't want to detract from them, I just love them as they are!


When using stickers I tend to foam tape so they don't appear flat and one dimensional. The
 hot pink lips with 'lets kiss' I fussy cut from one of the journal cards on the Daily Details paper.


I used the border strip paper to top and bottom of bazzill, you could change the style
 by using different borders.


This layout is all about the colours and 2Crafty heart cluster (inked with Jet Black versa mark)
 which is very on trend.

 You could use any photo on this layout,  for example in other
 layouts using this collection I have used photos of my children.


Thanks for dropping by and again have a wonderful and safe Christmas full of family and LOVE.


Photobucket

Friday, December 18, 2015

'Remember' by Tammy Klingner

Hi everyone.
 
 I recently participated in our local Relay For Life.
 After months of planning and fundraising to raise money for Cancer Council, it was here. 
A weekend where so many come together to 'fight' against this awful disease; to support those who are battling or are survivors; to remember those we have lost.
An amazing emotional, uplifting but exhausting weekend! 
 
 This layout is about that walk around the track, in those wee hours (between 1 am and 5am).  A moment I will never forget.....walking with just a few.....feeling tired.....in pain.....surrounded by beautiful candlelit messages that inspire and help you push through.....your mind filling with thoughts and memories.  Even in the moments when I was alone, I never really felt alone.  It was powerful and whenever I think back, I get goosebumps. 


This page started as most of mine do.....grabbing a base page, and then shuffling around with whatever is on my desk.  The torn strips I added to the top and bottom of the layout, is a great way to use up some of your scraps.
 
 
For this layout I used some Simple Stories, Basic Grey B Side,
 My Minds Eye and of course some 2 Crafty Chipboard.
 
I hope you can fit in some time to scrap a moment that you never want to forget.
 
See you next week!
 
Products used:
Simple Stories Summer Vibes White Wood paper
Simple Stories DIY Boutique Newspaper paper
Bazzill Kraft Paper
Cocoa Vanilla Hello Lovely Life Story paper
Basic Grey B Side Die Cuts
Basic Grey B Side Frames
2 Crafty line words Good Times Chipboard
2 Crafty Heart Clumps Chipboard
My Minds Eye My Story Everyday stickers
Dylusions Black Marble Paint
 
 
 Photobucket

Wednesday, December 16, 2015

Fancy Pants Wish Season - Christmas Magic by Fiona Johnstone

Hello everyone

Happy Hump Day! The last day of school for my two today, looking forward to some relaxing school holiday time. 

As it's close to Christmas I thought I would share another Christmas layout with you all. There are lots of gorgeous Christmas ranges in store, be sure to check them out! Today I am using some non traditional coloured papers from the stunning Fancy Pants Wish Season collection to create this layout:

Christmas Magic


Totally in love with these stunning colours and they worked so well with this photo of my little princess taken a few years ago now!  

The stunning background reindeer paper was my source of inspiration, just adore it! To create my layout I have chosen the pink, mint and white from the background paper and  used the plainer sides of these coloured papers and a pretty white doily to create a soft, pretty style layout. 


I combined this large doily from my stash with some of the Fancy Pants Die-Cuts and  super cute Flair Buttons, again staying with the Pink, Mint and White combo.


My title is 2Crafty chipboard inked in silver - to match the tiara, then I've finished off the layout with some enamel dots and clear bling. 

Thanks for stopping by
Till next week
Fiona
x

Photobucket
Products Used:
Fancy Pants Wish Season Paper - Rudolph & Crew
Fancy Pants Wish Season Paper - Whimsical Forest
Fancy Pants Wish Season Paper - Favourite Sweater
Fancy Pants Wish Season Ephemera Die-Cuts
Fancy Pants Wish Season Flair Buttons
2Crafty Chipboard
Enamel Dots
Doily

Monday, December 14, 2015

Simple Stories - We Are Family Collection - Happy by Rachel Lowe:

I love collections that have a 'family' theme.  Family is everything and to document is to record the story of your family for generations to come.


This collection is lovely with its wood grains, soft pinks, yellows and turquoise. The journal elements give so much scope for journalling those stories.


Firstly I splashed some Heidi Swapp Teal colour shine on my white bazzill. 
 I then took the 2Crafty Doodled Heart and inked with Pine Cone to create a wood grain look that matches this collection perfectly! I really wanted the 2Crafty doodled heart to be a focal point and therefore made it apart of my title.


 I went with the 'heart' theme choosing the heart patterned paper and the coordinating die cuts. I just had to add the very cute typewriter!


Here is a close up of the embellishments, such gorgeous bits and pieces to choose from.


I foam taped my photo to give it a instant photo frame feel. I also foam taped the typewriter sticker,  multiple heart sticker, corner heart cluster die cut and the 'good stuff' banner sticker to add more depth and layers to the layout.

I finished the layout with some enamel dots randomly on the white bazzill.

Thanks for stopping by and I hope you find some time to scrap at this hectic time 
of the year with only 11 days until Christmas!


Photobucket

Friday, December 11, 2015

Designing with Basic Grey 'B Side'
by Tammy Klingner

 
Hi everyone, well can you believe it's Friday already?? 
 And nearly halfway through December? Aaaargh!
 
So I got to play with the goregeous Basic Grey Range....'B Side'.  This layout is so fun and bright, and very suitable for teens, full of blacks, teals, yellows and pinks.  I have lots of pages planned  for my teenage daughter, but first I thought I'd create a page using none of the pink - which opens up the range to so much more (not that you can't use pink on a boys page, right?).
 
 
For this layout, I spread a little gesso, this time just using my finger.  I then stamped randomly with a Kaisercraft background stamp - triangles. I then started layering my papers together - and of course a bit of what was on my desk made it onto the page too (My Minds Eye - My Story),
Simple Stories - DIY and Cocoa Vanilla - Hello Lovely.
I always keep my scraps on my desk from the last couple of layouts....and its amazing how many sneak their way onto my pages.  I find it really handy, plus I love mixing up ranges (might have something to do with my quilting background)!
 
 
Anyway, I've digressed......I took inspiration from the background stamp, and added some 2Crafty chipboard  (I love this triangle design - appearing on lots of my layouts recently) -  I covered the chipboard in paper from the range, and stuck them down in random clusters on the page.
 
And that's about it!
 
Products used:
Kaisercraft texture stamp - triangles
Basic Grey B Side Die Cuts
Basic Grey B side fold over Photo Frames
Basic Grey B Side Journal Cardstock Stickers
Basic Grey B Side Paper - Hey There
Basic Grey B Side Paper - Maybe
Basic Grey B Side Paper - Journal Cards
My Minds Eye My Story Heart Strings Paper
Simple Stories DIY Boutique Newspaper/yellow
Cocoa Vanilla Hello Lovely Lucky Dip Paper
2 Crafty Triangle Set
 Gesso
Cotton
Black Ink
Mesh Tape
 
Photobucket