HOMEABOUT USSHOP HERECROPDATESCURRENT CHALLENGESTIPS&TUTORIALS
Showing posts with label Colour Blast. Show all posts

Wednesday, October 16, 2019

Enjoy Every Moment
using Doodlebug I {heart} Travel
by Amanda Hartmann

Hi all,

Here is another travel page to share today.
 This one features the new travel collection from Doodlebug Designs: I Heart Travel.

I combined this collection with a watery mixed media background.


To create the mixed media background, I first painted the entire white cardstock with white gesso - this seals the page so the colours sit on top and can be moved around, rather than soak in quickly. I sprinkled some Colour Blast Shimmer Dusts In Peacock, Paris and Duke, and added water. I used the heat gun to dry it and more water to spread the colour where I wanted on the page.

I used strips of the Doodlebug Papers: Love this; Picture this at the top and bottom of the page and to mount the photo.

I embellished the page with stickers...  Picture Perfect: Sprinkle stickers and 12x12 This and that Sticker Sheet.

A longer sticker along the bottom of the photo, and smaller ones in clusters.


You can also see the water colour background in these close ups.


I continued more stickers at the top and bottoms of the page as well!


What a fun and bright range!

Thanks for looking,
Amanda


Products used:
White cardstock
White Gesso
Colour Blast Shimmer Dusts: Peacock, Paris and Duke.
Doodlebug Paper: Love this
Doodlebug Paper: Picture this
Doodlebug Sprinkle Stickers: Picture Perfect


Photobucket

Wednesday, June 5, 2019

"Love this view", by Amanda Hartmann

Hi AAS fans,

I have done some travel in the past couple of years - so I have lots of photos to scrap. 
It means I am always looking for travel ranges to scrap with. 
The new Simple Stories - Simple Vintage Traveller collection is perfect!

In the collection, there is a pack of Simple Basics papers - they are amazing base papers, with no real patterns but in great colours for the collection. I bought this pack and used the papers as the back border and to mount the photo. I also used strips of the orange paper to hold my journaling.

The hero of this page, is the patterned paper -Explore & Discover - with an amazing design which means you need very little other paper.

To finish the page, I used some 2 Crafty chipboard Harlequin Clumps and stickers from the Simple Stories sticker sheet. Also I used more of my 49 & Market wishing bubbles.

 Please enjoy these close ups to see some of the details.


I layered the 2Crafty chipboard under the photo edges and under some stickers. I used Distress Oxide Ink: in Faded Jeans to add the first colour to the chipboard, before colouring darker with Colour Blast Shimmer Dust in Navy. I added a few layers to get the colour right. I also included splatters of the Distress oxide Ink to the background.


I loved the layers of stickers and wishing bubbles with the chipboard. The colours and stickers were a great match for this photo from the top of Mount Saint Peter in The Netherlands!


Thanks for looking today,
Amanda


Products used:


Photobucket

Wednesday, December 19, 2018

AJ, by Amanda Hartmann

Hello AAS fans,
 
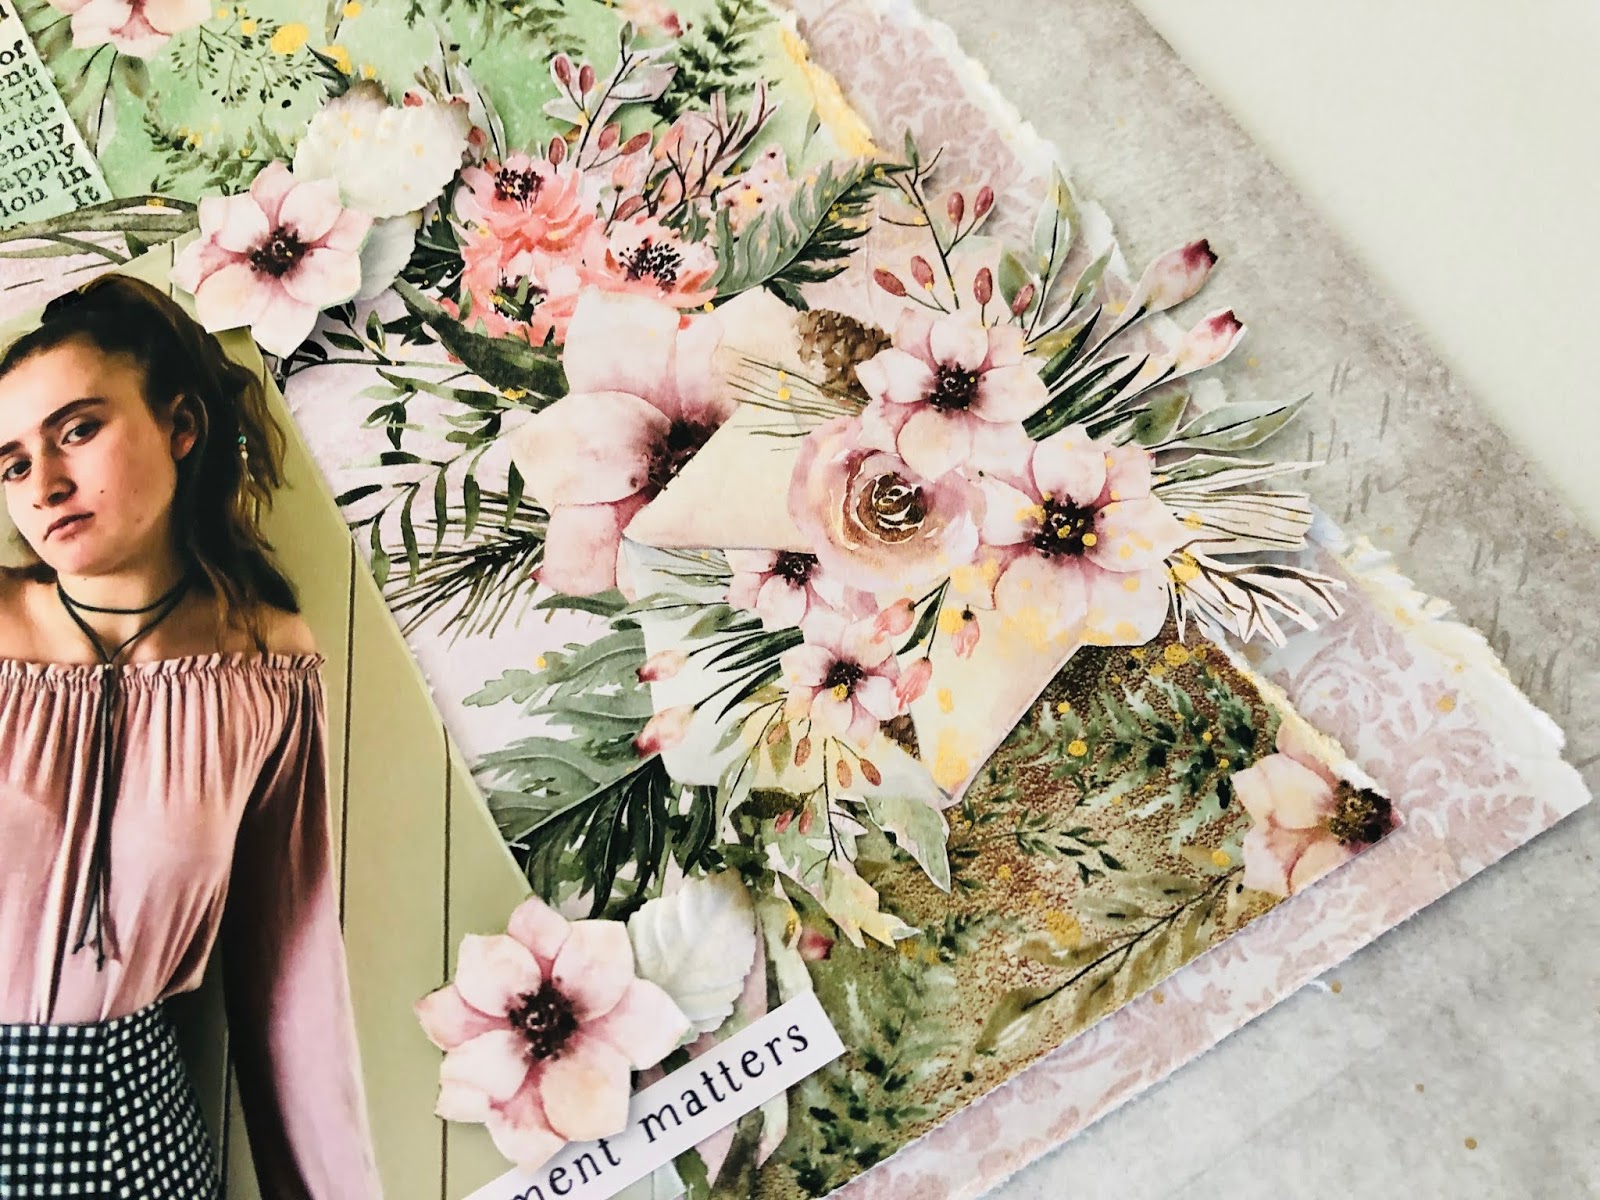
Today I am sharing a pretty page - again of my oldest daughter - growing up way too fast!
 I love the pink tones of the shirt she is wearing here and it was the perfect colour
 match to the Mintay Secret Place collection.


I started with a neutral base paper - Mintay - Secret Place Paper - 05 . Then I layered more papers in the range. I added ripped and distressed edges to the papers. The pink panel is the Mintay - Secret Place Paper - 01  and the flowers and text panels are from the Mintay - Secret Place Paper - 04


A feature of my page is the fussy cut frame. I fussy cut the circular plus floral design from the Mintay - Secret Place Paper - 02. I placed the photo directly onto this.

Let's look at some more close ups.


I added 3 simple word stickers, taken from the Cocoa Vanilla Studio Sticker Accessory sheet. and my daughters initials in some gold thickers from my stash.


I also fussy cut some extra flowers from the Mintay - Secret Place Paper - 04 and layered these on the page with some leaves from the Green Tara - Leaf Sprays - White.

I finished the page with a subtle, splattering of gold. I used Colour Blast Shimmer Spray in Bling with a paint brush to achieve this.

That's it from me today! Make sure you head in store to see this divine range of papers!
Thanks for looking,
Amanda 

Products used:
Mintay - Secret Place Paper - 02 (fussy cut)
Mintay - Secret Place Paper - 01 (pink panel)
Mintay - Secret Place Paper - 04 (panels and fussy cut flowers)
Cocoa Vanilla - Midnight Accessory Stickers
Green Tara - Leaf Sprays - White
Colour Blast - Colour Shimmer Spray - Bling
 
Photobucket

Wednesday, November 21, 2018

Embrace, by Amanda Hartmann

Hi everyone!

"Abrazo".... it's Spanish for "embrace" and seemed like the perfect title for this photo of my daughter hugging our friend Paty from Argentina.


I started with the striped background - it was the lovely Meadow paper in the range. The stripes seemed perfect to match my daughter's striped shirt.

Then I placed a lace doily in the centre of the page. On top of this, I layered a few papers in the range, with some black cardstock, to create the photo mount. Some distressed edges to the paper layers adds a little texture!

Now let's look at the cluster and details.

I used the 2 Crafty chipboard flourish along the bottom of the photo. Amongst the flourish I added a white leaf spray from Green Tara.

Also in the cluster, I added some 2Crafty Hearts - I inked them black and then coated them in dimensional magic.

I added a handmade felt heart from my friend Charmane of Charm's Creations. The "embrace" word sticker on this, is from the accessory sticker pack from Cocoa Vanilla Studio Midnight collection.

From my stash I added sequins and flower stamen. I cut some of the white leaf spray to tuck on this left side. The flower is from a prima pack and I gave it a spray of Steel grey to suit the colours I needed.

Here is the title, made with stickers.  I LOVE these mini puffy stickers from the Indigo Hills collection. I can see them on lots of my future pages!


 And hopefully you can see the technique I used on the 2 Crafty chipboard flourish. I inked it black to start. Then I gave it a coat of crackle medium (I got a cheap bottle from Aldi!). Then I painted the flourish with Lilac paint. As the paint dried, the cracks formed to show the black underneath. Looks really cool! Then I finished the flourish with a coat of dimensional magic.


Well that's it for today! Thanks for looking!

Amanda


Products used:

Photobucket

Wednesday, September 26, 2018

"Me" by Amanda


Welcome to another Wednesday!
If you have hung around AAS enough, you know I love stickers.
 Especially the word stickers with special words and messages.
Today I combined them for a sticker filled page!
I started with a sheet of Kraft cardstock for the base. Using an old credit card,
 I swiped some white gesso onto the background.
 I added some stamping to this, using an old harlequin stamp and some gold ink.

There were some key words I used stickers for on this page.
For "Mum", I used some black Cocoa Vanilla Studio stickers.
For "Speechie", I used gold PinkFresh Studios puffy stickers.
For "Jujitsuan" and "Scrapbooker", I used PinkFresh alphabets from a sticker pack.


The other key element on this page was sticker phrases and sticker hearts. I took phrases from Pinkfresh "Let Your Heart Decide" Sticker pack and Simple Stories "I am" Sticker pack.

I hope you enjoy this page, all about me! Amazing what some stickers can do!

Thanks for looking,
Amanda

Products used:

Photobucket

Friday, June 22, 2018

Love, by Amanda H

Hi again,

Welcome to my last page share for June. I found a little reserved pile of Cocoa Vanilla Studio More than Words in a pizza box. I'd been saving it. I found it hard to cut into some of these papers, but it was so worth it to create this page.


For the basis of the page I used both patterns on the Sketchbook piece of paper in the range, combined with a panel of Radiant paper. I used these 3 patterned papers in vertical panels down the page.

Then I created clusters all around the photo, using both stickers from the Accessory sheet, and diecuts.
 
I popped some elements on foam tape for some dimension.
For the title I used the word "love" from the Chipboard titles pack.
I also added some dark grey hearts from the same Chipboard titles pack.
  

 To finish the page, I added some fine splatters of: Colour Blast Colour Spray in Roadbase and Colour Blast Colour Shimmer Spray in Steel.
 
Thanks for looking:
Amanda


Products used:
Cocoa Vanilla - More Than Words Paper - Sketchbook
 Cocoa Vanilla - More Than Words Paper - Radiant
Cocoa Vanilla - More Than Words Accessory Stickers 6x12
Cocoa Vanilla - More Than Words Die Cut Ephemera
Cocoa Vanilla - More Than Words Chipboard Titles
Colour Blast - Colour Spray - Roadbase
Colour Blast - Colour Shimmer Spray - Steel
 
 
Photobucket

Wednesday, June 20, 2018

"Live your Adventure" by Amanda H

Hi everyone,

Today's page share uses the Kaisercraft Stargazer collection.
 I love blues so this range is perfect!

I started with 2 papers in the range: Milky Way and Cosmic and layering them for
 the background, and adding some black machine stitching for the edges.
 I also added another panel of paper (Universe) to centre of the page.

I decided to add some interest using the Starburst stencil from the Kaisercraft range - applying Colour Blast Paste in Dusty Charcoal through the stencil in the opposite corners 
of the page. Then I sprayed some Colour Shimmer Spray in Just Blue to these areas.

With the background done, I was ready to add my photo and layer some embellishments.


For the bottom right cluster, I started with the smaller 2Crafty Star circular frame, inked black.

 To this I added some tangles of black thread, sequins, puffy Bella Blvd blue stars and


For the title, I used a 2Crafty word title: Live your adventure. I inked this black and added 
a coat of dimensional magic.


The last final touches are more thread, stars and sequins, plus some stickers: 
Two of the word quotes are taken from the trimmed paper edge of the Kaisercraft papers.


 Thanks for looking today
Amanda

Products used:

Papers:

2Crafty chipboard:

Mixed media:

Embellishments:

Photobucket