HOMEABOUT USSHOP HERECROPDATESCURRENT CHALLENGESTIPS&TUTORIALS

Friday, December 31, 2021

Pretty as a Picture using Pinkfresh Studio Keeping It Real By Kerryn Fry

Hello everyone!
I can't believe it is 
the last day of another year?
And what a year!

Today I'm sharing a page 
created with the collection,
Pinkfresh Studio Keeping It Real

The photo of my niece works 
perfectly with the colours in this range.
A great photo taken on a visit to Adelaide. 


The base paper is my all-time favourite
I have created the background effect 

I have used Worn Lipstick
and Spun Sugar Distress Oxides
across the cardstock.
Love how it pops the pink in the photo.


The small houses have been hand cut
from the Adulting paper and added
to either side of the photo with foam tape.


The small butterflies and small rainbow cloud
have been hand cut from the Daily Grind Paper.
I've used foam tape to lift them on the page.


The 'Walk in the park' half circle
was also cut from Daily Grind paper.
The larger clouds were hand cut 


I had to include a 2 Crafty Mini Camera
on the page to go with the title.
I have covered it with gold ink
and added it to the photo with foam tape.


created a great border at the  bottom of the photo.
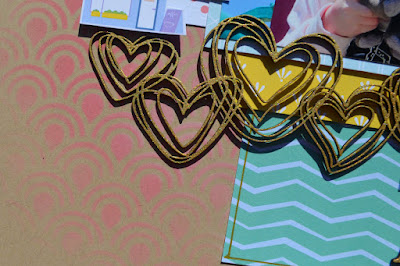
The  hearts have been covered with gold ink.

I've used a gold gel pen and ruler
to draw a border around the main patterned paper.


was the perfect title.
I have covered it with gold ink
and added it to the bottom of the page.


Thank you for visiting the blog today,
I hope you have enjoyed the page today.
Happy New Year to all
and may there be plenty of crafting
over the weekend.
Please join us on Monday 
for the first project of 2022. 


Products used:


Photobucket

Monday, December 27, 2021

Deck the Halls with Uniquely Creative Merry & Magical by Fiona Johnstone

Hello everyone

Hope everyone had a wonderful Christmas and if you are lucky gotten a few days off! 

This week I have the last of my Christmas layouts to end the year on, using the beautiful Merry & Magical collection from Uniquely Creative. 

Deck the Halls


I love this collection, mainly for the colours that are similar to those on my 2nd Christmas Tree. I added a piece of black paper from a different Christmas collection and some black cardstock to bring in more black to match the trees colour and make the other colours pop! 


Love the rays affect on the Christmas Spirit paper and used this as my base before adding extra paper layers then using the perfect ephemera embellishments to create my clusters. 


I found a cute flair button in my stash that went perfectly with the design:


I've finished off my page with some older Kaisercraft rhinestones - adding them where the little stars were on the background paper and using an ephemera piece for my title. 


Thanks for stopping by
Till next week
Fiona
x

Photobucket

Uniquely Creative Merry & Magical paper - Christmas Spirit 
Uniquely Creative Merry & Magical paper - Christmas Lights
Uniquely Creative Merry & Magical paper - Christmas eve
Uniquely Creative Merry & Magical Creative Cuts
Simple Stories Rustic Christmas - Under the Tree
Kaisercraft Rhinestones
Kaisercraft Black Cardstock 
Flair button

Friday, December 24, 2021

Happy Together using Cocoa Vanilla Studio These Days by Kerryn Fry


Happy Friday everyone 
and Merry Christmas Eve!
Today I'm sharing my second page 
created with the beautiful collection,
Cocoa Vanilla Studio These Days.
The photos are from the archives,
Mr H and his Nanna spending the day in the city
way back in September 2005


The first layer of the page is a 
12x12 sheet of Bazzill Kraft Cardstock.
The main background paper is 
the beautiful Ombre side of Daybreak.
Trimmed down to 11.5x11.5.

With white ink and the Crafters Workshop 
6x6 Template Mini Tiny Circles,
I have added marks around the outer edges of the paper.


The photos have been matted with 
the wood veneer side of Pretty Posies
and then built up with patterned paper layers
under the photos.

I've used a white gel pen
to outline some of the paper layers
on either side of the photos.


provided the embellishments on the page.

The two Butterflies on the top left 
corner have been added with foam tape
to lift on the page and create dimension.


On the right side of the photos
I have cut the journal card from 

It has been backed with Bazzill Raven Cardstock,
and lifted with foam tape.
I've highlighted parts of the pattern 

The floral watering can
and hearts are both from 
the Die Cut Ephemera Pack
and raised with foam tape.


The blank journal spot has been
It has been lifted with foam tape
and the flower centres have been
highlighted with Stickles Glitter Glue.


The houses at the bottom left corner 
are from the Die Cut Ephemera Pack.
They have been raised with foam tape.
I have hand cut the smaller

The title 'Happy Together' has been created
from some of the words in the Ephemera Pack.
I have hand cut some extra florals
from the Wall of Fame paper
and added them to each side
of the title. All of the elements
have been lifted with foam tape.

The final touch is Stickles Glitter Glue
to the flower centres. 


Thank you for visiting the blog today,
I hope you have enjoyed the process
and have been inspired to create.

Have a wonderful weekend,
enjoy the time with your family & friends.
Please join us again on Monday.

Products used:
Bazzill Kraft Cardstock
Bazzill Raven Cardstock 
Cocoa Vanilla Studio These Days - Daybreak
Cocoa Vanilla Studio These Days - Family Ties
Cocoa Vanilla Studio These Days - Pretty Posies
Cocoa Vanilla Studio These Days - The Good Life
Cocoa Vanilla Studio These Days - Wall of Fame
Cocoa Vanilla Studio These Days - Die Cut Ephemera Pack
Crafters Workshop Template 6x6 - Mini Tiny Circles
Ranger Stickles Glitter Glue - Crystal


Monday, December 20, 2021

Nutcrackers with Vicki Boutin Warm Wishes by Fiona Johnstone

Hello everyone

Another Christmas layout today, another with the funky Warm Wishes collection
by Vicki Boutin. 

Nutcrackers:


For this page I have really utilised the background paper, adding a few simple paper layers to my photo and placing it between the flowers on the background page.  I've added some simple ephemera pieces - the star banner, tag and bow as embellishments. 


My title and subtitle have been created using the tag on the background paper - I have added the Happy Holidays from one of the advertising strips on the paper base (also a similar one on the Happy Holidays paper)  before finishing with an ephemera holly & ivy. Lastly my title is made with some alpha stickers from my stash. 


Thanks for stopping by
Till next week

Fiona
x

Photobucket

Products Used:

Vicki Boutin Warm Wishes - Beautiful Sight paper
Vicki Boutin Warm Wishes - Happy Holidays
Vicki Boutin Warm Wishes - Holly Jolly
Vicki Boutin Warm Wishes - Ephemera Icons
Kaisercraft Alpha Sticker Sheet Black

Friday, December 17, 2021

Those Eyes That Smile using Cocoa Vanilla These Days by Kerryn Fry

Hi everyone!
The page I'm sharing today has been created with
Cocoa Vanilla Studio These Days
Love the soft pastel colours
and how well they work with the photo.
The photo is my youngest niece
and was taken at Grandma's house
in January holidays 2014.


The base is a 12x12 piece of Bazzill Kraft Cardstock.
The background effect has been created with 
a 6x6 stencil from my stash 
and Speckled Egg Distress Oxide Ink.


Once the background ink has dried,
I have added dots of Ranger Stickles Crystal 
Glitter Glue to the pattern of the stencil.

The photo has been matted with
the reverse side 'wood veneer' of Pretty Posies.


has been covered with gold ink
and finished with Dimensional Magic.


I have built three embellishment clusters
across the page with the Die Cut Ephemera Pack
and come hand cut frames from the Wall of Frame paper.

The top left of the page is parts
of frames layered with foam tape.
The butterflies are from Ephemera pack
also lifted with foam tape.

I have highlighted some of the paper
layers by outlining them with a gold gel pen.


The cluster to the bottom right corner of the photo
are layers of the Ephemera pieces.
Some are lifted with foam tape
and I have highlighted spots with Glitter Glue

been covered with gold ink
and then finished with Dimensional Magic


The cluster to the left side of the photo
is the small banner lifted with foam tape
and a flower cluster, both from the Ephemera pack.

The flower centres have been highlighted
with Stickles Glitter Glue.

The floral paper Pretty Posies
has also been highlighted with Stickles Glitter Glue
in the centre of the flowers.


The 2 Crafty title Those Eyes that Smile
has been covered with gold ink
and added to the left of the photo.


Thank you for visiting the AAS blog today.
I hope you have found my page inspiring.
Have a fabulous weekend
and join us again on Monday.

Products used:
Bazzill Kraft Cardstock
Cocoa Vanilla Studio These Days - Pretty Posies
Cocoa Vanilla Studio These Days - Family Ties
Cocoa Vanilla Studio These Days - The Good Life
Cocoa Vanilla Studio These Days - Wall of Frames
Cocoa Vanilla Studio These Days Die Cut Ephemera Pack
2 Crafty title Those Eyes That Smile
2 Crafty Mini Title Stick Set 3 - You are beautiful
2 Crafty Mini Camera
Distress Oxide Ink
Dimensional Magic
Ranger Stickles Glitter Glue


Photobucket

Monday, December 13, 2021

Joy with Pinkfresh Studio Holiday Magic by Fiona Johnstone

Hello everyone

Keeping with the Christmas theme this month, today I have a layout to share using
Pinkfresh Studio Holiday Magic!
Always love the bright fun colours Pinkfresh have for their Christmas Collections.

Joy


For this layout I started with the gorgeous floral frame of the Deck the Halls paper,  I mounted it to part of the Wonder & Peace to add some blue to the background to match my photo. To fit my photo in, I fussy cut part of the frame to tuck the corners in, adding some patterned paper either side of my photo. 


Next I added some of the cute ephemera from the Ephemera Icons pack to make some cute clusters top and bottom of my photo: 


A cute 2Crafty chipboard  branch  with some gorgeous 49&Market flowers completes the 3rd corner! I've added shimmer to the chipboard and the red ephemera pieces with the Uniquely Creative Sparkle Brush! 

and finally my title - also from the ephmera icons pack with a little shimmer added!


Thanks for stopping by
Till next week
Fiona
x


Products Used: 

Pinkfresh Studio Holiday Magic paper - Deck the Halls
Pinkfresh Studio Holiday Magic paper - Wonder & Peace
Pinkfresh Studio Holiday Magic paper - Feeling Festive
Pinkfresh Studio Holiday Magic Die-Cuts - Ephemera Icons
49&Market Vintage Artistry Peace & Joy flowers
2Crafty Chipboard Mini Branches
Uniquely Creative Sparkle Brush - Clear

Friday, December 10, 2021

Adorable using Penelope Dee Charlotte by Kerryn Fry


Morning everyone!
The page I'm sharing with you today
was created with Penelope Dee Charlotte collection.
The beautiful photo is my Great-Niece
at her first birthday, she is such a cutie!


The base cardstock is a 12x12 piece
This cardstock is an awesome, solid base for any mixed media.
The background effect was created with some
plastic packaging, water and Distress Oxide Inks.

I've used the colours Dried Marigold, Abandoned Coral,
Ripe Persimmon and Worn Lipstick.
Once the first layer if inks were dry,
I have used the Dried Marigold and Worn Lipstick
with two stencils to add some highlights of colour.
 The stencils were the older Vicki Boutin Wildflower & Honey
Honeycomb stencil and Celebr8 Damask Stencil.
 

The finishing touch on the background cardstock before 
adding the paper layers were some flicks 
I have watered the glaze down on plastic packaging
and then used a paint brushes to flick it on.
Love it!


Most of the embellishments on the page
have been hand cut from the Sentimental Paper.
The  embellishments have been lifted with 
foam tape to create dimension on the page.
I have used a gold pen to outline some 
of the paper layers to tie in with the gold splashes.


All of the flowers were also cut
from the Sentimental Paper.
I have cut down the wreath of flowers to 
smaller pieces to use on the page.

The journal card has been cut
from the Devoted paper and
lifted with foam tape to 
 add to the side of the photo.


I have used the gold pen again at
the bottom of the page to create a pattern
below the scalloped border edges.


The 2 Crafty title Adorable has been 
I have added to the base of the photo
and then added more gold pen touches
to the flower centres on the page.


Thank you for visiting the Blog today,
I hope the layout has inspired you to create.
Have a fabulous weekend
and join us again on Monday.

Products used:
Vicki Boutin Mixed Media Foundations Paper
Penelope Dee Charlotte - Precious
Penelope Dee Charlotte - Gracious
Penelope Dee Charlotte - Memorable
Penelope Dee Charlotte - Sentimental
Penelope Dee Charlotte - Devoted
2 Crafty title Adorable
Distress Oxide Inks
Vicki Boutin Mixed Media Creative FX Glaze - Gold
Celebr8 Lavender Lane Grunge Damask Stencil
Tsukineko All Purpose Gold Ink


Photobucket