HOMEABOUT USSHOP HERECROPDATESCURRENT CHALLENGESTIPS&TUTORIALS

Wednesday, July 6, 2016

Simple Stories Bloom and Grow - Bloom & Grown by Fiona Johnstone

Hello everyone

I've got a new collection to share this week, the delightful Bloom & Grow collection from Simple Stories. This range contains fun, bright primary colours paired with fabulous woodgrain textures. 

Today's layout shares the same name as the collection - Bloom & Grow


I love a woodgrain paper as a background piece, it gives the appearance of texture without having to add anything extra. Once i had my background I have added several paper layers under my photo, before embellishing the layout with co-ordinating embellishments from the Bloom & Grow collection.


 I have added a few flowers, flutterby designs  flair , a little gold heart and the cute wooden dots from the Jillibean Soup Mushroom Medley collection that I used last week. 


I added a couple of doilies to the edges of the page, I love the lace and timber contrast. 


Thanks for stopping by

Till next week
Fiona
x

Photobucket
Products Used:

Simple Stories Bloom & Grow Paper -  Dig It
Simple Stories Bloom & Grow Paper - Chin Up
Simple Stories Bloom & Grow Paper - Let it Grow
Simple Stories Bloom & Grow Paper - Navy Dot/Red Dot
Simple Stories Bloom & Grow 4 x 6 Sticker Set
Simple Stories Bloom & Grow Paper - 
Petaloo Botanica Mini's - Cranberry/Amber/Green
Jillibean Soup Mushroom Medley Wooden Dots
Flutterby Designs Flair
Doilies
Ampersand

Monday, July 4, 2016

You're Such a Deer layout by Rachel Lowe:

Hello everyone and a happy Monday to you.
 
Another share using Jillibean Mushroom Medley. Have I mention how cute this collection is!
 Initially it can be daunting when you have many patterned or 'busy' papers, and wondering
 how to put them together! 
 
Here is how I did it.
I just love the green wood grain paper and this time I cut it down to be a feature of my layout. As mentioned previously don't be afraid to use a 'busy' background paper as I have done here just ensure you have a stark contrast to mat your photo on so it does not get lost and use pops of bright colours as I have done on this layout.
 
I have also sewn a border around the edge of my background paper to give some definition. Again I have sewn around the green wood grain paper piece to add more texture.
I loved the journal block 'You're Such a Deer' and created my layout theme from this. I then chose from the die cut sheet what elements I wanted to use in keeping with the theme.
The bright colours of green, teal and red contrast beautifully against the brown. 


 I have foam taped most of the die cuts to add more depth to the layout.


 I have created an embellishment cluster around the journal block to draw your eye to the photo.


Keeping your embellishments in a diagonal manner also ensures your eye is drawn to the photo which is important when using a 'busy' or patterned background paper.


Don't be afraid to use patterned papers as your background as all it is, is a matter of contrast.

Thank you for stopping by for a look today.
X


Photobucket

Friday, July 1, 2016

Always look on the bright side of life
by Tammy Klingner

Hello lovely people!
 
Today I'm sharing a layout close to my heart. 
 
 
I had a couple of cards and papers left from the Kaisercraft Finders Keepers range. 
 One of them had the quote 'Look on the Bright Side'
Immediately I thought of my mum and yep 'Monty Python'.
'Always look on the Bright Side of Life' was my mum's mantra.
It was her final song at the celebration of her life.
 
This is often how a page begins for me.
A quote in a paper or an embellishment sparks a story in my head.
You see I'm one of those people who can't create a layout, and add a photo later.
I need the story first. 
  A story to tell my layout around.
It gives me focus.
  
I created a mixed media background using spritz and a stencil.  I also stamped around the edges of this.  I created this towards one side of the paper, as my aim was to layer everything on top, and have the mixed media background peeking through.
I added layers of woodgrain paper, doilies, and strips of leftover papers.
I love scrapping with strips.  I love the texture that it creates.
I tucked some 2Crafty chipboard and some embellishments in and around the photos.
 
 
To finish I added my title and journaling to the right hand side.
 
I'll be back next week!
 
Products used:
White Bazzill
Kraft Paper
Kaisercraft Finders Keepers Treat Paper
Kaisercraft Finders Keepers Montage Paper
Kaisercraft Captured Moments Treasure Chest Kit
Simple Stories Sn@p Basics Aspen Paper
Simple Stories Life in Color Big Memories Paper
Cocoa Vanilla Color Me Happy White Doilies
Photo Play Like a Girl Share Your sparkle Paper
My Minds Eye My Story Heirloom Roses Paper
Bella Boulevard Let's Go Tourist Spot Paper
2 Crafty Chipboard Chicken Wire Panel
Dylusions Ink Spray - Lemon Zest
Kaisercraft Template - Script
Prima Finnabair Messy Stamp
American Crafts Amy Tan Lucky Accent Foam Words Black
Crate Paper Maggie Holmes Puffy Alpha Stickers - Gold
Cocoa Vanilla Hello Lovely Sequins
 
Photobucket

Wednesday, June 29, 2016

Awesome by Fiona Johnstone

Hello everyone

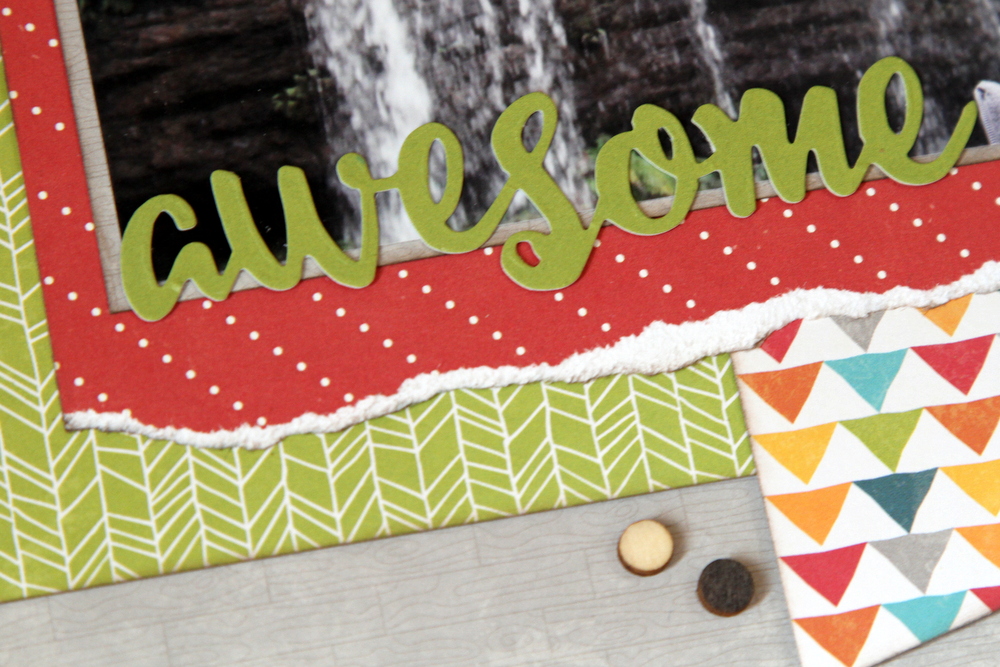
This week I'm sharing with you all a page created using Jillibean Soup Mushroom Medley and some Echo Park Petticoats and Pinstripes. These couple of papers from this range, tied in nicely together to create my layout:

Awesome


I've used the reverse side of the Echo Park paper to cut out these bingo cards, which I have tucked under different layers before adding some embellishments from the Pea Pod Parts and the cardstock stickers. 


My title comes from the Soup Labels Stickers, these are always great value, with fab colours! And how cute are these little Wooden Dots? So fun and they add the perfect finishing touch. 


Thanks for stopping by
Till next week 

Fiona
x


Photobucket

Products Used:

Jillibean Soup Mushroom Medley paper - Oysters
Jillibean Soup Mushroom Medley paper - Morels
Echo Park Petticoats & Pinstripes paper Boy Bingo Cards
Jillibean Soup Mushroom Medley Labels Stickers
Jillibean Soup Mushroom Medley Wooden Dots

Monday, June 27, 2016

Shimelle Star Shine - Never Let Go of your Dreams Layout by Rachel Lowe:

Happy Monday everyone.
 
I am a huge fan of Shimelle and this new collection StarShine is no exception.
 
This photo if my oldest son has been sitting in my photo box waiting for the right
 collection as I did not want to covert it to black and white as it would lose the features
 of his stunning blue eyes and blonde hair. 
 
Finally the right collection!
 
The stunning background paper I used is from the paper pack (it is called Curiosity).  I
 don't often centre my photos but with this background paper I did not want to lose the
 visual impact so I worked from the centre outwards.
 
I cut it down to 11 1/2 inches and attached to cream card stock. I then sewed around to create another layer to create a border (I have sewn in a messy fashion which I think suites this layout).
 
 
I have foam taped my photo to create a 3D effect and so I could add chipboard and 
die cuts under my photo.


 I have sewn on my paper layers and also tucked my chipboard globe ('never let go of your
dreams' is a die cut attached onto the globe chipboard) under the photo. I have added
acrylic stars and chipboard  stars to accentuate the solar system background.


 I have focused my layers and embellishments in the middle of the page to ensure the
 background solar system pattern remains a focus.

To finish I added the acetate word imagine ad the chipboard arrow at the bottom of the page.


Thank you for stopping by today. 
Have a fantastic week.
X


Shimelle Starshine 12x12 paper pad (Curiosity Paper)
Shimelle starshine -acrylic- shapes
Shimelle Starshine paper - galileo
Shimelle Starshine Chipboard Stickers
Shimelle Starshine - flair buttons
Shimelle Starshine - ephemera die cuts
Cream Cardstock

Photobucket

Friday, June 24, 2016

Go on Adventures
by Tammy Klingner

Happy Friday everyone!!
 
Here to share what I've been working on lately.
This time I got to play with some of Cocoa Vanilla's Colour Me Happy Range.
I love this company. I love that they are Australian.
 I love their products, and this new range is just gorgeous! 
 
 
This range has neutral papers, which is awesome as it allows you to add your own colour, whether that be with paint, spritz, pens, crayons or pencils.
 
I immediately grabbed the gorgeous leaf paper, and of course - green!
I used spritz, and then began my layering.
I noticed the reverse of the paper was green - Perfect!
So I trimmed it down a little, allowing me to use the green reverse strips in my layering.  
I also tore the edges of the paper, to allow some of the green to show around the edges.
 
As the layout has an 'outdoor/nature' theme, I also selected some leafy chipboard from
 2 Crafty, and a few flowers to complement this.
The three large flowers were all originally white, I spritzed one with the background spritz,
 just to make it match perfectly!


The embellishments from this Colour Me Happy range are awesome. 
I used quite a few - doilies, a flair, words, journal spots.
I can't wait to use them in my Project Life. 
 
Products used:
Black Bazzill
Kraft paper
White Bazzill
Dylusions Ink Spray - Fresh Lime
2 Crafty Mini Branches Chipboard
Cocoa Vanilla Colour Me Happy Leaf Litter Paper
Cocoa Vanilla Colour Me Happy Snip Its
Cocoa Vanilla Colour Me Happy Flair
Cocoa Vanilla Made of Awesome Alpha Stickers
Cocoa Vanilla Colour Me Happy White Doily
American Crafts Shimelle Starshine Orion Paper
My Minds Eye My Story Heirloom Roses Paper

Kaisercraft Paper Blooms - Coconut
Kaisercraft Mini Paper Blooms - Honey
The Twinery Twine - Charcoal
 
Photobucket

Wednesday, June 22, 2016

Pink Paislee Fancy Free - Love You by Fiona Johnstone

Hello

Another layout created using Pink Paislee Fancy Free - love this gorgeous collection. I've created a soft, girly page this week titled:

Love You


My design for this week was inspired by the patterned paper #5 with it's diagonal stripes. I've cut triangles from two of the corners that run in line with the stripes and broken it up with some plain white cardstock to which I have added a very small amount of pale blue splatters using watered down gelato colours. 

Then I have layered up some of the other patterned papers & paper doilies  before embellishing my layout. 


I've fussy cut a flower and leaves from paper #7 and added it under my paper layers before topping it with a flair button. My title comes from the Pink Paislee Fancy Free Ephemera pack as does my journaling tag pictured below


I'll finish with a close-up of all the embellishments:


Thanks for stopping by
Till next week
Fiona
x
Photobucket
Products Used:
Pink Paislee Fancy Free Paper #1
Pink Paislee Fancy Free Paper #5
Pink Paislee Fancy Free Paper #7
Pink Paislee Fancy Free Paper #9
Pink Paislee Fancy Free Paper #11
Pink Paislee Fancy Free Ephemera
Cocoa Vanilla Studio - Life is Beautiful Flair
White Cardstock
Asstd Enamel Dots
Paper Doilies
Gelatos
Twine

Tuesday, June 21, 2016

Jillibean Soup - Mushroom Medley cards and gift tags:


My left overs from my design team kit, Mushroom Medley were too lovely to throw
 away so today I have some cards and gift tags I created.

I love the mini placemats Jellybean Soup produce but I could not incorporate them into my layout designs.


I love creating gift tags and knew the mini placements would be perfect to make into gifts tags. I simply attached them to 3x4 ice paper pieces left over from my kit and then decorated with die cuts from this collection. I added foam tape on some of the die cuts to create a 3D effect.


 I finished them off with white cord. So you can write your personal message on the back I cut another 3x4 inch white paper piece and attached.


Finally I made a card and gift card, again using the last of my paper pieces and finishing off with the remainder of the die cuts and sentiments. Again I have foam taped some of the elements and to finish of I have added some some sewing to add texture and interest.
 
 
Thanks for stopping by today and I hope I have inspired you to use up your left overs,
 nothing beats a handmade card or gift tag in my books.
See you next week.
X
Mushroom Medley - Mini Placemats
Mushroom Medley Yardstick Stickers 6-x12
Mushroom Medley Paper - bite size bits
Mushroom Medley Paper - chanterelles
Mushroom Medley Paper - morels
Mushroom Medley Paper - oysters
Mushroom Medley Paper - shiitake
Mushroom Medley - pea pod parts
Photobucket

Monday, June 20, 2016

Un-Bee-Lievably Cute layout by Rachel Lowe.

Hello Rachel here again!

I hope you have all had a wonderful week end.

Well this week I have created a very different layout using this collection(Mushroom Medley
 from Jillibean Soup). I love collections that allow you to be versatile and this certainly does
 as you will see over the next few weeks.

This photo is of son number two and three, hard to believe they were ever that little as
 they now tower over me as young teens.

The die cut sheet is full of the cutest animals such as foxes, racoons, hedgehogs and bumble bees.
 All which suites layouts of little ones.


I have created a 'sky' with the paper and adding the die cut sun and clouds.  I have sewn on the yellow paper piece and foam taped the clods and finished the sun off with an enamel dot.


As I often do I have sewn on this layout to add texture and visual interest. I foam taped the super cute hedgehogs and heart die cut.


I have used the journal card to create my title and foam taped the bumble bees and toadstool.


I love how you can create such vastly different layouts from the same collection!
 
Previous layout...

and this weeks layout. 
So very different!
 
Thank you for taking the time to have a look today.
Have a safe and warm week.
xXx
 
Mushroom Medley Paper -bite size bits
Mushroom Medley Paper - chanterelles
Mushroom Medley Paper - trompettes de mort
Mushroom Medley Paper - shitake
Mushroom Medley - die cut sheet
White Cardstock
WRMK Enamel Shapes

 
Photobucket

Friday, June 17, 2016

Note to Self
by Tammy Klingner

Well I'm back to share another Friday Inspiration!
 
This one was a quick one, and was totally inspired by one of the Project Life Cards in the Kaisercraft Finder's Keepers Treasure Chest.  I love how this kit contains PL Cards, and co-ordinating die cuts!
 
I love the colours in this collection, and I love the script font words.
 
As soon as I saw this quote 'Worry less, live more" I knew it had to be a title on a layout.
A note/reminder to myself.
A mantra to live by.
 
 
So I cut it out.
I added some gesso, and a few splashes of spritz to a gorgeous woodgrain Paper,
 
I then layered up some doilies, some strips of paper, and a few embellies from the range.
 
I finished off the layout by using some 2Crafty Chipboard.
I decided to leave it 'a la natural' to suit the colours in my layout.
I really love those revolution frames. I love how they draw your focus to the photo.
 
 
There is soooo much in the kit that I've created another Project Life spread.
I think I've still got enough to do another too (first things first eh - think about that next week!)
 
I focused on the blues, greens and reds in the kit this week, as last time I used the pretty creams, corals, krafts and yellows. 
I really wanted this week to look totally different in my album.
 
 
I love it when a range is so versatile!
 
Here's the left side:
 
 
And the right:
 
 
Just ignore the glare from the plastic sleeve!
 
Thanks for stopping by.
Tammy 
xx
Products used:
Kaisercraft Finders Keepers Treasure Chest Kit
Simple Stories Sn@p Basics Paper Cedar
Cocoa Vanilla Colour Me Happy Doilies -White
2 Crafty 6" Revolution Chipboard
2 Crafty Chipboard Mini Sampler
Dylusions Ink Spray Lemon Zest
Heidi Swapp Navy Color Shine
Kaisercraft Stencil Designer Script
Kaisercraft Stamp Texture Script
American Crafts Shimelle Starshine Epoxy Paper Clips
White Gesso