HOMEABOUT USSHOP HERECROPDATESCURRENT CHALLENGESTIPS&TUTORIALS

Tuesday, October 14, 2014

Crate Paper Notes and Things By Fiona Johnstone


Hello everyone
 
This week I am fortunate to be playing with the truly beautiful Crate Paper range, Notes & Things. It is just divine and I have two layouts to share with you today. 

My first layout is "So Lovely"

This layout is of Lily not long after her 3rd Birthday - she received several gorgeous dress-ups as presents that year, this one was one of my favourites, she looks so cute in it!! Lovely papers from Crate in this range, so easy to layer up with each other.
 
 
  There is such a great variety of embellishments available with all the Crate Paper ranges. For these layouts I have used the Chipboard Elements, the tags and the Standout Stickers. Pretty much everything you could need to create your layout from the one collection.  There are plenty more that go with this fantastic range, so be sure to check them out in store.  You can see the three I've used on this close-up:


I've decorated the tag, with some patterned paper underneath to highlight the word LOVE, some gold arrows from the chipboard sheet, a small studio calico heart and some string.
 
My title has come from the chipboard sheet. How cute are these layered butterflies from the stand outs pack? They are my favourite!

 
 My second layout for today is Hello London:

The lovely green paper I have used is what inspired me to create using this photo. I went with lots of layers, including fussy cut flowers & postcards from the paper and tucked under doilies. Once that was done, I decided the papers didn't stand out enough on the papers I had chosen, so went with a basic black cardstock, to which I have added some light stamping in white and splashes of gold to fit in with the gorgeous pops of gold in this range!


The Hello speech bubble was too fun and cool not to use in and inspired my title! Did I mention I love the gold! You can see the flowers I have fussy cut and tucked under my layers here too. 


To create the gold sploshes I used some gold luminarte paint. I wet it lightly and applied it to my dot texture stamp and then for the bigger sploshes I added water to the stamp before stamping. 
 

 This  little pocket with the journaling tag is part of the standout sticker set - super cute!
 
Thanks for stopping by
Till next week
Fiona
x
Photobucket 
Products Used: 
 
So Lovely
Crate - Notes & Things Paper - Be Kind
Crate - Notes & Things Paper - Inbox
Crate - Notes & Things Paper - Journal
Crate - Notes & Things Paper - Reminder
Crate - Notes & Things Paper - Honest
Echo Park Fine and Dandy - Garden Party
Crate - Notes & Things - Tags
Crate - Notes & Things - Standout Layout Stickers
Crate - Notes & Things - Chipboard
Studio Calico Essentials Chipboard Heart
Doily
String
Hello London
Crate - Notes & Things Paper - Honest
Crate - Notes & Things Paper - Reminder
Crate - Notes & Things Paper - Signed
Crate - Notes & Things Paper - Schedule
Crate - Notes & Things - Enclosed 
Crate - Notes & Things - With love 
Crate - Notes & Things - Standout Layout Stickers
Crate - Notes & Things - Chipboard
Dark Room Door Texture Stamp - Criss Cross 
Kaisercraft Texture Stamp - Tiny Dots
White Ink
Solar Gold Luminarte


Friday, October 10, 2014

WRMK Indian Summer - By Linda Eggleton

 Hi everyone & welcome.

Today I have another layout to share featuring the utterly gorgeous
"Indian Summer" collection from WRMK.
It has been such a joy to work with this collection so far......I think I'd have to rate it up there as one of my all time favourite collections :) 
The colours are simply gorgeous...as is the patterns on each of the papers.


"Dublin Famine Statues"

For this page, I wanted to keep the background fairly plain, so that the 2Crafty Square Collage Panel didn't get lost in patterns etc on the background. So I have used the Whitewash paper & just simply flicked a few random mists around and then built my page from there.


I have slightly coloured the square collage panel with a brown Gelato...by rubbing the gelato over the chipboard piece & then using a wet brush, I spread the colour around.  I wasn't too particular about the coverage, as I wanted to depict the feel of the statues, which were quite rustic & dull.


For my cluster I've used one of the flowery stickers from the embossed sticker sheet as the base, and then have added a variety of flowers (see list of products at the bottom of post), a Flutterby flair & some punched butterflies. There's also another embossed sticker at the bottom of the photo...plus the mustardy coloured arrow that is an offcut of one of the frames in the Jouranl Card pack (I dont't think it was meant to be in there...so that was a little bonus!)


I've also added another smaller cluster at the opposite side of the photo...again using a variety of flowers & one of the gears from the 2Crafty Gears pack, which I've coloured with a variety of gelatos to depict the colours in the statues. And I've used a leftover piece from last weeks layout, the embossed doily that I cut off .


I cut some of the small triangle arrows from the Carefree paper to run across the bottom of the page, with a piece added that I've cut off one of the frames from the Journal Cards pack. I also added a few arrows to the opposite top right of the layout to help balance things out a bit.  The Journal card pack really is excellent value....there are so many pieces in the pack & they would be fabulous for pocket style scrapping as well as for normal layouts.


I added my journaling onto some Kraft cardstock, cut into strips & inked the edges.
Title is some old alpha stickers from my stash....Sassafras & Prima.


And here is a close up view of the main area of the page....to once again hightlight the fabulous 2Crafty Square Collage Panel....which I cut into a few pieces & spread around so that there was some showing around most sides of the photo.
 
Thank you so much for taking the time to check out my work.
I hope you have been inspired by this amazing collection!
 
Until next time...happy scrapping :) xx
 
 
Photobucket
 
Products used:
 
WRMK - Indian Summer paper - Whitewash
WRMK - Indian Summer paper - Daydreamer
WRMK - Indian Summer paper - Wildflower
WRMK - Indian Summer paper - Carefree
WRMK - Indian Summer - Journal Cards
WRMK - Indian Summer - Embossed Stickers
2Crafty - Chipboard - Square Collage Panel
2Crafty - Chipboard - Gears
Green Tara - Apple Blossom - Ivory
Petaloo - Botanica Velvet Hydrangeas - Blue
Petaloo - Botanica Minis - Yellow
Petaloo - Botanica Minis - Teal
Petaloo - Darjeeling Paper Mini Blossoms - Soft Grey
Manor House Creations - Flower
Flutterby Designs - Flair Button - Design 181
Kaisercraft - Pearls - Chino
Tattered Angels - Glimmermists
EK Success - Butterfly Punch
Creative Memories - Butterfly Punch
Sassafrass - Alpha Stickers
Prima - Alpha Stickers
Faber-Castell - Gelatos
Kraft Cardstock
 

Tuesday, October 7, 2014

Kaisercraft Tropical Punch by Fiona Johnstone


Hello everyone
 
This month I am working with the bright and fun Tropical Punch collection from Kaisercraft. Perfect timing as I have just come back from a week visiting family in tropical north Queensland!  
 
My layout today is based on the new sketch over at Stuck Sketches.
 
Riverway: 


The gorgeous script font on the "Bubbles" paper has provided the perfect background for my layout, no need for any extra background work and the colours are a perfect match to my photo! 


Once again the collectibles that come with all Kaisercraft collections add the perfect embellishment touches, you really need to add little else, some alphas, a doily and flowers and the page is done.
This photo of Riverway was taken after we had been swimming, but earlier I had taken a photo of my two when they first jumped in. I decided I wanted to include this picture, so I made it into an embellishment by printing my photo small (3x4) then using my cuttlebug to cut it into a circle, and then a scallop to frame the photo. It also serves the purpose of hiding the 2 people that were in the bottom left corner of my scenic shot!
 
 
Thanks for stopping by, be sure to check out this gorgeous tropical collection in store!
 
Till next week
Fiona
x
Photobucket 
Products Used: 
Kaisercraft Tropical Punch Paper -Bubbles
Kaisercraft Tropical Punch Paper - Cocktail
Kaisercraft Tropical Punch Paper - Lemonade
Kaisercraft Tropical Punch Paper -Mocktail
Kaisercraft Tropical Punch Paper - Party
Kaisercraft Tropical Punch Collectibles 
October Afternoon Daily Flash Alpha Orange Soda Shop Front
Prima Bel Canto Handmade Paper Flowers
Green Tara Cherry Blossoms
Paper Lace Doily

Friday, October 3, 2014

We R Memory Keepers "Indian Summer" PLUS Kaisercraft "Yuletide" - By Linda Eggleton

Hi everyone....and welcome to October!  Yikes, how did that happen so quickly?!?
I guess you can say that we are on the downhill slide to Christmas
and the end of another year, which is pretty scary!
 
Today I have a layout to share using the utterly gorgeous Indian Summer collection from WRMK.
The colours & patterns in this collection are to die for!  I absolutely LOVE them and have really enjoyed creating with them for my first layout........
 
 
"S.W.A.K"
Based on the October sketch at Scrap365
 

The background paper I've used is "Watercolour"....which lives up to its name very well, don't ya think?  All those gorgeous blended looking watercolours are right there, already on the paper....all I have added is a little bit of stencil work using Kaisercraft Lattice template, some light stamping, some stamped rings using glimmermist & a few flicks of different mists.


I have stamped a few Prima Stitched Circles onto a variety of papers, in different sizes & then layered them on top of each other & in under the photo.  I've created a cluster using a few Petaloo & Green Tara flowers, Flutterby Flair & 2Crafty Leafy Silhouettes that I've coloured in dark brown using my Gelatos.
 

The little frame around the photo is from the Indian Summer Journal Cards pack....and wow, there are so many cards, frames, diecut cards, journal cards etc in this pack...and in a variety of sizes too!  They are seriously good value...and although they are pocket page type of cards, they can also be  quite easily used on layouts as well.  They are really super cool :)
 
The cute little camera is a 2Crafty Tiny Camera that I coloured with gelatos & then I've highlighted a few areas with some journal pens.  The gorgeous little doily is from the Embossed Sticker Sheet.....and the embossing on these is quite detailed & very prominent.


The arrow is another piece from the Embossed Sticker Sheet


The journal strips I have cut from one of the 4x4 cards in the journal card pack....and I've also coloured it slightly with some glimmermist that I've randomly painted on with a brush.


Here is a bit of a close up of the stencil work....using modelling paste & Kaisercraft Lattice template. 
To get the coffee ring effect, I've painted the rim of an old glass with some glimmermist, and then simply "stamped" it onto the page.  I've then lightly stamped randomly over the page with Kaisercraft Tiny Dot stamp.
 
 
I can't stress enough how much I love this collection...it's one of my new fav's <3
I hope you love it as much as I do!


I also have a few of my Kaisercraft DT layouts to share as well....using one of the new Christmas colletions - Yuletide, which features more traditional colours & patterns.
 
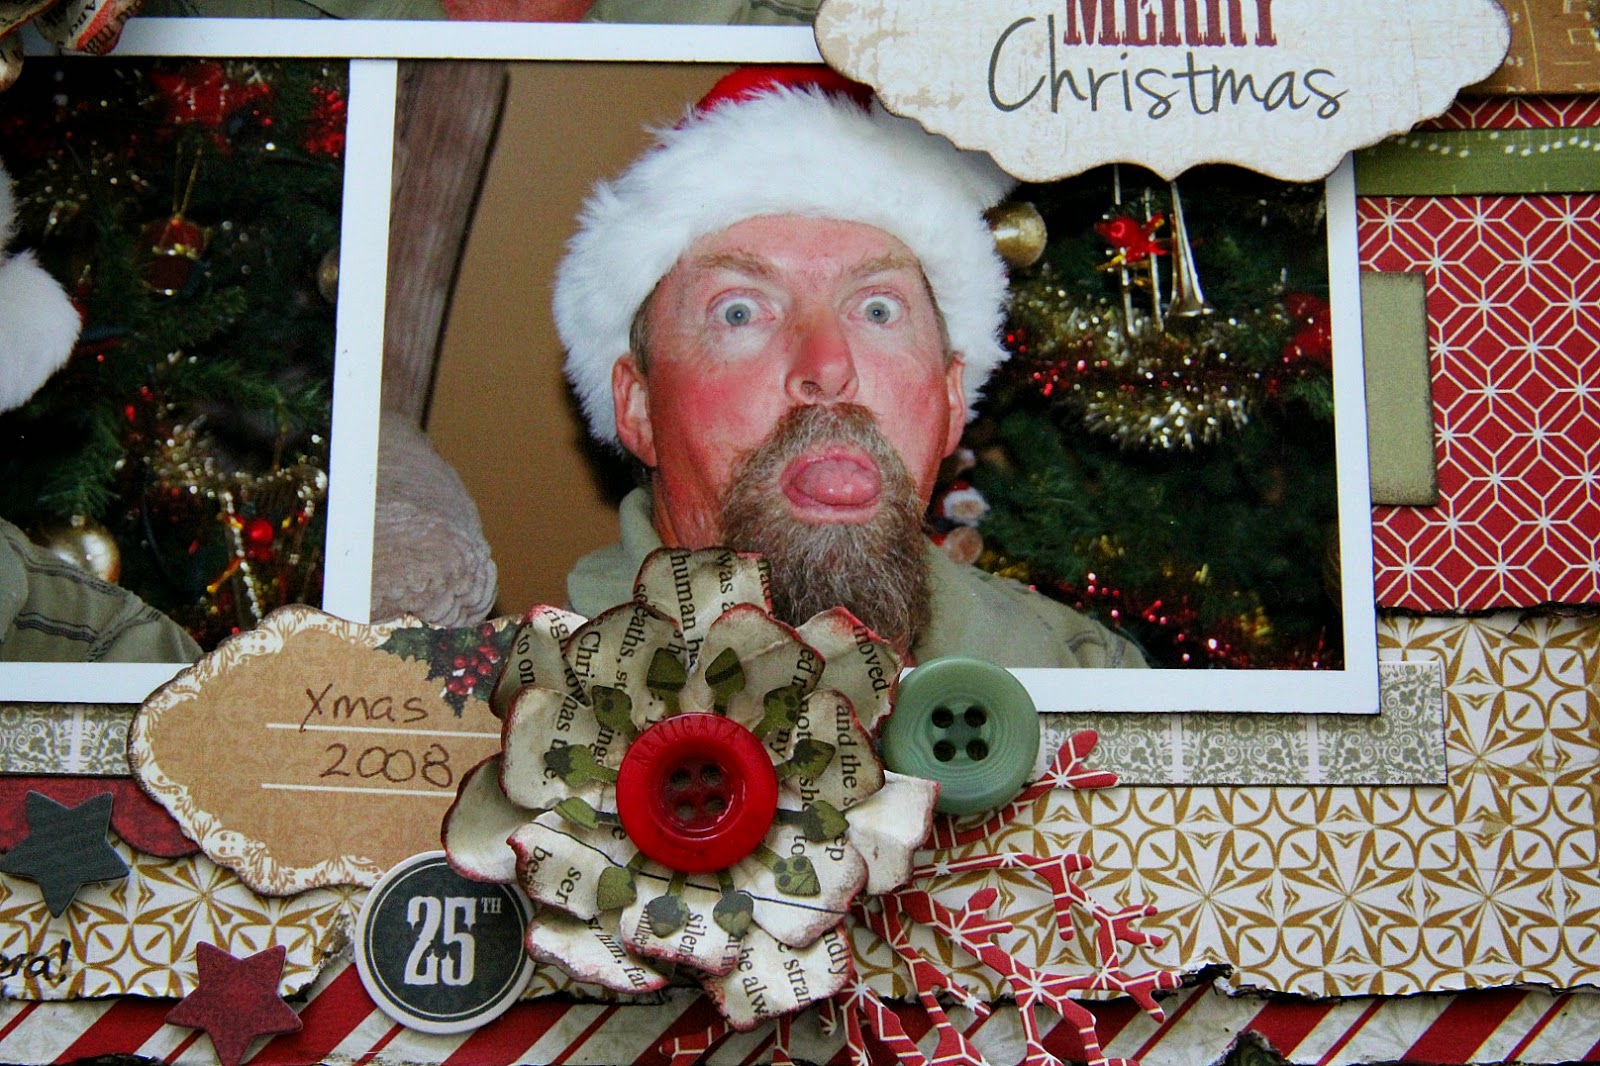
"Cheeky Santa"
 
I've used a variety of papers in red, green & gold, and embellished with pieces from the fab Collectables pack & sticker sheet.
 

I've also embellished using a few of my Die's, both the leaves.... & the flower that is sitting under the Red KC Paper Bloom - all cut from papers in this collection.


Here is another shot from a different angle.


Some layered up collectables, stickers & scrap pieces of pp...... and some
green alpha stickers for the title.


Another diecut flower using the "Garland" paper that has a gorgeous news print on it.


More stickers & Collectables - there are soooo many pieces in each of these, which makes them such great value & there's always something to suit just about everyone,
no matter what your style of scrapping :)


Pics are of my hubby wearing a santa hat & being rather cheeky!
 
Kaisercraft Products: Festive P1614, Christmas Eve P1617, Nativity P1615, Joyful P1619, Good Tidings P1612, Miracle P1620, Garland P1616, Paper Pad PP948, Collectables CT805, Sticker Sheet SS255, Fire Red Paper Blooms F664, Olive Mini Paper Blooms F650, Fire Red Mini Paper Blooms F669, Latte Pearl Strip PL505, Green Alpha Stickers AS257, Double Sided Tape T314, Foam Tape T303
 
Other: Flower Die, Leaf Dies, Buttons


"Believe in the Magic of Christmas"

For this layout I've cut out a few of the squares on the Miracle paper & arranged them in a patchwork effect across the page.... and I have added a bit of stamping to the background using the Numbers stamp with KC white ink.


I've used some paper blooms, stickers & collectables pieces to create a cluster...I just
love these pieces!


And more stickers, collectables & strip pieces of pp
 

Pic is of one of our fav santa decorations that comes out each year to decorate our home :)
 
Kaisercraft Products: Nutcracker P1613, Nativity P1615, Good Tidings P1612, Goodwill P1618, Joyful P1619, Miracle P1620, Paper Pad PP948, Collectables CT805, Sticker Sheet SS255, Coconut Paper Blooms F627, Honey paper Blooms F628, Olive Mini Paper Blooms F650, Numbers Stamp CS838, White Ink Pad IP720, Double Sided Tape T314, Foam Tape T303, Bark Ink Pad IP724, Paper Blooms Wire Stems.
 
Other: Red Flower, Stiching Stamp


Next I have decorated a few plain white candles...very quick & easy & is a great idea for some cheap christmas decorating for the home....or perhaps as a small gift :)

"Christmas Candles" 
 

Just a few strips of paper - some with punched edges & others left plain....with some added collectables & some twine....very quick & easy :)
 
Here's a few close ups....


Kaisercraft Products: Nutcracker P1613, Goodwill P1618, Nativity P1615, Paper Pad PP948, Collectables CT805, Sticker Sheet SS255, White Cardstock CD601, Double Sided Tape T314
Other: Candles, Twine, Doily Die


And lastly....a couple of Christmas cards...


Both are fairly basic, simple cards, yet still look quite unique.
These type of cards are very achievable for any skill level of paper crafter.
 
Kaisercraft Products: Festive P1614, Nativity P1615, Nutcracker P1613, Joyful P1619, Good Tidings P1612, Miracle P1620, Paper Pad PP948, Sticker Sheet SS255, Yuletide Clear Stamps CS186, Bark Ink IP 724, Double Sided Tape TT314, Foam Tape T303
Other: Twine, Rosette Die
 
 
That's all from me for today....I hope you have enjoyed my creations & have been inspired.
Until next week....happy scrapping!  xx
 
 
Photobucket
 
Tim Holtz - Distress Ink - Walnut Stain
Mont Marte - Gesso
Sassafras - Alpha Stickers
Faber-Castell - Gelatos

Tuesday, September 30, 2014

Basic Grey Highline - by Fiona Johnstone


Hello everyone
 
The end of the month is upon us already, only 3 months left of the year - yikes!
Today I am sharing a layout with you I created using the very colourful Basic Grey Highline range. I love working with bright, vibrant paper ranges like this one.
 
Here is my layout, Cherish of my daughter and youngest niece together on their last visit.
 
 
Because I was using so many bright colours, including the hot pink background,  I have used  black accents which really pop against all the colour. I have inked my background with a mask in black ink, added some black doilies, a black title and even some black leaves. I have also edged my main paper layers in black pen, before finishing off the layout with a little more pink!
Some close ups,
 
 showing masking detail and hand doodled edges. You can see I have kept the embellishments to a minimum with all the bold colour going on, a simple flair badge and some sequins on this side and a small flower cluster on the other.


Thanks for stopping by

Till next time
Fiona
x
Photobucket 
Products Used
 
Basic Grey Highline Paper - Be Yourself
Basic Grey Highline Paper -  Hello
Basic Grey Highline Paper - Awesome
Green Tara Cherry Blossoms - Pink
Green Tara Cherry Blossoms - Light Pink
AC Amy Tan Plus One Thickers Phrase Stickers
Flutterby Designs Flair - Design 200
Sequins - variety
Transparent Doily
VersaColor Ink - Black
 

Friday, September 26, 2014

More October Afternoon Public Library - By Linda Eggleton

Hi everyone & welcome
 
Today I have 2 final layouts to share using October Afternoon - Public Library collection.
I have to say that this has been such a fun range of papers & embellies to play with.  I love each & every page I've created with it, and it has been so super versatile, which is fantastic :)
 
My first layout is based on sketch #123 at Sketchabilities
"Girls gone wild"
 
For my background, I first dabbed on some watered down Teal Gelatos using some cling wrap, then I added some stamping in red ink.  I've also used the new Triangles template from Kaisercraft, and have randomly traced out a few different sized triangles onto the Biography paper with a black journal pen....and I cut a few triangle shapes from a variety of papers & stuck them so that they sat inside a few of the traced triangles from the template.....I then finished off with a few splashes of glimmermists.


I've added some 2Crafty Maple leaves to my cluster of Green Tara & Petaloo flowers...and there's also an October Afternoon 9-5 Tin Pin (Flair) in there as well.


With the Maple Leaves, I first sprayed them with water & then scrunched them up in my hand & worked them until they were soft & resembled nothing like a leaf.  I then carefully opened them back out & gently pulled the different layers apart, giving it a bit more shape & dimension.  I finished them off by colouring them with a green Gelato & then randomly painted the edges & centre vein pieces with some gesso.


Another 2Crafty piece....Mini Camera.  Oh boy, these are just the cutest little cameras ever!  I love them & couldn't wait to start using them on my pages!  I have coloured it with Gelatos again, and then enhanced a few of the features with a white & black journal pen.  I hand cut a little tag from the "Children's Section" paper, then tied a small piece of twine & arranged the tag in under the camera.


The papers are layered up under the photo, with the corners punched...and there's also some more of the border stickers in there too, as well as some more 2Crafty - pieces cut from the Circular Panel & coloured with black gelato.


A few more layers on the side of the page to fit in with the sketch....plus more pieces of border sticker, 2Crafty Circular Panel again, and also Green Tara flowers & another Tin Pin :)


I've added my journaling directly onto the page & have hand drawn a bit of a border around the other edges with a journal pen.  The pic is of a few of my GF's gone totally wild & having fun with my camera....way back in 1986 :)


Next layout is this one that was sooooo much fun to create...
 
"Weee"

I just had to create a page that featured the gorgeous balloon & cute little animals from the "Story Time" paper....and somehow it all just fell into place.  I normally struggle to use large pieces like this on my pages, but this one wasn't the case at all & I love how it has turned out.
 
I have mounted the balloon piece up on some scrap pieces of corrugated cardboard to give it a bit of height & definition on the page & I've used my newly acquired Prima Stiched Squares stamp to stamp a variety of different sized squares onto to a variety of papers that have been layered over & under each other after cutting them from the different papers. 
I really love the effect these have given :)
 
I have journaled around the page to create a bit of a border.


As you can see, the stamped squares are just randomly placed over each other
giving a great layered effect.


Here is a bit of a close up of the different stamped squares....with a small cluster of Prima, Petaloo & Green Tara Flowers.....PLUS some of the cute 2Crafty Mixed Buttons that I've inked in a few different colours.  The 2 strips across the top of the page are more pieces from the Border Stickers sheet.


One of the TidBits journal spots that I've added the basic When & Where....with more close ups of the stamped squares.


And here is a close up of the super cute balloon :)
 
I hope you have enjoyed seeing my creations with this fabulous, versatile range....and I also hope you've been inspired to want to create with them :)
 
Until next time....Happy Scrapping!  xxx


Photobucket
 
Products used:
 
"Girls gone wild"
October Afternoon - Public Library paper - Biography
Green Tara - Cherry Blossoms - Soft Pink
Dylusions - Ink Spray - Black
Faber-Castell - Gelatos
Tattered Angels - Glimmermists - Key Lime Pie, Denim Blue, Crushed Seashell
Prima Marketing - Stamp
Black Journal pen
Twine
 
 
"Weeee"
Green Tara - Cherry Blossoms - Soft Pink
Prima Marketing - Stitched Stamps - Squares
Prima Marketing - Flower
Ranger - Archival Ink
Sassafras - Alpha Stickers
Crochet Cotton