HOMEABOUT USSHOP HERECROPDATESCURRENT CHALLENGESTIPS&TUTORIALS
Showing posts with label My Minds Eye. Show all posts

Monday, March 22, 2021

Wild at Heart with Echo Park by Fiona Johnstone

Hello everyone

This week I have a layout to share created with a mix of papers from Echo Park & MME base paper to create this weeks page. I just love this photo I took recently at Mogo Zoo. 

Wild at Heart


I chose the papers based on this adorable Giraffe pair from the Echo Park collection Welcome Baby Boy Collection. I teamed it up with the cute Little One Leaves paper from the range, but then needed some extra green so started my search in another Echo Park Collection (Little Dreamer Boy) usually these will tie in with other collections easily. 

I chose this older but cool MME background paper - I wanted a Kraft background and this with the woodgrain pattern was perfect! Next I have used my central piece as a strip and added torn paper strips to the sides. I have centred my matted photo so that you can see the Giraffes on the main paper too. 


To embellish my page I have created some cute floral clusters with some stickers and tags to finish off. My title is by 2Crafty and perfect for the photo, I have inked it in Red, drawing colours from the papers and to make it stand out on the page. 


Thanks for stopping by
Till next week
Fiona
x

Photobucket
Products Used:

Echo Park Welcome Baby Boy paper - Animals
Echo Park Welcome Baby Boy paper - Little One Leaves
Echo Park Little Dreamer paper - Twinkle Twinkle
Photoplay To the Moon and Back paper
My Minds Eye - My Heritage Legacy paper
Green Tara Fantasy Blooms - White
Green Tara Leaf Sprays - Light Green
2Crafty Chipboard - Wild at Heart
Pinkfresh Studio Noteworthy Stickers
Pinkfresh Studio Days of Splendour stickers
Kaisercraft Roses - Blue
Fancy Pants Attwell Shipping Tag
Paige Evans Go the Scenic Route Puffy Stickers

Monday, May 25, 2020

Find Joy in the Journey with MME Gingham Gardens by Fiona Johnstone

Hello everyone

I've got another layout to share today created with the beautiful My Minds Eye Gingham Gardens:

Find Joy in the Journey
Love the papers in this collection and wanted to highlight them on this page so created lots of torn layers. I've tucked my photo underneath the paper so it peeks out and also fussy cut some flowers to add some extra layer detail. 

I've used lots of the ephemera again on this page to embellish the page, including using a piece as the title:
A few more ephemera pieces on this side , tucking some more under the paper layers and then the shipping tag central to add some journaling to later on. 
Thanks for stopping by
Till next week

Fiona
x
Photobucket
Products Used:
MME Gingham Gardens paper - Amanda
MME Gingham Gardens paper - Birdie
MME Gingham Gardens paper - Hannah
MME Gingham Gardens paper - Savannah
MME Gingham Gardens Ephemera
Cocoa Vanilla Studio Unforgettable Accessory Sticker Sheet
Doily
Twine

Monday, May 18, 2020

Family with MME Gingham Gardens by Fiona Johnstone

Hello everyone

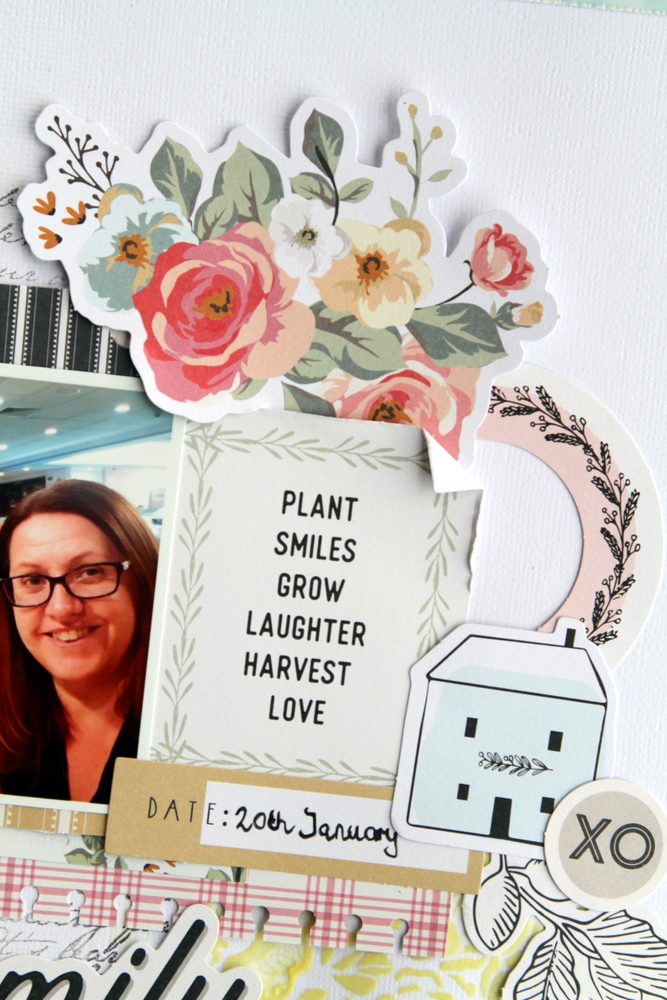
Today I have a layout to share created with the popular MME Gingham Gardens collection. 

Family


For this layout I have used the papers and embellished with the ephemera from the MME Gingham Gardens Collection, with a focus on the ephemera. I started with my white cardstock and then worked out which ephemera I was going to use and added these around my page before adding paper to the mix.  I used a notebook punch to give one of the papers a decorative edge. 


I then added some extra dimension to my background with some texture paste through my Kaisercraft Roses stencil and then some stamping with a Kaisercraft script stamp. 


Thanks for stopping by
Till next week
Fiona
x


Photobucket

Products Used:

MME Gingham Garden paper - Birdie
MME Gingham Garden paper - Savannah
MME Gingham Garden paper - Amanda
MME Gingham Garden Ephemera
Kaisercraft Stencil 6x6 Roses
Kaisercraft 
Ranger Texture Paste

Wednesday, December 25, 2019

Joy, by Amanda Hartmann

Hi everyone,
Merry Christmas for 2019!
What better way to celebrate in a scrappy way, than to share a Christmas page. 
In fact, these photos are from this time last year - and the girls waking up to a pile of presents under the Christmas tree. For this moment, I used the Holly Jolly collection from My Minds Eye.
 

I started with white cardstock on the base. I also used white cardstock to mount the photos.

Then I used panel and strips of these patterned papers from the range: Comfort & Joy, Deck the Halls, and Merry & Striped. I added these in layers, with torn bottom edges and distress edges.
I used Deck the Halls paper to extra mount 2 of the photos.

I finished the page, by layering and building the stickers from the 6x12 pack of cardstock stickers into clusters.

Check out these close ups:


There are stars, little Christmas trees, circles, banners and little tickets in the sticker packs.
 They are fun to layer up in a cluster.


I stacked a few Christmas tree stickers in this cluster! So cute!


And what a perfect word - JOY - Joy on Christmas -
 I hope that you find JOY with your friends and families this season!

Thanks for looking,
Amanda

Products Used:
Holly Jolly collection from My Minds Eye.
Holly Jolly collection: Comfort & Joy paper
Holly Jolly collection: Deck the Halls paper
Holly Jolly collection: Merry & Striped paper
Holly Jolly collection: Holly Jolly: 6x12 pack of cardstock stickers
Photobucket

Friday, November 29, 2019

Remember, by Amanda Hartmann

Hi all,
Sharing a second time this week - this time using the versatile
 My Minds Eye: My Heritage collection. 
 

I used some black cardstock for the base, but the focus of this page was really layering all the awesome prints of the patterned papers. The designs and colours of this range make it suitable for any photos. I have used travel photos, and there are a number of travel theme accents within the collection.

Here are the papers that I used: Family tree, Roots, Memories and Origin. I used the Family tree and Origin papers at the base - I used the reverse side and will need to buy more, as I want to use both sides! I created the folded paper panel on the right side of the page using 3 sides of the Roots and Memories papers. Each paper layer had the edges inked black.


In these photos I hope you can see the folded paper technique I used. The dimension of it is lovely, although hard to capture in a photograph! I folded the three different designs of paper on angles. I inked the edges and then layered them evenly to create the panel.


I finished with bits and pieces from the Mixed Ephemera bag.


In the top right corner, I layered different tags and elements from the ephemera bag. Some acetate elements are included, which I stapled to the tag with some threads. (I hate the wet glue showing on clear acetate pieces).


I included more circles and tags from the ephemera bag on the right side of the photo.


And in the bottom left of the photo, I added the word tag with thread, acetate and threads all stapled together.

That's it for this week! Next week we are into December! Final countdown for 2019.

Thanks for looking,
Amanda
Products used:
My Minds Eye: My Heritage collection
MME: My Heritage collcection: Family tree
MME: My Heritage collcection: Roots
MME: My Heritage collcection: Memories
MME: My Heritage collcection: Origin
 MME: My Heritage collcection: Mixed Ephemera bag
 
Photobucket

Friday, May 24, 2019

Those Eyes using My Minds Eye Happy Days by Kerryn Fry

Hello everyone!
Today I am sharing the 4th and final page created using 
My Minds Eye Happy Days
I have used almost every piece of this collection
and I just love the result against the black cardstock.
The photo is one of my Great-Nieces 
showing off her baby blues.

A different start for this page, Black cardstock is the star
and I love how the colours stand out even more.
I've layered the patterned papers under the photo
which has been matted with Black Cardstock for definition.
Most of the embellishments have been hand-cut from the remaining papers.


Glad Garden and Ice Cream Dreams papers provided the houses
and flowers to embellish the page.
I've used foam tape to lift these elements
and layer them across the page.
The word 'Hi' is from the Ephemera Pack
and have hand drawn a faux stitch line with a white pen.


The 2 Crafty Anthea's Butterflies have been covered
with Distress Paints first, then swiped with gold ink.
Once dry, I have sealed with Dimensional Magic for a gloss finish.


The 2 Crafty Addy's Butterflies were painted with
2 colours to coordinate with the papers
and then sat on top of the Anthea Butterflies as a second layer.


The 2 Crafty title Those Eyes was painted black 
and once dry, stamped with a script stamp and gold ink.
The title was also sealed with Dimensional Magic for a glossy finish.

Thanks for visiting the blog today.
I hope you have enjoyed this collection as much as I have.
Have a great weekend with plenty of crafting.
Please join us again on Monday for Fiona's next page
Products used:
Bazzill Raven Cardstock
My Minds Eye Happy Days - Free Range
My Minds Eye Happy Days - Glad Garden
My Minds Eye Happy Days - Good Vibration
My Minds Eye Happy Days - Ice Cream Dreams
My Minds Eye Happy Days - Cheery Disposition
My Minds Eye Happy Days Mixed Bag Ephemera
2 Crafty Title Those Eyes
2 Crafty Addy's Butterflies
2 Crafty Anthea's Butterflies
Dimensional Magic
Photobucket

Wednesday, May 8, 2019

"Perfect" by Amanda H

Hi AAS fans!
 
Today's share is all about the florals! Using the My Minds Eye Splendor collection, I combined papers and stickers from the range to create this "perfect" page of my second daughter.
 

I started with a base paper: Beautiful for the background, as well as using a section of the pink side of the paper to mount the photo.

Next I layered a panel of the Remember paper; I love this text/typed patterned paper.

To finish the page, I layered flower stickers from the Accessory Stickers sheet, as well as some small pieces from my AAS stash.

I ran a piece of white lace across the page, as that matched my daughters dress so well!
Here you can see how I layered flower stickers with the lace, sequins and some Prima flowers.
For the title, I used the grey chipboard word from the More than Words collection by CVS. This pack also had some chipboard hearts so I added these to each cluster as well. I added a coat of Dimensional Magic to them all, for some extra shine!
I repeated more of the same elements in the top left corner of the photo...

\
and on the end of the title. Perfect!
I love the patterned papers in this range, and I love how this page come together!
Thanks for looking,
Amanda


Products used:
 My Mind's Eye - Splendor Paper - Remember
 My Mind's Eye - Splendor Accessory Cardstock Stickers
Cocoa Vanilla - More Than Words Chipboard Titles
Prima Flowers from stash from Havana Collection
Dimensional Magic
 
Photobucket

Friday, April 26, 2019

Crazy About You using My Minds Eye Happy Days by Kerryn Fry

Hi Everyone, happy Friday!
Today I'm sharing my third page created with the beautiful collection,
My Minds Eye Happy Days.
I have really enjoyed this collection, 
especially the yummy combination of bright colours.
I've actually created a 4th page with this collection to share at some stage.
This is a gorgeous photo of my eldest Great-Niece,
it was taken a few years ago at Christmas time.
 
The page started with my favourite Kraft Cardstock.
The background has been given a pop using a Crafters Workshop Template 
and a mixture of Ripe Permisson & Victorian Velvet Distress Paint.
Once the paint had dried, I have highlighted some of the circles with a white pen.
I've hand cut a few different pieces from the patterned papers to embellish the page.
The flowers, hen and house were all elements cut from different papers,
Free Range, Glad Garden and Ice Cream Dreams.
I have used foam tape to lift each piece to create some depth in the page.
The white pen was used again to add some finishing touches.
I've also used some embellishments from the Ephemera Pack
to create clusters either side of the photo.

Two great 2 Crafty pieces used on this page.
The 2 Crafty title Crazy About You was base coated with gesso.
Once dry, I have roughly swiped Broken China Distress Paint
across the surface, allowing the gesso to peek through.
The title has been given a border with the white pen.

The 2 Crafty Topiary Tree has been painted with colours to match the papers.
The pot was coloured with a mixture of Mustard Seed and Crushed Olive Distress Paint.
The stem was painted with Mowed Lawn
and the flowers with the earlier mixture of Ripe Permisson and Victorian Velvet.
I've outlined the pot and flowers with the white pen.


A simple girly page to finish off the week.
Thank you for visiting the blog today.
I hope you have a fabulous weekend,
filled with plenty of crafting time.
Please join us again on Monday for Fiona's next project.


Products used:


Photobucket