HOMEABOUT USSHOP HERECROPDATESCURRENT CHALLENGESTIPS&TUTORIALS

Monday, March 11, 2019

Sweetness with CVS Midnight by Fiona Johnstone

Hello everyone

This week I am using up some of my leftovers from Cocoa Vanilla Studios Midnight Collection while I finish off some pages with the new Happiness collection. 

Sweetness
 
For my papers - the pretty pink stripe makes a lovely backdrop for my photos against white cardstock, then I've cut up some banners and tucked them under the stripe. 
 
 
To add some extra layers to my page, I have added some of the frames from the ephemera pack, and a doily!

Then I've used embellishments from the chipboard, sticker and ephemera packets from the Midnight Collection. Then I added some sploshes of watered down Dylusions Paint to finish off my page. 
 
 
Thanks for stopping by
Till next week

Fiona
x
Photobucket
Products Used:
Cocoa Vanilla Studio Midnight paper - Sophisticated
Cocoa Vanilla Studio Midnight paper - Bloom & Grow
Cocoa Vanilla Studio Midnight paper - Inspired
Cocoa Vanilla Studio Midnight Ephemera
Cocoa Vanilla Studio Midnight Accessory Stickers

Friday, March 8, 2019

Day at the Beach using Kaisercraft Deep Sea by Kerryn Fry

Hi Everyone!
I'm back today with my second page 
created with the collection Kaisercraft Deep Sea
The shades of blue and green in this collection are fabulous.
The photos are Mr then 7, attempting to fly a kite with Dad. 

The page started with the gorgeous Mermaid Scales Specialty paper as the base.
A few layers of patterned paper and some fussy cutting.
I've hand cut some shells, pebbles and foliage from the Tide paper,
then combined them with a few elements from the Collectables pack.


Plenty of focus on my favourite thing this week, 2 Crafty chipboard.
The octopus, seahorse and crab are all from the 2 Crafty Sea Creatures pack
 I've base coated each piece with gesso and set them aside to dry.
The 2 Crafty Sea Grass has been sponged with a combination 
of Distress Paints Scattered Straw,  Brushed Corduroy and Frayed Burlap.
The seahorse was also sponged using Distress Paints Tumbled Glass,
Stormy Sky and Chipped Sapphire.


The chipboard title Day at the Beach has been given a 
layer of Charcoal Ink and let dry.
Once dry, I have given the title a finishing coat


The chipboard Octopus has been covered with a two-tone finish
of Distress Paints Evergreen Bough and Broken China.
The starfish was sponged with multiple Distress Paints
Once dry, I covered them with Dimensional Magic 
and have used foam tape to lift each piece.


I have used similar colours on all of the chipboard pieces
to tone in with the colours of the collection.
Using the hand-cut elements, I have embellished across the base of the page.
The 2 Crafty Kites were the perfect final pieces.
They were hand painted with a brush using Distress Paint
and scribbled some borders on them with a black pen.
I have also framed the photo with black pen.


That's my page for this week.
I hope you have enjoyed the project
and have a very happy, scrappy weekend.
Please join us again on Monday for Fiona's next page. 

Products used:

Photobucket

Wednesday, March 6, 2019

Adventure, by Amanda Hartmann

Hi all,

Welcome to March!
 Today I am sharing a page created with the new My Minds Eye collection - Gingham Farm. 
I love the mix of patterns and the black and neutral colour palette.
 After looking at my photo, I decided the gold tones were perfect to add to the page.

I started with a sheet of black cardstock and then layered papers: Madi & Molly.
 I combined these with some black machine stitching.

A feature of my page is the 2Crafty Harlequin Clumps chipboard. I embossed this in gold.
 I placed it in three locations on the page as the base of my clusters.

To the right of the photo, I placed the chipboard with some stickers from Gingham Farm Accessory Cardstock Stickers.


In the top right corner, I layered the chipboard with some messy threads, muslin and more stickers.

You can also see the gold Splatters made on the page in these close ups. I used Colour Blast Shimmer Spray in Bling to do this.


For the title below the photo, I used more of the gold harlequin chipboard and layered more messy thread and muslin, before placing the 2Crafty chipboard quote on top. The chipboard "Let the adventure begin" has been embossed in black. I also tucked some more stickers in there.


And then a few more word strip stickers on the edge of the photo.


I love how the gold worked out with the colour tones of this paper collection.


Thanks for looking.

Amanda


Products used:
2Crafty Harlequin Clumps chipboard
2Crafty - Let the adventure begin- chipboard title
 
Photobucket

Monday, March 4, 2019

Today with Emerson Lane by Fiona Johnstone

Hello everyone

My final share with Emerson Lane this week. I have really enjoyed creating with this collection and it's stunning colour palette. 

Today
I've used the True Stories paper for my background, love how it has a nice border around the page to frame the layout. I've then used up a selection of my paper scraps from my previous layouts with this collection, layering them up behind my photo and adding a doily for extra texture. 
I've used the sticker sheet and ephemera from the Emerson Lane collection for co-ordinating embellishments before once again using the MME gold acrylic stickers and adding some Green Tara teas roses. 
To finish off my layout, I covered my photo and paper layers, before adding some sploshes of Dylusions paint in Peony Blush to the base paper. 

Thanks for stopping by
Till next week

Fiona
x
Photobucket
Products Used:
Heidi Swapp Emerson Lane paper - True Stories
Heidi Swapp Emerson Lane paper - Restoration
Heidi Swapp Emerson Lane paper - Emery
Heidi Swapp Emerson Lane paper - Sweet Nothings
Heidi Swapp Emerson Lane paper - Harrison
Heidi Swapp Emerson Lane Ephemera
Heidi Swapp Emerson Lane Cardstock Stickers
Doily
Green Tara Tea Roses - Cream
Dylusions Paint - Peony Blush
MME Blush Alpha Stickers Gold

Friday, March 1, 2019

Water Fun using Kaisercraft Deep Sea by Kerryn Fry

Good morning AAS faithfuls.
It's going to be just a tad warm here in South Australia today,
think we're going for a top of 40 degrees, 
so I'll be spending the day trying to stay cool.
And I've just realised it is already March!....Crazy!
Today I'm sharing my first page using the fabulous collection,
Kaisercraft Deep Sea.
I have to say I have really enjoyed doing this page.
It might have something to do with the very cute then Mr 6.5 as my model.
And where else could he be, but in the water.
 

 Now surprisingly for some, there is no cardstock in sight this week.
With so many fabulous patterned papers in this collection,
I didn't need to work up a sweat to create a background.
But my scissors were definitely very busy.

The page was started with the Deep Blue paper,
I've then hand-cut the circles from Anemone 
and the sandbanks from Tide.
I used the big sandbank as a base for the photo.
Each element has been given dimension with foam tape.


The individual waves under the photo have been hand-cut from the Deep Sea Dive paper.
I have roughed up the edges of each strip and
then re-aligned them with a small gap when sticking them down.
With a white pen, the edges have been defined by adding some faux stitching lines. 


The clusters on either side of the photo are a combination of
hand-cut follage and shells from the Tide paper 
and a few pieces from the Collectables.
Plenty of layering and more foam tape.


The large starfish was hand-cut from Tide
and was a great base for the smaller cluster along the bottom of the page.


The 2 Crafty title Water Fun was basecoated with gesso,
then once dry, I've covered it with Distress Oxide Chipped Sapphire.
The next layer was created using the 6x6 Crafters Workshop stencil
and two more Distress Oxides, Broken China and Tumbled Glass.
I've dried the ink off with a heat gun to set it
and added some circles with a white pen.
I have lifted with foam tape.

Thanks for visiting the blog today.
I hope you have a wonderful weekend, with plenty of crafting.
And stay cool if the heat finds it way to you.
Please join us again on Monday for Fiona's next project.
Products used:
Kaisercraft Deep Sea - Deep Blue
Kaisercraft Deep Sea - Anemone
Kaisercraft Deep Sea - Tide
Kaisercraft Deep Sea - Deep Sea Dive
Kaisercraft Deep Sea Collectables
2 Crafty title Water Fun
Distress Oxides
Crafters Workshop 6x6 Mini Tiny Circles
Photobucket

Wednesday, February 27, 2019

"Pack your bags", by Amanda Hartmann

Hi AAS fans!
 
I loved the latest travel range from Kaisercraft "Let's Go", so I combined papers with some of the awesome stickers to create this page.
 

I started with black cardstock as the base to the page.

Then I layered vertical panels of papers down the page. I used: Fly Away, and Street Signs. I distressed the edges of the papers too.

To embellish the page, I combined different stickers taken from the Let's Go sticker sheet.

In a horizontal strip under the bottom of the photo,  I used the longer border stickers from the sheet. I also included a paper border taken from one the 12x12" papers.

I used a Kaisercraft doily die to cut a doily from the Street Signs paper and place under the photo.


I added some of the word and quote stickers in a stack, with some on foam tape for some pop.


And I finished the page with some black ink splatters.


This was such an old photo, I was so glad to get it scrapped! Have you got some old travel photos lying around? Get them out and use Let's Go to get them scrapped!

Thanks for looking today.

Amanda


Products used:

Kaisercraft - Let's Go Paper - Street Signs
Kaisercraft - Let's Go Sticker Sheet
Kaisercraft - Decorative Die - Detailed Doily
Dylusions Ink Spray - Black Marble
 
Photobucket

Monday, February 25, 2019

Mr Bock with Emerson Lane by Fiona Johnstone

Hello everyone

I can't get enough of this stunning Emerson Lane collection by Heidi Swapp so have another layout to share with you created with this range:

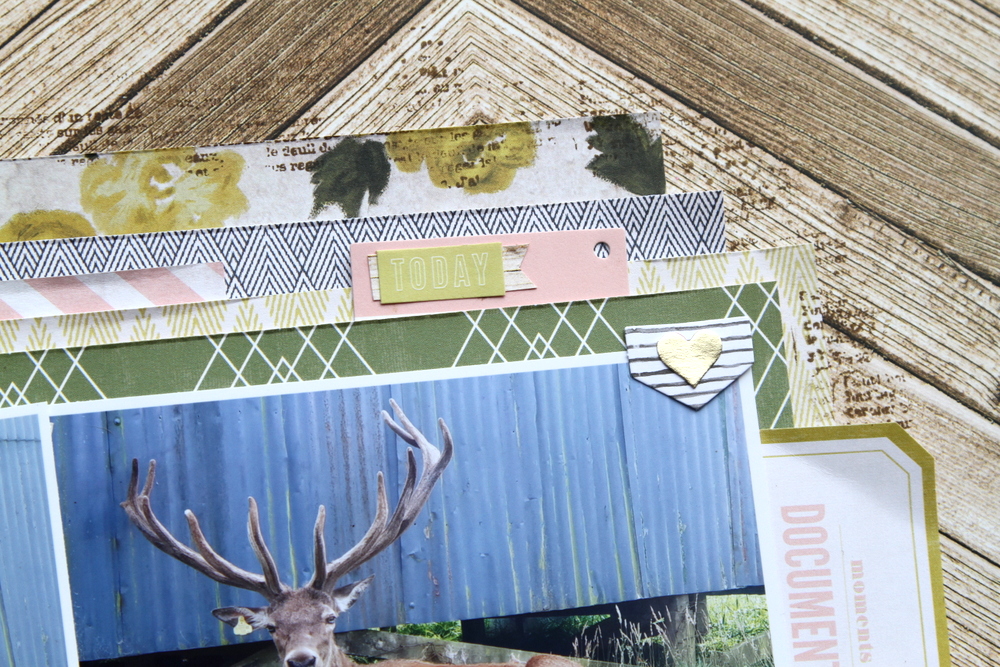
Mr Bock


We got to see this elderly guy on a visit to our cousins farm when we were overseas recently, he is about 20 years old and just magnificent!
For this layout I have focused on the colours in my photo, the fawn of the stag, the green grass and the blue shed, then adding a pop of pink & gold. 

I've used the Harrison paper for my background, gotta love the timber background papers. I've then added lots of paper layers to match my photo and tucked in some journaling pieces and tags. 

I've embellished my layout with the Emerson Lane stickers & ephemera, and then dug into my stash for a few extra pieces - love the gold hello and bow from 

For my title I found some cool wooden thickers, go perfectly with my background. 
Thanks for stopping by
Till next week

Fiona
x
Photobucket
Products Used:
Heidi Swapp Emerson Lane paper - Harrison
Heidi Swapp Emerson Lane paper - Emery
Heidi Swapp Emerson Lane paper - Restoration
Heidi Swapp Emerson Lane paper - Easy Peasy
Heidi Swapp Emerson Lane paper - Dalila
Heidi Swapp Emerson Lane paper - True Stories
Heidi Swapp Emerson Lane Cardstock Stickers
Heidi Swapp Emerson Lane Ephemera
My Minds Eye Gold Stickers
American Crafts Thickers 
Green Tara Apple Blossoms Pink
Bo Bunny It is Written Stamp

Friday, February 22, 2019

#Love everyday using Simple Stories Kissing Booth by Kerryn Fry

Happy Friday everyone!
Today I have another page to share using the lovely collection,
A rare photo of my man and me,
This one is a few years ago when we were ballroom dancing
and my hair was really dark.


It's the same starting point for me, why stop something I love.
A Bazzill Kraft Cardstock base, Stencils and Distress Oxides.
I love the chalky finish from the oxide inks on to the kraft.
Then using two different heart stencils and 
Distress Oxides Aged Mahogany, Worn Lipstick and Spun Sugar,
I have created the layered background.
I have highlighted random hearts with a white pen
and also doodled some free-hand small hearts across the page.


Before adding any paper layers, I have flicked white paint across the page.
The small paper hearts were hand-cut from the patterned papers
and then lifted with some foam tape.
I have cut the quote and flowers from a few different papers.
The Elements papers are perfect for a adding embellishments to a page.
It's a big reason why I love Simple Stories collections.


The flower has been cut from the 4x4 Elements page
and the banner cut from the 4x6 Vertical Elements.
I have layered them both pieces with foam tape.


The 2 Crafty words #Love and everyday have been used to create the title.
They have both been covered with Distress Oxide Worn Lipstick.
The final layer is Dimensional Magic.
I have used the heart cut from the 4x6 Vertical Elements as a base for the title.


And that's a wrap!
Thanks for visiting the All About Scrapbooks Blog today,
I hope to have enjoyed the process.
Have a great weekend
and please join us again on Monday for Fiona's next page.
Products Used:
Bazzill Kraft Cardstock
Simple Stories Kissing Booth - 4x4 Elements 
Simple Stories Kissing Booth - 4x6 Vertical Elements
Simple Stories Kissing Booth - Hugs & Kisses
Simple Stories Kissing Booth - Love Day
Simple Stories Kissing Booth - Smitten
2 Crafty #Love
2 Crafty title Everyday
Distress Oxides
Photobucket