HOMEABOUT USSHOP HERECROPDATESCURRENT CHALLENGESTIPS&TUTORIALS

Friday, November 5, 2021

Create your own sunshine using Carta Bella Craft & Create By Kerryn Fry

Hello everyone!
Today's page was created with the collection
A fabulous range that has the perfect 
'B' side patterns to create a page for any occasion.
The photos of Mr H are from the archives,
taken in 2010, playing outside at home.


I've created the background effect in layers.
The first layer is Distress Oxide Inks,
Speckled Egg and Peacock Feathers
and a stencil from my stash.
The second layer is white ink 


The 2 Crafty Sun has been covered
with Scattered Straw and Wild Honey Distress Paint.
Once dry, I have outlined the centre with a black pen.
I've also used the pen to outline some of the paper layers.

The clouds are from the 2 Crafty Rainbow set.
They have been covered with white gesso
and added to the page with foam tape.


I have created embellishment clusters on both
sides of the photos with hand cut leaves
from the papers Sew Lovely Floral 


The 2 Crafty leaves have been covered 
with a combination of Mowed Lawn 
and Twisted Citron Distress Paint.
They 've been layered with foam tape.


The journal card and tag have been cut
from the paper Handmade with Love.
I've added more hand cut leaves
and raised both elements with foam tape.


to the background Oxide Ink pattern and 
to the green patterned paper Sew Lovely Floral.
Gives the page a little sparkle.


has been covered with Black Archival Ink
and backed with patterned paper Handmade with Love

It has been covered with Wild Honey
Distress Paint and added to the Ornate heart.


Thank you for visiting the Blog today,
I hope the page has given you some creative ideas.
Have a lovely weekend
and please join us again on Monday.

Products used:
Carta Bella Craft & Create - Crafting Floral
6x6 Stencil from stash


Monday, November 1, 2021

Puttin' Around with Simple Stories Family Fun by Fiona Johnstone

Hello everyone

Another page with the fun and awesome Family Fun collection by Simple Stories. This time I have created a page featuring some Putt Putt golf:

Puttin' Around


For this layout I focused on the ephemera and found the bits and pieces in the pack that suited playing Putt Putt. I also used one of the tags from the ** paper to use as an embellishment with a little string bow. 


I layered up some papers underneath my black cardstock - the black really makes the bright colours pop and worked well with my dark photos - from being in an indoor, glow in the dark putt putt centre. 

I love the admit one paper and cut a blue strip to tie my page together and added a few green ones for balance. 


Next I framed my design with the ephemera pieces, choosing Puttin' Around to be my title and then I finished off with a few puffy sticker stars. 


Thanks for stopping by

Till next week
Fiona
x
Photobucket

Friday, October 29, 2021

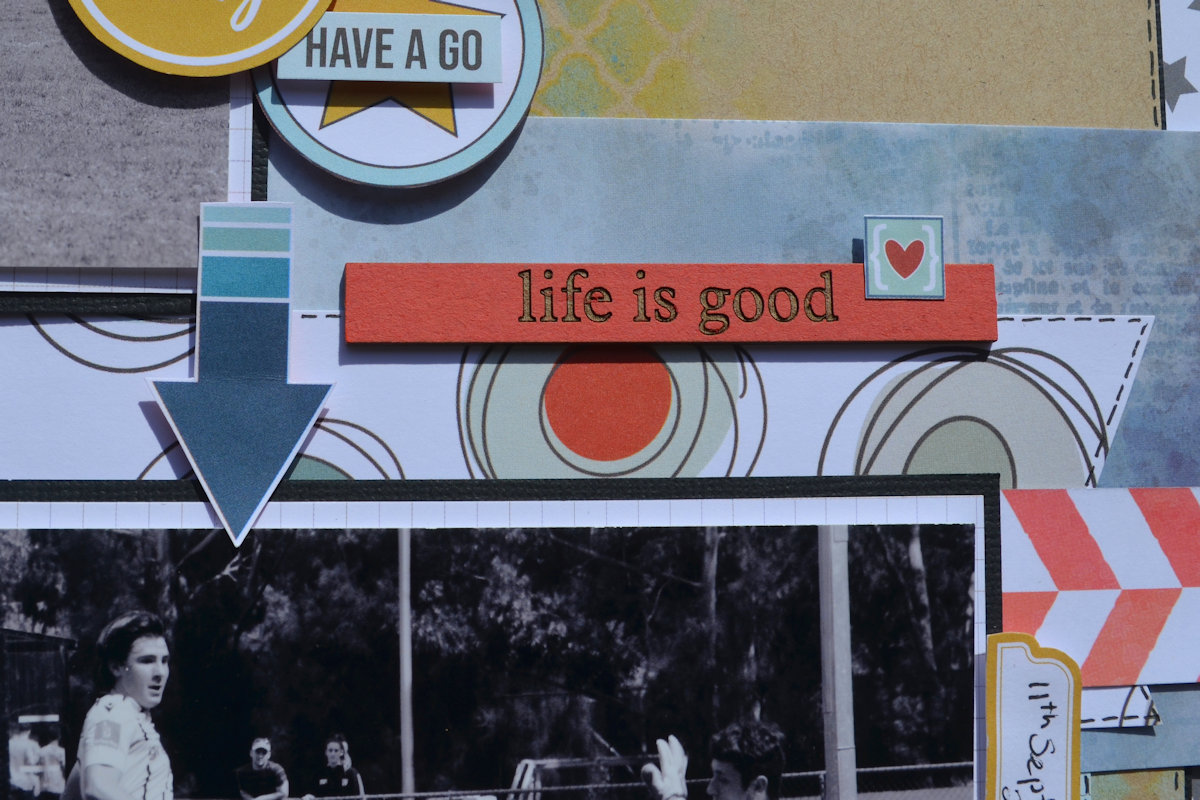
Life is Good using Uniquely Creative Choose Your Own Adventure by Kerryn Fry


Hi everyone!
Today I'm sharing a page I've created with 
Uniquely Creative Choose Your Own Adventure.
The photos are from a soccer match last month,
where I actually managed to snap some photos 
of Mr H kicking a goal, go me!


The familiar Bazzill Kraft Cardstock is still 
part of the base layer, but I've added two other layers.
The stars frame is cut from the reverse side of READY? GO! paper.
Then I've cut a Bazzill Raven Cardstock frame
to define the kraft cardstock edge. 

The background effect has been created with
 a stencil from my collection and 
three Distress Oxide Ink colours.
Fossilized Amber, Speckled Egg and Storm Sky
work well with the colours in the papers.

Once the oxides were dry, 
I've flicked some water onto the ink
and then soaked it up with paper towel
to get that distressed look.


with white gesso and cut into two pieces.
Each piece has been layered under the photos
to symbolize the netting of the goals.

The tags and words have been cut from
the patterned paper The Story - Layer cuts. 
The elements have been lifted with foam tape. 


The black arrows were hand cut from 
More foam tape pops them off the photo.

The 2 Crafty words 'Shoot' and 'Goal'
are from the 6x6 Soccer Panel.
I've covered them with Black Archival ink
and then outlined each letter with a gold pen.
Once dry, I've swiped the words again with 
the black ink pad to dull down the gold outline.


The photos were originally very busy with colours
so I've changed them to B&W to better suit the papers.
Both photos have then been layered on the white graph
reverse side of The Story-Layer Cuts
and Black Raven Cardstock.

 
The Story - layer cuts paper was a fantastic source 
for embellishments and words to suit the page.
The had cut stars have been lifted with foam tape
and the journal card was cut from 


The flags and banners were also cut from the patterned papers
and the scalloped edge under the bottom photo.
I love the pop of yellow in the papers.


The 2 Crafty Mini Title Stick 'Life is Good'
has been covered with Candied Apple Distress Oxide Ink
to tie in with the red in the patterned papers.

The hand cut circles and coloured arrow were cut


Thanks for visiting the blog today,
hopefully the page has inspired to to create.
Have a great weekend!
Please join us again next week
for our next projects.

Bazzill Kraft Cardstock
Bazzill Black Cardstock
Uniquely Creative Choose Your Own Adventure - Authorised Personal Only
Uniquely Creative Choose Your Own Adventure - Journey
Uniquely Creative Choose Your Own Adventure - No Limits
Uniquely Creative Choose Your Own Adventure - Ready? Go!
Uniquely Creative Choose Your Own Adventure - The Story Layer Cuts
2 Crafty 6x6 Soccer Panel words 'Shoot' & 'Goal'
2 Crafty Chicken Wire Panel
2 Crafty Mini Title Stick Set 1 'Life is Good
Distress Oxide Ink

6x6 Stencil
White Gesso
Black Archival Ink
6x6 stencil


Photobucket

Monday, October 25, 2021

Now Showing with Simple Stories Family Fun collection by Fiona Johnstone

Hello everyone


I have a fun range to create with this week - Simple Stories Family Fun collection, perfect for documenting those fun times and the bold primary colours in this collection are just fabulous!

Now Showing


I have started this page off with a super cute cut file of popcorn - and backed it with the most perfect paper - Movie Night - red and white strips on one side and popcorn on the other!!


I've used a photo from my phone that is slightly shorter than your standard photo size at (7cm x 15cm instead of 10cm x 15cm) which has allowed me to use one of the 4x6 Elements pieces to mat my photo giving it a cute dotted border. Next I have added another paper layer behind and some strips to the top of my Kraft background. 


Embellishing my page was simple with the cut file being the focal part of my page. I have cut some extra Admit One tickets from the Let's Play paper and used some movie themed embellishments from the ephemera pack, before adding a selection of stars from my stash. 


Thanks for stopping by
Till next week
Fiona
x

Photobucket

Products Used:
Simple Stories Family Fun paper - Movie Night
Simple Stories Family Fun paper - Let's Play
Simple Stories Family Fun paper - 4x6 Elements
Simple Stories Family Fun paper - Game Night
Simple Stories Family Fun paper - Score
Simple Stories Family Fun Bits & Pieces
Kraft Cardstock
Kaisercraft Cardstock Snow
Bella Boulevarde Stars
Thickers Foam Stars

Friday, October 22, 2021

Happy & Magical using Carta Bella Craft & Create by Kerryn Fry

Hello everyone!
Today I'm sharing a page created with 
the collection Carta Bella Craft & Create.
Some fun photos from 2012 of Mr H
playing with his very cute, youngest cousin
during the January school holidays. 


The page began with a 12x12 piece of Bazzill Kraft Cardstock.
I've created the background effect in stages.
The first layer is three different Distress Oxide colours,
Using a blending tool and an older Vicki Boutin Stencil,
I have applied the Oxide inks randomly mixed
around the outside edge of the page.


The next layer is using Vicki Boutin Colour Study 
It has been applied with a sponge, over-lapping the Distress Oxides
in multiple spots on the cardstock.
I've then made watery mixtures of the gold ink 
and white gesso to create splashes on the page.


The final layer in the background 
is with a gold pen and I have outlined 
some of the hexagon shapes from the original stencil.


covered with the Tsukineko Ink.
I have finished the chipboard with a layer

The flowers on the page have been hand cut
from the paper Sew Lovely Floral.
I have raised each floral cluster with foam tape.


The 4 photos have been matted with
lifted with scrap cardboard to create dimension.

I've used black and white pens to outline
different layers of the patterned paper
with a fake stitch border.


The numbers and '&' are from a Thickers set.
They have been covered with the gold ink
and finished with Dimensional Magic.

The tag for journalling has been cut from 
The tag has been raised with foam tape.


The title has been created with the chipboard pieces 
Both piece have been covered with the 
Once dry, the final layer is Dimensional Magic.
Love the mixture of different fonts.


Loved creating this page!
Thank you for visiting the Blog.
I hope you have enjoyed the process of the page.
Have a fabulous weekend and happy crafting!
Join us again on Monday with Fiona's next page.

Products Used:
Thickers - Numbers 


Monday, October 18, 2021

Coastal Walk with Simple Stories Vintage Coastal by Fiona Johnstone

Hello everyone

Back today with another layout created with the summery Vintage Coastal collection by Simple Stories. 

Coastal Walk


I've used the collection this week to document a favourite photo from one of my coast walks. Lucky to live near this during lockdown!

For this layout I've focused on the green, blues and browns from the photo and added a pop of red/pink. Love a Kraft cardstock background for beachy pages and I have added some stamping to the background before add my torn paper layers


I've tucked some chipboard pieces, left natural to compliment the Kraft background, under my paper layers for added texture before embellishing with the cardstock stickers and floral ephemera pieces. 


The ready-made cluster above and my cluster below using a mix of stickers and adding some 49 & Market Hike More trinkets. 


Finally adding my title using the Foam Stickers for the large word Coastal and some smaller stickers for walk. 


Thanks for stopping by
Till next week
Fiona
x


Products Used:
Simple Stories Vintage Coastal paper - On Island Time
Simple Stories Vintage Coastal paper - Rest & Relax 
Simple Stories Vintage Coastal paper - Elements 4x4
Simple Stories Vintage Coastal Cardstock Stickers 12x12
Simple Stories Vintage Coastal Floral Bits & Pieces
Simple Stories Vintage Coastal Foam Stickers
49&Market Vintage Artistry Hike More Wishing Bubbles & Trinkets
2Crafty Chipboard Fishing Net Bits
Uniquely Creative Stamp
Kraft Cardstock


Friday, October 15, 2021

Today's Moments using Pinkfresh Some Days by Kerryn Fry


Hi everyone!
The page I'm sharing today was created 
with my remaining pieces of Pinkfresh Some Days.
The colours in this collection 
worked really well with the photos.
More photos of Mr H at his first
school sports day in 2009.


The 12x12 base is Bazzill Kraft Cardstock.
To that I've add the contrast piece of
I pulled a few border punches from my stash
to add a decorative edge to one side of the black cardstock.
The layer of white graph paper
is the packaging from the Cardstock Stickers.
I added a decorative edge to that layer as well.


The 2 Crafty Photo Corners don't appear
on the page, but the 'Dots' from the corners
were a great embellishment on the page.
The Dots have been covered with Black Soot Distress Paint.


with Black Soot Distress Paint and then 
cut in half to frame the embellishment clusters
on either side of the photos.


The embellishment clusters were built from
the Cardstock Stickers and foam tape.
I've layered them to create dimension on the page.


I've layered strips of patterned paper 
under the embellishment cluster to pop 
some of the colours in the photo.
Some of the paper layers have been framed
with a black pen border.


The title 'Todays moments, tomorrow memories'
It has been covered with Distress Paint,
but have kept the engraved word neutral to pop.


Thank you for visiting the Blog today,
hopefully you have enjoyed the page.
Have a fabulous weekend
and enjoy your craft time.
Please join us again on Monday.

Products Used: