HOMEABOUT USSHOP HERECROPDATESCURRENT CHALLENGESTIPS&TUTORIALS

Friday, October 12, 2018

Live it Up using Simple Stories Travel Notes by Kerryn Fry

Good morning everyone!
Today I am sharing a page I created back in August, 
but then I put it aside and promptly forgot about.
The double page features the fantastic collection Simple Stories Travel Notes.
Once again there are no travel photos, 
but the collection had the perfect colours and patterns.
And yes there are more sport photos!
Can you tell Mr 14 loves his sport.
It's the only time I get to take photos of him.
The double page started with a clean kraft cardstock base.
Plenty of paper layers and multiple photos with a black cardstock base.
2 Larger 6x4 photos and 3 square.
I have hand cut the strips of dots from the 3x4 Elements sheet.
The 2 Crafty stars have been painted with both red and blue Distress Paint.


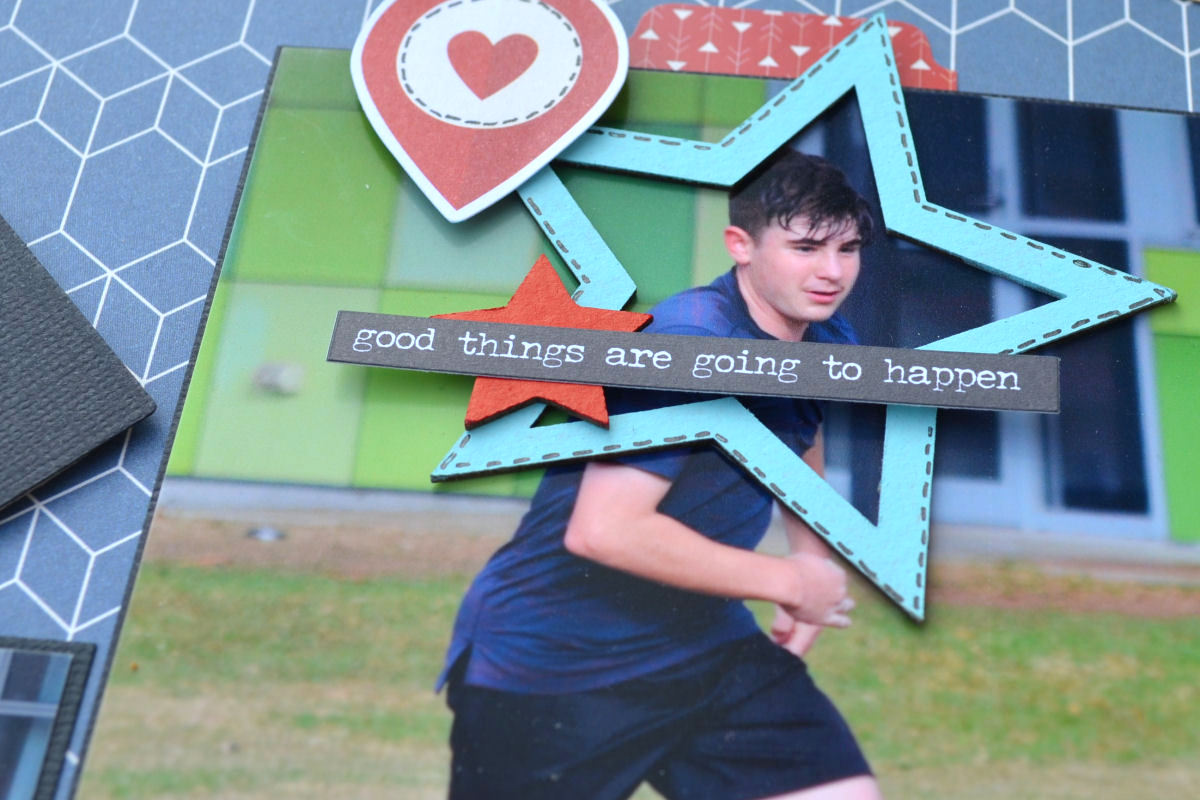
The Star frame was perfect to highlight his concentration.
A black pen was used to doodle faux stitching on several elements.

I have used two different size punches and black cardstock for the chevrons.
They have been popped up on foam tape to add to the layers.
The Cardstock Sticker sheet had a few great inspirational words 
to add to the photos.


I have hand cut some arrows from the patterned paper
and used the cardstock stickers and Bits & Pieces pack to create clusters on the page.


The 2 Crafty title piece Live it Up has been painted with Distress Paint Black Soot.
With so much colour in the patterned paper, the black paint was perfect
and tied in well with the chevrons.


The 2 Crafty Geometric Circle Arrow was also painted black.
I've added it to the cluster on the left hand side of the page
and used it to 'point out' the title.
Love all of the dots and arrows!
Gives the page plenty of direction and flow.
The stickers have also been popped on foam tape.


Thank you for dropping by today,
I hope you have enjoyed the double page.
Have a fabulous weekend, hopefully plenty of crafting
and we hope you can join us again on Monday for Fiona's next page.

Products Used:


Photobucket

Wednesday, October 10, 2018

"Daughters", by Amanda

Hi all!

Today I have a simple page, that focuses on a beautiful photo of my daughters.
 I used some 2Crafty chipboard, a little colour and some sweet little embellishments to finish.

Here is my page, and some close ups!


To create this page, I started with a sheet of white cardstock. 
Then I layered and glued some lovely pieces of 2 Crafty chipboard on top.
I used these pieces: Apron Lace, Bubble Clumps and Mini Branches.
I applied a coat of gesso over the cardstock and chipboard.

Then using some watercolours, I washed some blues, and orange/yellows to the background.
 I added some splatters too, but I kept it simple.

Now time to add a title, photo and embellish....

For the title, I used a 2 Crafty chipboard title. I inked this blue and sprayed with Colour Blast Colour Shimmer Spray in Just Blue. A coat of dimensional magic finished it perfectly.

For embellishments, I added some blue and red colours - many from my stash - but from my AAS goodies, I included:
A simple page... one that focuses on that beautiful photo!!!
 
Thanks for looking, Amanda 
 
Products used:
2Crafty chipboard:
Daughters are so special - just one example of an individual chipboard word.
Photobucket

Monday, October 8, 2018

Hello Beautiful with Doodlebug Hello Collection by Fiona Johnstone

Hello everyone

Today I have a layout I created for the class I taught on Saturday at All About Scrapbooks monthly crop. This page was all about the layers. 

Hello Beautiful 

I've used Doodlebugs Hello Collection which is just stunning with lots of bright fun colours and pops of gold. 

For my layout I wanted to use lots of layers of this pretty range. The trick with busy patterns is to team them up with the more neutral patterns, so I've broken up busy coloured floral papers with stripes and a plainer heart print. The background paper is also quite plain with a simple spot pattern. 

I've the used the sticker sheet to embellish my page and for my title. 

Thanks for stopping by
Till next week

Fiona
x
Photobucket 
Products Used:

Doodlebug Hello Collection Paper - Beautiful Blooms
Doodlebug Hello Collection Paper - Gold Foil
Doodlebug Hello Collection Paper - Petite & Pretty 
Doodlebug Hello Collection Paper - Poppy Plaid
Doodlebug Hello Collection Paper - Sitting Pretty
Doodlebug Hello Collection Paper - Tickled Pink
Doodlebug Hello Collection Sticker Sheet

Friday, October 5, 2018

Let the Adventure Begin using Simple Stories Lil' Dude by Kerryn Fry

Good morning all.
I am back today to share with you my final page using 
Simple Stories Li' Dude.
This collection has been amazing, definitely a favourite!
The bright blue was perfect for the photos.
This is Mr 14 playing his other sport,
at a recent development event.

The base for this page is a dark kraft cardstock.
I've used Distress Oxide Inks to flick some colour onto the cardstock,
by using a brush and a little water to create pools of ink
and then letting loose.
I've used the patterned paper Boys Rule and a die to create the grass.


The photos have been matted with Black Cardstock, 
popped on foam tape and then staggered on the page.
The 2 Crafty Star Circular frame has been covered with Black Soot Distress Paint.
The smaller stars have been highlighted with a metallic pen.
I've used the frame to draw the eye to Mr 14.


The two banners have been hand cut from the paper Play Hard.
One has been glued to the paper and the other popped on foam tape.
I have doodled some faux stitching with a black pen 
The 2 Crafty title Let the Adventure Begin was covered with Picket Fence Distress Paint


The 2 Crafty Harlequin Clumps have been covered with Distress Paint
and then each diamond outlined with a red metallic pen.
I've doodled some more faux stitching across the base of the grass clumps.


The strip of red paper is Backpacks from Echo Park Back to School.
I've used a border punch to cut the strip.


The arrows and stars have been hand cut from the patterned paper.
Simple Stories Bits & Pieces added a few elements to the page
for the where and when facts.
The journal strips were hand cut from 4x6 Elements paper.


That's my page for this week.
Hopefully you have been inspired to pull out your craft supplies and create!
Have a great weekend and please join us again on 
Monday for Fiona's next page.

Products Used:
Simple Stories Lil' Dude - Boys Rule
Simple Stories Lil' Dude - No Limits
Simple Stories Lil' Dude - Never Grow Up
Simple Stories Lil' Dude - Play Hard
Simple Stories Lil' Dude - Boy Oh Boy
Simple Stories Lil' Dude - 4x6 Elements
Simple Stories Lil' Dude - 4x4 Elements
Simple Stories Lil' Dude Bits & Pieces
Echo Park Back to School - Backpacks
2 Crafty title Let the Adventure Begin
2 Crafty Harlequin Clumps
2 Crafty Star Circular Frame
Distress Oxide Inks
Distress Paint
Photobucket

Wednesday, October 3, 2018

Happy, by Amanda

 
Hi all!
 
I loved the warm tones and interesting patterns on the papers from the "Lil Dudes" collection by Simple Stories, I was able to combine these with white and black cardstock, some stamping and chipboard to create this page.
 

The background sheet of paper in this page is the orange 'Never Give Up' paper in the range.

On this I layered a piece of white cardstock.

For the papers and photos on this page, I mounted each of them on black cardstock. This is an effective way to create frames and highlight each of the papers. I used a panel of the orange 'Never Give Up' paper, diamonds and card from the 3X4" Elements paper and UR awesome card from the 2X2" Elements paper.

I also used the yellow back from this 2X2" Elements paper to mount the photo.

Stamping and colour was also added to the background.

Used black ink and Kaisercraft stamps to stamp around the edges of the white cardstock. I then swiped colour using Colour Sprays in Sunset and Lagoon. I also added splatters to the page with these colours as well as Colour Spray Roadbase.


 Under the photo, I layered some 2Crafty chipboard. First was some Interlocking panels, ink orange and finished with some crackle medium. On top of this, I layered Aidan's Arrows, inked black.
I also included some lovely flowers from my stash to match the colours of the page.
For the title, I used the word "happy" taken from Crate Paper - Good Vibes - Word Sticker pack.
More flowers from my stash and the lovely orange puffy hearts.


Thanks for looking!
Amanda

Products used:

Photobucket

Monday, October 1, 2018

Bloom & Grow with Pebbles My Bright Life by Fiona Johnstone

Hello everyone

Pinch and a punch for the first of the month! Can you believe it is October already?

Back again with another share created with the stunning Pebbles My Bright Life.
 I love the pops of gold throughout these papers, just gorgeous. 

Bloom & Grow


Loved this photo I took of Zara recently while having a play with my new phone and had to scrap it straight away! The gorgeous pinks and greens in this range were perfect combined with the pops of gold.  

This inspired my background - I scraped some Dylusions paint across my page with an old credit card, then used some Colour Blast paste through a mask to add some gold detail. Next I layered up the pink & green papers , adding a layer of gold in between, before embellishing with some co-ordinating embellishments. 


I used gold paint for my title- 2crafty chipboard Bloom & Grow, and added some gold flicks with Heidi Swapp ColorShine. 


Thanks for stopping by
Have a wonderful week

Fiona
x


Photobucket
Products Used:
Pebbles My Bright Life Paper Pad 12x12
Dylusions Paint - Peony Blush
Colour Blast Paste - Bling
2Crafty Chipboard - Bloom & Grow
Simple Stories Bloom Stickers 4x6
Green Tara White Azalea
Heidi Swapp Colour Shine
CVS Flair Button
Mask & Heart from stash

Friday, September 28, 2018

Always follow your Dreams using Echo Park Back to School by Kerryn Fry

Happy Friday everyone!
It's a great one for us, school holiday are just starting 
and it's a long weekend here.
My page today features the fabulous collection,
Echo Park - Back to School.
This versatile collection was perfect for some soccer photos showing 
Mr 14 and a quarter, doing what he loves.


The page started with a very crisp and clean piece of white cardstock,
very unusual for me, but I have kept it simple and let the colours pop.
I've layered the papers that coordinated well with the photos
and outlined a few pieces with a black or white gel pen.
The photos and embellishment have been lifted with foam tape
and some string added for the tag.


The 2 Crafty chipboard is the perfect addition to this simple design.
with Black Soot Distress Paint. 


The 2 Crafty Barbed Chicken Wire has been painted with
Weathered Wood Distress Paint.
I've have cut two corners pieces to add to the photo,
pretending to be goal nets.
They were originally painted white, but didn't quite stand out.
I chose the lighter blue from the striped paper.


I have used a border punch to create the pop of red under the photo
and across the top right corner.


That's my page for today,
the perfect colours for the photos.
Thanks for dropping by the blog, hope you have a great weekend
and please check back on Monday for Fiona's next page.

Products Used:
Bazzill White Cardstock
Bazzill Black Cardstock
Echo Park Back to School - School Stripes
Echo Park Back to School - School House Fun
Echo Park Back to School - Backpacks
Echo Park Back to School - Alphabet Scramble
Echo Park Back to School - 3x4 Journalling Cards
Echo Park Back to School - Icons
2 Crafty title - Always follow your Dream
2 Crafty Chicken Wire Barbed
Distress Paint
Photobucket

Wednesday, September 26, 2018

"Me" by Amanda


Welcome to another Wednesday!
If you have hung around AAS enough, you know I love stickers.
 Especially the word stickers with special words and messages.
Today I combined them for a sticker filled page!
I started with a sheet of Kraft cardstock for the base. Using an old credit card,
 I swiped some white gesso onto the background.
 I added some stamping to this, using an old harlequin stamp and some gold ink.

There were some key words I used stickers for on this page.
For "Mum", I used some black Cocoa Vanilla Studio stickers.
For "Speechie", I used gold PinkFresh Studios puffy stickers.
For "Jujitsuan" and "Scrapbooker", I used PinkFresh alphabets from a sticker pack.


The other key element on this page was sticker phrases and sticker hearts. I took phrases from Pinkfresh "Let Your Heart Decide" Sticker pack and Simple Stories "I am" Sticker pack.

I hope you enjoy this page, all about me! Amazing what some stickers can do!

Thanks for looking,
Amanda

Products used:

Photobucket