HOMEABOUT USSHOP HERECROPDATESCURRENT CHALLENGESTIPS&TUTORIALS

Monday, February 12, 2018

You are my Sunshine with Pink Paislee Wild Child by Fiona Johnstone

Hello everyone

Mixing it up this month, this time with some Pink Paislee Wild Child!
 This is a fun and colourful collection, great for all those busy kid photos. 

You are my Sunshine


This collection has a mix of colours & patterns to suit kids of any age! I've chosen to focus on the floral, a pink and a mint green, using the heart pattern as my background. I've chosen the blue and the mustard from the floral to add a few more colours to my page and layered these under my photo. 

After layering my papers I have used the ephemera to embellish my layout. I love the mix of quotes in this pack. 

I've used different embellishments - flair and enamel flowers that compliment the colour scheme to finish off my page. The ephemera makes for great titles too! I added a little foam heart to make the title stand out a little more. 

Thanks for stopping by
Till next week

Fiona
x

Photobucket
Products Used:
Pink Paislee Wild Child Paper - 02
Pink Paislee Wild Child Paper - 03
Pink Paislee Wild Child Paper - 04
Pink Paislee Wild Child Paper - 05
Pink Paislee Wild Child Ephemera - Girl
Cocoa Vanille Life is Beautiful Little Pretties
Freckled Fawn Foam White Words
Flutterby Designs Flair

Friday, February 9, 2018

Grandpa's Boys with Photo Play Memory Lane by Kerryn Fry

Good morning all!
My project today features the beautiful Photo Play Memory Lane
This is my second page using these divine rich colours and 
the photo has been taken from the archives.
A precious photo taken from 2007 Father's Day, a very little Mr 3 with his Pa.
 
 First an admission of failure!
When I first started this page, the base cardstock was white.
But once I started putting the layers together, I realized the white was too stark.
So I carefully pulled things apart and swapped it for Kraft.
Back to my happy place.
The Kraft base has been stenciled with layers of Distress Ink 
I love the darkness of the red and green, so I have continued them onto the base,
along with some grey.


The Element Sticker sheet for this collection was a fabulous way to decorate the page.
Black cardstock for some definition and plenty of 3D foam for depth.
I've added a few die-cut pieces using stars, doily and a tag die.


The title Grandpa's Boys has been painted with metallic grey,
once dry, I've add some red dimension paint dots to pop with the rest of the red in the papers


I've finished off the page with some random doodling use a black gel pen.
So glad that I did rescue this page.
I think the black & white photos needed the kraft base.
And as Mr 3 was wearing very bright Pj's, the photos were better in B&W.

Thank you for visiting the blog today
I hope you are keeping cool it this very hot weather and get to enjoy a great weekend.
Please pop back on Monday for Fiona's next page.


 Products Used:
Bazzill Cardstock - Kraft
Bazzill Cardstock - Black
Photo Play Memory Lane - Ancestry
Photo Play Memory Lane - Heritage
Photo Play Memory Lane - Legacy
Photo Play Memory Lane - Memories
Photo Play Memory Lane - Tradition
Photo Play Memory Lane - Element Sticker Sheet
2 Crafty title Grandpa's Boy
Crafters Workshop Template 6x6
Distress Ink
Photobucket

Wednesday, February 7, 2018

"The best of times", using CVS Bohemian Dream, by Amanda H.

Hi everyone!
 
Welcome to February!
 
I was lucky enough to get my hands on the beautiful collection from Cocoa Vanilla Studio - none other than "Bohemian Dream". The pinks, purples and blues make for a divine colour combination. Then luck struck again when I found the perfect photo of my girls to match!
 
Here is my page.
 

I used the Dreamer paper as my background. I love the pink to purple ombre effect of this paper.

Then I stacked some more papers in the range: Wild & Free and Abundant. I used combinations of the backs and fronts to create the paper layers.

As a feature of the layout, I cut out some quotes from the Boho Bits paper.

 I used machine stitching to tie all the elements together, and it is particularly useful for attaching vellum to layouts.
In the close ups you will see how I have used 3 of the embellishment sets available in this range: Sticker Sheet, Vellum Accents, and Enamel Shapes.

I love the vellum butterflies! I machine stitched them and combined them with word stickers and enamel shapes.

Tucked under the quote, I added a vellum flower from the pack and layered with more stickers, word stickers and enamel shapes.


It was easy to repeat clusters and combine elements perfectly with this beautiful dreamy collection.


Products used:

Papers:

Embellishments:
CV - Bohemian Dream Enamel Shapes
 
Thanks for looking,
 
Amanda


Photobucket

Monday, February 5, 2018

Little Moments with Echo Park Fashionista by Fiona Johnstone

Hello everyone

This week I've been creating with Echo Parks Fashionista collection, a stunning collection of pinks, green and black. Perfect for the fashion conscious!

Today's layout:

Little Moments
I love the dramatic black and white spot paper, the perfect background paper. I have then layered the softer pink and green papers, added a doily to highlight my photo. 
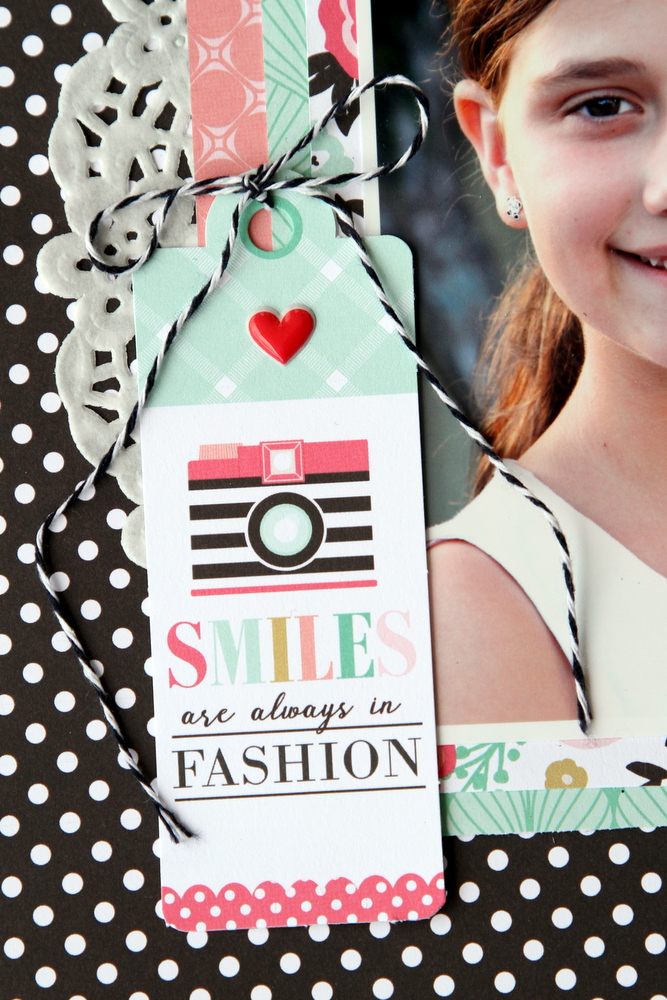
A cute little printed tag makes a fantastic embellishment, I added some twine and an enamel heart to finish it off. 

Simple journaling of who & when on some ephemera, with a flair badge to finish the cluster. 

I wanted my title to go across the page, this foam thickers title was perfect, the white shows up against the black and adds some dimension to the page. I added a little flower to top, fussy cut from the paper. 
Thanks for stopping by
Till next week

Fiona
x
Photobucket
Products Used:
Echo Park Fashionista Paper - So Many Shoes
Echo Park Fashionista Paper - Retail Therapy
Echo Park Fashionista Paper - Border Strips
Echo Park Fashionista Paper - Floral
Echo Park Fashionista Ephemera Frames and Tags
Shimelle Little by Little Thickers Hello Joy Black and White Phrase
Enamel Heart
CVS Limited Edition Flair
The Twiner Twine - Charcoal
Doiley

Friday, February 2, 2018

A Glimpse of You with Photo Play Boys Rule by Kerryn Fry

Happy Friday Everyone!
I'm back today with my second page from the awesome collection,
Photo Play Boys Rule
The colours and sticker sheet worked perfectly for this page.
Featuring Mr 13 and his soccer season.
 This page started with my customary Kraft cardstock base.
But this week I've kept the base clean and simple to make room for the photos.
I've used the patterned papers to create a few layers under the photos and
to have a focal point for the main photo.
 Then I got busy cutting!


I really do love cutting things out.
Most of the photos have been popped with foam tape.
I have doodled the direction of the balls to give the page some movement.


The Element Sticker Sheet was a fabulous source for embellishments.
I used them to create clusters around the page.
All of the 2 Crafty chipboard has been covered with black ink.
The 2 Crafty Family Symbol was a great addition to the photo frame.


The title 2 Crafty A Glimpse of You was the starting point for the whole page.
It got my thinking about how I wanted to capture a glimpse of Mr 13.
His soccer season was the perfect story.
I have used some scraps of black cardstock 
and dies from my stash to add a few more elements to the page.


The 2 Crafty Word Circle Attitude was the finishing touch.


That's it from me today, thank you for dropping in.
Have a fabulous weekend and remember to pop back on Monday
for Fiona's next project.

Products used:
Bazzill Kraft Cardstock
Photo Play Boys Rule - Mr Awesome
Photo Play Boys Rule - Mr Boy
Photo Play Boys Rule - Mr Mischief
Photo Play Boys Rule - Seeing Stars
Photo Play Boys Rule - Smash Bang
Photo Play Boys Rule - Element Sticker Sheet
2 Crafty title - A Glimpse of You
2 Crafty Word Circle Set 2
2 Crafty Family Symbols
Photobucket

Wednesday, January 31, 2018

"Perfect" by Amanda H

Hi everyone!

Welcome to another Wednesday share from me!

If you have noticed one thing about my scrapbooking.... I love stickers. Sticker packs usually have so many variations and designs, that they can be perfect in the clusters I like to create. However, in this page, the stickers are the main part of the design.

I started with the Simple Stories Romance Collection. And with one patterned piece of paper and LOTS of stickers, I created this page.

I really loved the brick work and heart feature on the "Love Story" paper from the collection. I just didn't want to cut that beautiful sheet of paper! Instead I made it a feature!

I stuck on the photo and grabbed the sticker sheet pack from the collection. Slowly, I added stickers, building up the design, adding different shapes and designs. Some were added with foam tape for some height and definition. 

Here are some close up of the stickers.


This technique was simple but so effective. Thanks for looking today!

Products used:

Papers:

Embellishments:

Amanda


Photobucket

Monday, January 29, 2018

Good Vibes Ahead with Crate Paper Good Vibes by Fiona Johnstone

Hello everyone

Back with another share created with the funky Good Vibes collection by Crate Paper. 

Good Vibes Ahead:

For this layout I wanted to use the darker floral paper as a larger piece so you could see all the wonderful design, but it is very busy so to break it up a little I tore the edges and lay it across the plainer pink paper. 

Then I have layered some of the more neutral patterned papers behind my photo, and added a doily to soften the page. 

I've used the fabulous chipboard stickers from the Crate Good Vibes collection, some Green Tara flowers, Cocoa Vanilla Studio Tassle and some other bits and pieces to embellish my layout. 


My title is from the chipboard stickers plus some Shimelle Thickers. 


Thanks for stopping by
Till next week

Fiona
x
Photobucket
Products Used:

Crate Paper Good Vibes paper - All Good 
Crate Paper Good Vibes paper - Flourish 
Crate Paper Good Vibes paper - Passion
Crate Paper Good Vibes paper - Chill
Crate Paper Good Vibes paper - Life Goals
Crate Paper Good Vibes Chipboard Stickers
Shimelle Go Now Go Luggage Thickers Departure Black
Green Tara Cherry Blossoms Pink
Cocoa Vanilla Studio Love Always Bits & Pieces
Doily

Friday, January 26, 2018

You & Me with Photo Play Memory Lane by Kerryn Fry

Hi Everyone!
Welcome back to the blog on this lovely Friday morning.
Today I am sharing a page created using the collection Photo Play Memory Lane.
Beautiful rich colours, reds and greens combined with grey and white.
The photos are rare snaps of Mr 13 and myself sharing his first experience with snow.
A very special weekend.

With the rich colours in the patterned papers, 
I have been more subtle colouring the Kraft Cardstock.
There are fours layers to the base piece, 
two Crafters Workshop Stencils, a Tim Holtz stencil and a Darkroom Door stamp.
Rich red hearts using Candied Apple Distress Ink, faint moroccan pattern 
with Pine Needles Distress Ink and Picket Fence Distress Ink for the snowflakes.
The random stamping has been done with a charcoal ink. 

The 2 Crafty Squiggly Hearts were painted with Distress Ink
I have used patterned paper to back one of the hearts and then
added some heart stickers for decoration.


The 2 Crafty title You & Me was painted with acrylic paint, 
then stamped using the Script Kaisercraft Texture stamp and gesso. 
Then using the same Darkroom Door stamp from the background
with some red paint, I have added the second layer.
The title has been finished off with a layer of Dimensional Magic.


The Element Sticker Sheet is a fabulous way to embellish the page.
I have used foam tape and black cardstock to add layers to the page.
The lighter patterned papers have been matted with black cardstock
to give them clear definition.

Thank you for visiting the blog today.
Hopefully you have been inspired by my project
and have some time to create this weekend.
Don't forget to pop back on Monday for Fiona's next project.

Products Used:

Photobucket

Wednesday, January 24, 2018

"Today", by Amanda H.

Hello again!

Today is Wednesday, so it is my turn to share!

Ever find the perfect photo to go with a perfect piece of chipboard? I did! 
So.... here is my Lighthouse page!

Have you seen the range of Wood Effect papers in store from ModaScraps? I LOVE LOVE LOVE these papers! They create the perfect base to build a page on. And they are thick enough to handle mixed media without warping. In this page, I have used some Colour Blast to add some colour on the wood grain. Perfect blues for my page!


My first step was to add some Colour Blast White Heavy Gesso to the paper. I used a stiff brush and painted a light coat in the centre of the page. The Gesso is great to seal the page- I know I am going to add a water based colour next, and the gesso stops the colour soaking straight in. This gives me time to play with colour to get it messy and spreading to my liking!

Next I used some Colour Blast Colour Shimmer Dust in Navy. These are shimmery water-based pigment dusts, activated by water. I put a few sprinkles of navy dust onto some old plastic packaging and spray with water. I then turn and smoosh it onto the layout. I can spray more water and use a brush and heat gun to play with the colour. Another benefit of the dusts, is by adding more or less dust or water you can get different shades and intensities of colour.

Next, I added some Colour Blast Colour Paste in Singin the Blues through a stencil.

The last layer was to add some Colour Blast Colour Shimmer Spray in Singin the Blues - with some splatters on the page.

With the background complete, I decide to trim and distress the edges of the ModaScraps paper and mount onto a white cardstock base.


I used 3 different pieces of 2Crafty chipboard on this layout.

Firstly was the Lighthouse chipboard. I painted this with a couple of coats of Colour Blast White Heavy Gesso. To finish the chipboard, I used some Colour Blast - Colour Shimmer Spray - Steel. I took the lid off and using a fine paint brush I lightly painted the edges of the lighthouse.

Next was the Leafy Shrub chipboard. I painted this with a couple of coats of Colour Blast White Heavy Gesso and tucked it in the clusters to the left.

Lastly I used a Word Circle "today" for the title. After inking blue, I decided it needed to be darker so I mixed some Colour Blast Colour Shimmer Dust in Navy with water and painted it.


To finish the clusters on this page I used the following embellishments:

* Vellum leaves and butterfly from Cocoa Vanilla Studio - Bohemian Dream Vellum Accents
* flower stamen (from my stash)
* Puffy blue balloon sticker from Prima - St. Tropez Puffy Stickers
* Word sticker from Cocoa Vanilla Studio - Make A Wish Accessory Stickers


 Thank you SO much for looking today!


Products used:

Papers:

2 Crafty chipboard:

Embellishments:

Inks, Mists, Paints, Mediums:

Amanda

Photobucket