HOMEABOUT USSHOP HERECROPDATESCURRENT CHALLENGESTIPS&TUTORIALS

Friday, October 7, 2016

You had me at Hello....
by Tammy Klingner

Hi everyone!
 
This week I had a play with Cocoa Vanilla's Love Always Collection.
 I'm a big Cocoa Vanilla Studio fan, so couldn't wait to play.
 
 
I usually steer towards bright, bold colours, so really enjoyed all the soft pastels in this range.
I love the little pops of black and white, and I love grey, so I went with these colours, adding a splash of pale pink.
 
 
I started with white bazzill and swiped it with a light coat of gesso.
 I then added some acrylic paint, making sure I had lots of water on the page, to create a soft look.
I love how it dried with both dark and light patches. 
I also flicked some paint around too.

 
I cut out some strips of  papers, adding these to my page. 
I then added my photo and a few embellishments from the Ephemera Die Cuts and Stickers.
I cut the title from paper, and finished it all off with a gorgeous 2Crafty Chipboard Heart Frame.
 
 
I'll be back next week with another share.
Have a great weekend everybody.
 
Products used:
White Bazzill
Gesso
Tim Holtz Distress Paint Victoria Velvet
Tim Holtz Distress Paint - Brushed Pewter
Dylusions Paint - White Linen
Cocoa Vanilla Love Always Paper - Class Act
Cocoa Vanilla Love Always Paper - Lovely Things  
Cocoa Vanilla Love Always Paper - Twin Set
Cocoa Vanilla Love Always Ephemera Die Cuts
Cocoa Vanilla Love Always Stickers
Cocoa Vanilla Love Always Flairs
2 Crafty Heart Frame
 
Photobucket

Wednesday, October 5, 2016

Darling with Cocoa Vanilla Studio Make a Wish by Fiona Johnstone

Hello everyone

This week I've had a play with the delightful Cocoa Vanilla Studio's  Make a Wish collection. It is so very pretty, with soft pinks, blues and yellows. 

Darling


As you can see I have chosen the blue stripe to co-ordinated with my daughters top and then softened it with some pink and the neutral woodgrain. 
 

The embellishments from the collection are fabulous as always from Cocoa Vanilla Studio and I've teamed them up with these snazzy gold glitter thickers. 


Thanks for stopping by, till next week
Fiona
x
Photobucket
Products Used:

Cocoa Vanilla Studio Make a Wish Paper - Hip Hooray
Cocoa Vanilla Studio Make a Wish Paper - Party Dots
Cocoa Vanilla Studio Make a Wish Paper - Fresh Cut
Cocoa Vanilla Studio Make a Wish Paper - Daydream
Cocoa Vanilla Studio Make a Wish Flair Buttons
Cocoa Vanilla Studio Make a Wish Chipboard Accent Stickers
Cocoa Vanilla Studio Make a Wish Paper - Ephemera
Crate Shine Thicker Stickers Beautiful Words & Icons
Charms Creations Heart

Monday, October 3, 2016

Today the Dream is Real layout by Rachel Lowe:

Happy Monday everyone!

Today I have my fourth and final share using the gorgeous Saturday collection by Dear Lizzy.

Each layout I have created are very different from each other which shows it's versatility.

This layout is bright and fun which totally suites my photo. This is such a typical behaviour from my son (number 3) who is a whole lot quirky!!


Firstly I chose the brightly colour/patterned papers that incorporated various colours (so my embellishments would not be limited).

I chose five different patterns/colours and then made them various width sizes ranging from 1 1/4 inch to 1/2 inch.

To add texture I then sewed on three of the strips.

I then used one of the last rubber shapes left from my kit, the lime green camera and attached over the camera pattern. 


I cut a paper piece from the red grid paper (a 4x5 inch strop so it look like a polaroid frame when photo attached). I have sewn under the photo, alternating between zig zag and straight stitching. I left some strands showing for effect.


I could not resist using the wooden clothes pin (so much love for these) and to as previous I have attached the clothes pin to the top of my photo and then added two layers of foam tape on the other three sides so it sits even on the page.


I have used some die cuts to embellish next to my photo and hand punched several tiny circles and added around the camera die cut. I added another word sentiment die cut under my photo.


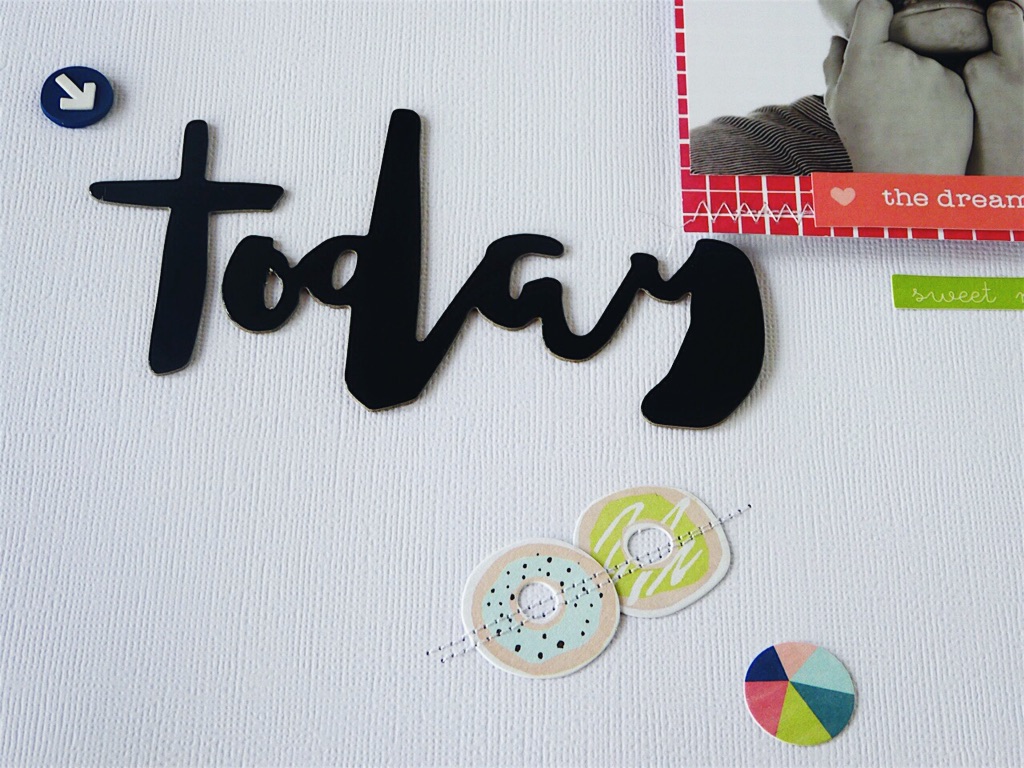
I loved the chip board words from this collection and added the word today to create a part of my title.

I have sewn over the two doughnut die cuts to add more visual interest.

I lastly added the rounder rubber arrow.


I totally love these colours and patterns together and this would work for a girl themed layout also.


As you can see I have created four very different layouts with this collection and I have loved it's versatility. 


Thank you for joining me today and I hope these layouts have inspired you to get creating with Dear Lizzy.

See you next week with some new collections to show case over the following weeks.

xXx


Dear Lizzy - Saturday - decorative clothespins
Dear Lizzy Saturday - ephemera
Dear Lizzy Saturday - bright lights paper
Dear Lizzy Saturday - the city paper
Dear Lizzy Saturday - times square paper
Dear Lizzy Saturday - rubber shapes
Dear Lizzy Saturday - thickers hello multicoloured chipboard
Bazzill White Cardstock
Photobucket

Friday, September 30, 2016

Perfection
by Tammy Klingner

Good morning everyone.
 
This week I'm sharing a layout created using Shimelle's Starshine Collection.


I began with my white cardstock, adding a thin layer of gesso and then painting with acrylic paints.
I went with the reds and navy's for this layout - very appropriate for my sweet little niece who lives in the USA.
 I LOVE this photo, and thought the blue would compliment the denim (ain't that the cutest little toosh and legs you ever did see?)
 
 
I then layered up with some tags, and strips of paper, before fussy cutting the gorgeous flowers.
I adhered a few of the flowers using foam tape to give some extra dimension.
 
I then added my title using a 2 Crafty Chipboard title - I love the font!!
 
 
A few embellishments were then added.
Some of the embellishments come from Cocoa Vanilla's Free Spirit range - 
they just matched so perfectly!!
 
That's about it!
 
Products used:
White Bazzill
Dylusions Paint - After Midnight
Dylusions Paint - Calypso Teal
Dylusions Paint - White Linen
2 Crafty Title - Perfection
American Crafts Shimelle Starshine Epoxy Paper Clips
American Crafts Shimelle Starshine Mercury Paper
American Crafts Shimelle Starshine Orion Paper
Cocoa Vanilla Free Spirit My Way Paper
Cocoa Vanilla Free Spirit Flairs
 
Photobucket

Wednesday, September 28, 2016

My Boy with Crate Paper Cool Kid collection by Fiona Johnstone

Hello everyone

I've been waiting for this super cool boys range to arrive, and I was not disappointed. I love it! It's the fab new Cool Kid collection by Crate Paper. 

My Boy


For this layout, I created my paper layers before I created my background. I couldn't decide on the colour background I wanted to use initially. The layering was easy - use a combination of the colours as my photo was neutral - apart from those big blue eyes! So I chose the blue to highlight those then added the other primary colours with a touch of neutrals. 

A black background was too much so instead I grabbed my Dylusions paints to add some black for the base. Then I took some inspiration from one of the patterned papers and some inspiration from Tammy, to add some plus signs in texture paste. 


I've used some chipboard and wood veneers to embellish the layout, and added some extras from the Cool Kid collection. 
 

Thanks for stopping by

Fiona
x
Photobucket
Crate Paper Cool Kid paper -  Boys Club
Crate Paper Cool Kid paper - Brothers
Crate Paper Cool Kid paper -  Handsome
Crate Paper Cool Kid paper - Champ
Crate Paper Cool Kid Foil Accent Stickers
Crate Paper Cool Kid Small Star Embellishments
2Crafty Chipboard View Finder
Flutterby Designs Flair and Wood Veneer
Kaisercraft Tag
Dylusions Paint - Black Marble
Texture Paste
Rainbow Splendour Wood Veneer Chevron

Monday, September 26, 2016

Dear Lizzy Saturday - Just for Fun layout by Rachel Lowe:

Happy Monday everyone!

Hoping you managed to squeeze in some scrapping time over the week end.

As promised, today I have a super pretty/girly layout for you using the new collection by Dear Lizzy Saturday.

My photo choice was again to highlight that you do not have to just use girl photos on 'pretty' layout, I just love this photo of my youngest and I, me sneaking a kiss lol!

I always love the challenge of creating both masculine and feminine layouts with the same collection.


It is very on trend to use cutting devices and cut files and I am a huge fan of using mine to add backgrounds and layers to my layouts. Some cut files however you can create using the good old fashioned punches and some imagination.

To create this background all you need to do is cut a heart from the beautiful floral paper, then use the reverse of this paper and punch numerous circles from hand punches and then attach in a random fashion so it looks like confetti.

I have used the chipboard thickers to create my title, keeping with the same colour I also used the arrow and two chipboard hearts (attached in random circles).


Again I have used a wooden button (pink and white heart) from the Shimelle collection Go Now Go.


I finished my background off with the floral rubber shape.


From the journal card paper I have used the 'Wild Heart' square and attached over my off centred photo with a wooden paper clip, finished off with a puffy sticker heart which has now created a embellishment cluster.


Under my photo where I attached the chipboard arrow I finished off with two puffy sticker hearts.


Although this background may take a little time to create I think it is totally worth 
the stunning effect.

This collection is stunning and a must have in your supplies.

Thank you for taking to the time to stop by and have a look.

xXx


Photobucket

Friday, September 23, 2016

Young, Wild and Free
by Tammy Klingner

Happy FriYay everyone!
 
This week I've been playing with Kaisercraft's Boho Dreams Range.
 
As soon as I saw this range, I knew I had to create a layout for my daughter, she
 has always loved Dream Catchers.
 
 
I began with a piece of Kraft Paper. I went a bit crazy spreading gesso around.
I then used some Tim Holtz paints - I splodged them onto the background and then spritzed with water and allowed them to run down the page.
 
I used the dream catcher from the sticker sheet, and added extra feathers which I cut from the black and white paper.  I then added a few micro beads to various feathers.
 
 
I added a few layers of paper, and then mainly embellished with more stickers.
I loved all the sayings on the word stickers, so I used lots of them.
 
 
I hope you get some scrapping time over the weekend!!
 
Products used:
Kraft Paper
Gesso
Tim Holtz Paint Lucky Clover
Tim Holtz Paint Candied Apple
Kaisercraft Boho Dreams Dreamcatcher paper
Kaisercraft Boho Dreams Feathers Paper
Kaisercraft Boho Dreams Young Paper
Kaisercraft Boho Dreams Sticker Sheet
Prima Micro-Beads - Bronze
 
Photobucket

Wednesday, September 21, 2016

Seeing the World with Shimelle Go Now Go by Fiona Johnstone

Hello everyone

Crop week again this week and I created a double page layout for all those travel photos, using the stunning Go Now Go collection by Shimelle. 

Seeing the World
As you can see I've used 7 photos on this spread yet still managed to use 7 different patterned papers as well, including using one sheet for embellishments. 

A close up of each side:
and the second page - I love the" Arrivals" paper which I have used as paper strips across the top of each page. 
I have fussy cut embellishments from the "Race" paper and finished off with several wood veneer embellishments to compliment the travel theme.

I finished off the layout with a 2Crafty title - Seeing the World. I've inked the globe section in green and the the frame in black pen, finishing the word in red to tie it together with the rest of the layout. 
Photobucket
Shimelle Go Now Go Paper -  Arrival
Shimelle Go Now Go Paper - Action
Shimelle Go Now Go Paper -  Cafe
Shimelle Go Now Go Paper -  City
Shimelle Go Now Go Paper -  Market
Shimelle Go Now Go Paper - Race
Shimelle Go Now Go - Walk
2Crafty Seeing the World title
Wood Veneer - custom made
Kraft Cardstock

Monday, September 19, 2016

Oh baby it's a wild ride layout by Rachel Lowe:

Happy Monday and welcome to another week of inspiration from the All About Scrapbooks DT.

Today I have another layout created using the fun and versatile collection by Dear Lizzy, Saturday.

I wanted this layout to be fun and bright.  I just adore this photo of my youngest and I having a cuddle and both having fun.

The photo had to be the focal point of this layout so I created a frame with one of the journal cards from the journal card paper by cutting out the centre. This in turn created my title/theme, 'oh baby it's wild ride'.


I am a huge fan of blues and varying hues of red and kept my layout to these colours adding a strip of black and white paper to really make my layering pop. 


'the best DAY' paper is also a journal card which I wanted to incorporate into my layering.

I cut two diagonal pieces from the blue dot paper and as you can see I off entered the top one for visual interest.


To really make my photo and the frame stand out I added one of the gorgeous wooden paper clips. When attaching I used foam tape (a double layer so my photo remained flat)


I have added the wooden camera flair which is actually from the new collection by Shimelle Go Now Go, but it just suited perfectly.


I added the rubber heart embellishment behind my foam taped photo which adds another layer of interest.


Here I have used a border strip and cut it down to create a form of journalling finished off with a puffy sticker flower, heart and bird.

On the grid paper these layers and embellishments are stunning!

I hope you like this layout as much as I did creating it.

Thanks for stopping by and see you next week with a very pretty layout.

xXx



Photobucket

Friday, September 16, 2016

This rocks!
by Tammy Klingner

Good morning everyone.....can you believe Friday has snuck up on us already?
 
This week I've had another play with Cocoa Vanilla's Totally Rad Collection.
I adore this!  Cocoa Vanilla do the best ranges!
I love how everything just works together and I love that they are Australian!
 
 
This layout documents my son's basketball Grand Final win, so the embellies worked so well!
 
I chose black cardstock for the background, swiped some gesso and then added some stamping.
I added a few strips of paper, and then layered some papers around my photo, adding lots of embellishments.
 
 
I also decided to add a few stars to the layout as it suited the theme.
I used a variety of 2Crafty Chipboard Stars - I painted them in colours to suit the layout.
The white stars are created by using the 'negative' chipboard background as a template.
I just grabbed a white pen and traced around it. Easy!
 
 
I love it!
I love that with this range I was able to create both a bold, bright strong layout, and also a softer lighter layout too (a couple of weeks ago).
Such a versatile range, and so awesome for our boys.
 
I also found the time to create a Project Life spread with the leftovers.
 
I love the colours!
 
Here's the left side:
 
 
And here's the right:
 
 
I love creating these snapshots of our weeks!
 
 
Enjoy your weekend!
 
Products used:
Black Bazzill
Dylusions Paint - Fresh Lime 
Dylusions Paint - Calypso Teal
Gesso
Kaisercraft Texture Stamp - Edges
Kaisercraft Captured Moment Stamp - Calendar
Cocoa Vanilla Totally Rad Ephemera
Cocoa Vanilla Totally Rad Flairs
 Cocoa Vanilla Totally Rad Mixed Tape Paper
Cocoa Vanilla Totally Rad Line Up paper
Cocoa Vanilla Totally Rad Say What Paper
Cocoa Vanilla Totally Rad Enamel Shapes
Cocoa Vanilla Totally Rad Stellar Paper
American Crafts Shimelle Starshine Epoxy Paper Clips
 
Photobucket