HOMEABOUT USSHOP HERECROPDATESCURRENT CHALLENGESTIPS&TUTORIALS

Wednesday, March 9, 2016

Simple Stories You are Here - Life is Wonderful by Fiona Johnstone

Hello everyone

This month I am playing with some of the gorgeous new Simple Stories collections. Love them all and couldn't decide which to get so bought them all!

First up I am sharing a layout using the travel themed You are Here collection. Very tropical but certainly not limited to travel photos! In my layout Life is Wonderful I have used an everyday photo of my son, but as the light was reflecting so nicely on his face I thought the tropical themed paper would suit the photo perfectly. 


I adored the wood grain background paper, however the bottom of the page has lots of travel stamps and tags along it, so I have cut off that section and turned the paper upside down .I have then used the floral paper on the reverse side and run that along the top of my page, before adding a some torn chevron pattern and a strip of contrasting orange. 

Next I have layered up some papers behind my 5x7 photo and used a variety of embellishments from the You are Here collection and my favourite coloured yellow flowers, love how tropical these look and they have a hessian texture so not too soft & girly. 
 

My title Life is Wonderful is from 2Crafty, inked in blue to match the papers and I have added some orange mini market stickers to compliment the blue. 


Thanks for stopping by
till next week

Fiona
x


Photobucket
Simple Stories You are Here paper - Itinerary
Simple Stories You are Here paper - Happy Place
Simple Stories You are Here paper - Here We Go
Simple Stories You are Here paper - Boarding Pass
Simple Stories You are Here paper - Paradise
Simple Stories You are Here Wood Veneer Shapes
Simple Stories You are Here Self Adhesive Brads
Simple Stories You are Here Enamel Dots
2Crafty Chipboard title - Life is Wonderful
October Afternoon Mini Market Stickers - Orange and Cream
Petaloo Burlap Flowers
Green Tara Skeleton leaves

Monday, March 7, 2016

Basic Grey - Hello U by Rachel Lowe:


Hello everyone Rachel here again.

Well February was all about little boys so today I have gone grown up and cool boys!
 I love this photo of my three boys, I think it captured their relationship perfectly.


I just love Typeset collection by Basic Grey. It has a vintage feel with a modern twist.
I went for a colour combination that is more masculine.

Firstly I splashed black colour shine spray on the woodgrain Kraft and then sprayed and
 splashed the Goosebumps textured shimmer spray. I like the messy effect which adds to
 the mood of the layout.

I cut down the wood grain kraft to 11x11 inches and centred it on the photo shoot paper. 
I really wanted the black camera paper to be visible.

I sewed around the edges of the kraft to add more texture. As you will see I went around
 twice to create a messy look.


I have used a 6x4 inch landscape photo. I have not matted my photo as I have
 used the chipboard to 'frame' my photo.
Do not be afraid to create a bold title that dominates your layout as it provides
 visual impact.
I added a flair to the lens of the camera to finish off.
Here are some close up photos for you.


Although simple in design this layout remains visually eye catching without
 detracting from the photo.
Thank you for stopping by and next week I am going totally shabby/vintage
 using Basic Grey again!
 
Hoping you all get some scrap time this week.
X
 
Basic Grey - Typeset photo shoot paper
Basic Grey - Typeset Chipboard
AC Textured Cardstock dark kraft woodgrain
Basic Grey - Typeset Flair
Heidi Swapp Color Shine spritz black
Goosebumps Textured Spray - Shimmer
Photobucket

Friday, March 4, 2016

Celebrate You
by Tammy Klinger

So it's Friday already???
Where did the week go?
 
I did find time in the craziness of life to create this layout.
It's all about my son and his graduation from Primary School.  
For this layout I used a 'bit' of this, and a 'bit' of that. 
Specifically, from Fancy Pants Happy Place, and Cocoa Vanilla Made of Awesome (some of
 you may remember I created a graduation book for my son earlier this year with this range) - 
I grabbed the leftovers. 
The link to the book is HERE for those of you who missed it.
 
 
I started with a piece of kraft cardstock.  The colour matches my son's pants. 
The cardstock piece  I chose has a gorgeous wood grain pattern embossed into it.  To enhance
 this I swiped a few spots with gesso, and then added some spritz.  This really 'showed off'
 the wood grain. 
I then added some spritz, and a few layers and strips of leftover papers.
I always enjoy adding the embellishments, and finding the 'right' pieces.  I admit, I probably
 spend too long on this part, but it's so much fun!  I love rummaging through stickers, flairs, chipboard, words, etc.  I'm like a kid in a candy store!
I added some 2Crafty Chipboard Stars, as they suited the theme perfectly, and finished off
the layout. I played around painting them a few different colours, before deciding on 
embossing them in a metallic finish.
 
 
 I needed an older male birthday card this week, so whipped one up with what was sitting on
my desk after creating this layout........
 
 
I added a patterned base to the card, and then added a few strips of leftovers.  I tore a few
 edges, to prevent it from looking to 'square' and 'blocky'.  I then added a 2Crafty Chipboard
 Star, which I had embossed with a metallic finish, and a few random stickers, some thread
 and of course a few mandatory flicks of spritz!
I kept the cluster to the bottom right corner, as the paper I had used was drawing the eye to 
that focal point.  If I had put the cluster anywhere else, it would have been too 
overwhelming and confusing to the eye. 
 
I love how all the boy colours work so well together.
 
Well that's it for now, I'll see you next week!
Have a great weekend!!
Love Tam
 
 
Products used:
American Crafts Textured Cardstock - Kraft Woodgrain
Raven Bazzill
Cocoa Vanilla Made of Awesome Ephemera
Cocoa Vanilla Made of Awesome Flairs
Cocoa Vanilla Made of Awesome Paper - Awesome
Cocoa Vanilla Made of Awesome Paper - Lucky Star
Cocoa Vanilla Made of Awesome Paper - Mixed Up
Cocoa Vanilla Hello Lovely Paper - Life Story
Fancy Pants Happy Place 6x6 Paper Pad
Fancy Pants Happy Place Puffy Stickers Script Words
Pink Paislee Memorandum Paper - Labels
American Crafts Shimelle True Stories Paper - Espresso
Heidi Swapp Color Shine - Navy
Dylusions Ink Spray - Postbox Red 
2Crafty Stars
Bella Boulevard Just Add Color Treasure and Text Stickers
Gesso
Thread
Aged Silver Metallic Emboss Powder
 
Photobucket

Wednesday, March 2, 2016

Fancy Pants Happy Place - Together by Fiona Johnstone

Hello everyone

A new month already! This week I am sharing my layout from my class at All About Scrapbooks monthly crop day. If you are in Sydney be sure to check out the days they are held and come along for 12 hours of scrapping. All the info is here.

On to my layout:

Together


So many colours in this range and they mix and match easily and are perfect for those busy coloured group photos! This photo is of my two and their cousins - with everyone living in 3 different states in can be difficult to get everyone together. 

Loved all the words on this background paper and wanting them to still show through I just added some sprays of dylusions ink - love the depth of colour these sprays give, while still being sheer enough to see the background. 

I've layered up quite a few pieces of the patterned paper to create a nice mix of colours, and I have roughed up the edges of the paper - love how nice, thick and textured the FP papers always are. 

I've added some colour matched flowers and added some black skeleton leaves, which stand out against the ink. I've finished with a black title and added a black tag to tie the colours all together. 

Thanks for stopping by
Fiona
x


Photobucket
Fancy Pants Happy Place paper - My Happy
Fancy Pants Happy Place paper - Life is Good
Fancy Pants Happy Place paper - Origami Club
Fancy Pants Happy Place paper - Here & Now
Fancy Pants Happy Place paper - Hello  
2Crafty Chipboard - Together
Green Tara Apple Blossoms - Red
Green Tara Gardenia - Turquoise
Green Tara Skeleton Leaves - Black
Dylusions Ink - Vibrant Turquoise
Dylusions Ink - Lemon Zest

Monday, February 29, 2016

Echo Park - Little Man: Awesome You by Rachel Lowe

Happy Monday everyone!


This is one of my favourite photos of my boys and hubby (probably because they are all actually looking at the camera!) and I love how it stands out against the red and blues in this collection.
I have managed to achieve a totally different look with the same collection by keeping it to
 minimal coordinating colours.

Again I have used the journalling cards as a feature and to help in telling the story/message.

I have added some 2Crafty Chipboard to add texture to the layout. I firstly inked them in
 turquoise and then added dimensional magic so they really stood out.


I added some alpha stickers to the bottom journalling card to create my title 'Awesome You!'

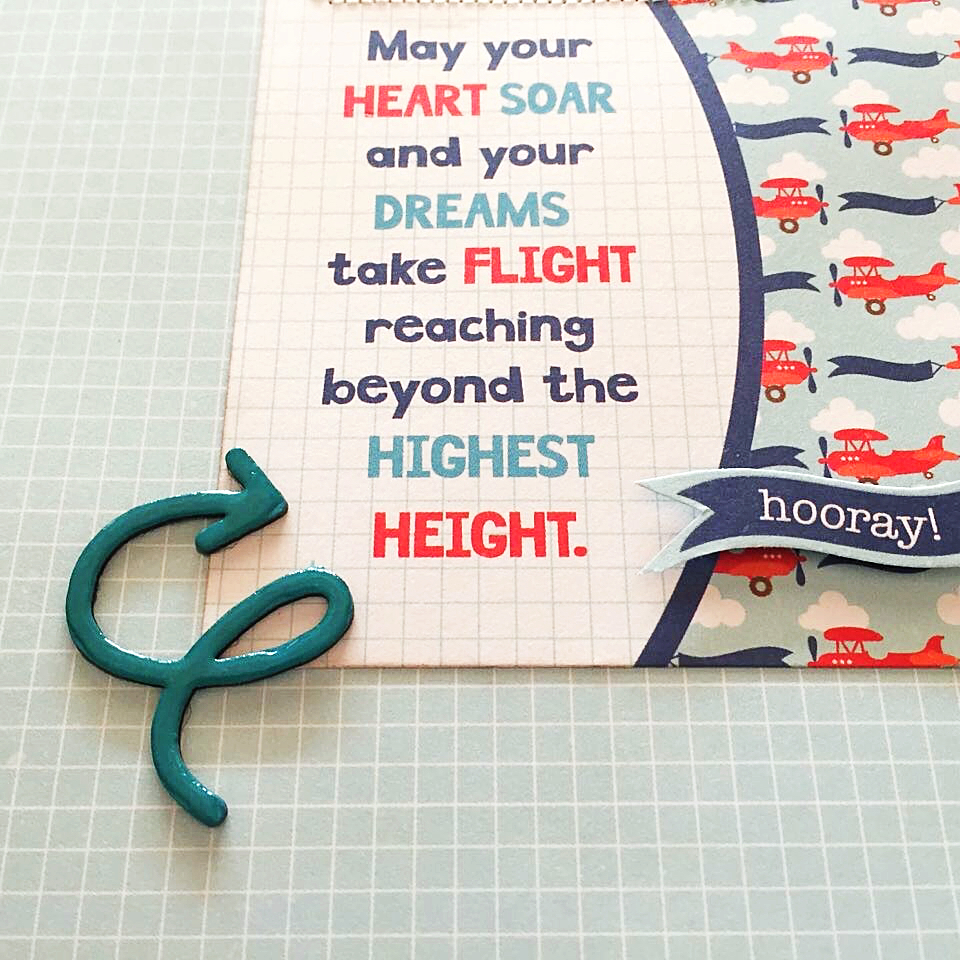
I have foam taped elements such as the plane with banner to create a 3D effect and finished 
with some sewing.

Here are some close up photos.


I love the red, white and turquoise colour combination and I think it creates visual impact.


Thanks for stopping by and see you next week where I will be show casing Basic Grey.
X


2Crafty Chipboard - Harlequin chipboard


Photobucket

Friday, February 26, 2016

Love you More
by Tammy Klingner

Hi Everyone
My turn to share my latest inspiration with you!
 
This week I got to play with the gorgeous Happy Place by Fancy Pants. 
What a gorgeous range!!
Happy, fresh, with a colour palette that works for both boys and girls. 
It has a bit of a funky edge to it, and has triangular and plus shapes, which are very 'on trend'
 and also cool puffy stickers.  These are perfectly suited to the age of my kids (I have a 14 year
 old girl, a 12 year old boy).
 
 
I had a play around with some watercolours again in the background again.  I just splattered 
them on without thinking about it too much. 
 I then added a bit of background stamping, ensuring the lines of the stamp followed the 
direction of the photo.
I added a few layers of papers from the paper pad, some stickers and a flair.


I painted some 2 Crafty chipboard as my title.  This title was actually the starting point
 for this layout.  As soon as I saw the words, it sparked a story - something my son and I say
 all the time. 
This is often how my layouts begin - with the story.  With what I want to say.  If I don't have
 this, I often just sit and shuffle.  But if I know what I want to capture, what I want to remember,
 the creative process just seems to 'happen'. 
 
What story are you inspired to tell?
 
Have a great weekend.
Love Tam
 
Products Used:
 White Bazzill
Prima Watercolor Pencils
Dylusions Ink Spray - Postbox Red
Kaisercraft Texture Stamp - Wood Panel
2 Crafty Chipboard Love You More
Fancy Pants Happy Place 6x6 Paper Pad
Fancy Pants Happy Place Ephemera
Fancy Pants Happy Place Flairs
Fancy Pants Happy Place Puffy Stickers Mixed Shapes
Fancy Pants Happy Place Dictionary Stickers
 
 
Photobucket

Wednesday, February 24, 2016

Cocoa Vanilla Fre Spirit - Peace by Fiona Johnstone


Hello everyone

This week I am back again with the delightful Cocoa Vanilla collection, Free Spirit. Just perfect for my own little free spirit in today's layout; Peace.


Once again I have used that denim paper from the Hello Sunshine collection as it goes so perfectly with this collection, and of course the dress! I've teamed it up with the softer patterns of the Free Spirit collection and used the gorgeous pastel background of the Dreamy paper. 

I've left the background plain as I just adore the bubble pattern! Instead I focused on the frame to add some softness to the page and tie my colours together. I wanted a soft pastel feel to the frame so applied some gesso, then once that was dry, I sprayed some Dylusions and Dsitress inks and dabbed them dry to get a soft colour. Once done, I added some sploshes of gold with my Gold Lame colour shine. 


I've kept my embellishing to a minimum too, a few choice flowers, some hearts and finished off with some enamel dots. I love how the frame really focuses the photo.


Thanks for stopping by
Till next week

Fiona
x

 
Photobucket 
Products Used:
 
Cocoa Vanilla Free Spirit paper - Dreamy
Cocoa Vanilla Free Spirit paper - My Way
Cocoa Vanilla Free Spirit paper - Wildflowers
Cocoa Vanilla Hello Summer paper - Chill Out
2Crafty Chipboard - Frame Messy Squares
Cocoa Vanilla Free Spirit Enamel Dots
Cocoa Vanilla Hello Lovely Die Cut Ephemera
Green Tara Fantasy Blooms in Rose
Dylusions Ink Spray - Squeezed Orange
Dylusions Ink Spray - Vibrant Turquoise
Distress Stain Spray in Festive Berries
Heidi Swapp Color Shine Spritz - Gold Lame
Pink Paislee Atlas Thickers - Gold Foil
 

Monday, February 22, 2016

Echo Park - Little Man: It's the little things layout and card set by Rachel Lowe

Happy Monday everyone.
This week I have created a layout and card set using Echo Park, Little Man collection.
There is just nothing cuter than little boys!!!!
This is my youngest baby just being too cute with his adorable shy smile.
I just love lime green and the frog is super cute. I used a white card stock so the contrast would have real impact and it coordinates perfectly with Ben's T shirt.
The real star of this layout is the 2Crafty Chipboard star frame.
I have inked it in Lime and instead of placing it over my photo I placed it behind the photo to give the appearance of stars cascading out of the photo.

The title is also from 2Crafty Chipboard and again I inked it in lime green. I used enamel dots around my title so your eye would be drawn to it.


I have tucked a writing journal block under my photo. I have stamped on it and later I will add some hand writing.


On viewing this collection I knew I had to make some cards. I made these keeping in mind my younger relatives. With the journalling card papers, element sticker sheet and alpha sicker sheet these came together easily. I used foam tape and enamel dots to add a 3D effect to the cards.

The colour combinations of this layout are just stunning and perfect for children's layouts and cards.


Thanks for taking the time to have a look.
See you next week with my final share using this collection
X
2Crafty Chipboard Star Frame
2Crafty Chipboard Individual Words - It's the Little Things
Echo Park - Little Man Plaid Paper
Echo Park - Little Man Blocks Paper
Echo Park - Little Man Ephemera
Echo Park - Little Man 3x4 Journaling Cards
Echo Park - Little Man 4x6 Journaling Cards
Echo Park - Little Man Alphabet stickers
Echo Park - Little Man Frogs Paper
Echo Park - Little Man Element Stickers
Echo Park - Little Man Words Paper
Cardstock - White 12x12
Photobucket

Friday, February 19, 2016

Summer
by Tammy Klingner

Hi everyone
 
Well it's Friday which means it's my turn to share my latest creation.
 
This one was taken on a recent family holiday to the beach. We had a ball.....we got lucky
 with the weather and were on the beach every single day. Bliss.
 
I snapped this selfie with my guy, and wanted to document how nice it was to spend a
 whole week together, as a family. Without the pressures of work, distance, and all the other commitments, and frustrations.  Perfection!
 
 
As soon as I saw this background sheet of soft creamy woodgrain by Cocoa Vanilla, I knew
 I HAD to use it.  It's just beautiful.  
 
 I added some spritz, and then tore and adhered lots of little strips of various papers. 
 I LOVE using leftovers, and this technique is a great way to used up little bits of papers
 from  previous projects.  I try not to think too much at this stage, just stick them down
 randomly, with some overlapping. 
 
I then added some random stamping around the edges of the paper.  This helps bring
 it all together.
 
I then adhered my photo with foam tape and added a few finishing touches
 (2 Crafty chipboard arrows and title, journaling, word stickers, and some final flicks
of black paint).
 
 
This technique is something I do often - different colour combos look totally different. 
As I said it's a great way to use up scraps! 
 
I kept my colour scheme to teal, black, cream and kraft, as they have a real beachy feel
 to them - and they look pretty great together.
 
Why don't you give it a try?
 
See you next week.
Love Tam
xx
 
Products used:
Cocoa Vanilla Hello Sunshine Paper - Full Bloom
Dylusions Ink Spray - Polished Jade
Kaisercraft Texture Stamp- Triangles
Dylusions Paint - Black Marble
2 Crafty Chevron Bits
2 Crafty Line Words - Summer
  Kraft Paper
Cocoa Vanilla Hello Sunshine Paper - Happy Days
Bella Boulevard Valentina Paper -Love
Cocoa Vanilla Made of Awesome Paper - Rock Star
Simple Stories Summer Vibes Paper - Teal Wood/Grid
Cocoa Vanilla Hello Lovely Paper - Life Story
Photo Play Like A Girl Paper - Share your Sparkle
Simple Stories DIY Boutique Herringbone Paper
Bella Boulevard Just Add Color Little Bits - Gulf
Maggie Holmes Confetti Everyday Phrase Stickers
 
Photobucket

Wednesday, February 17, 2016

Cocoa Vanilla Free Spirit - Good Times, Good Friends by Fiona Johnstone

Hello everyone

This week I am breaking things up with a softer colour palette and creating with the fabulous Cocoa Vanilla Free Spirit collection. This is a gorgeous collection with pinks and blues and some touches of gold. 

Today's layout: Good Friends, Good Times

For this layout I have added a patterned paper from the Cocoa Vanilla, Hello Sunshine collection. If you are not comfortable with mixing papers from different brands,  mixing from other collections from the same brand is a good place to start as they often have similar toned papers. 

I've kept my background clean on this layout as it already has a print but also because of the busy papers I have used and the variety of colours in my photo. 

The chipboard title and foliage I've inked and then sprayed with some gold color shine, taking inspiration from the floral pattern paper. 

To continue my mixing collections from the same brand, I've used ephemera and the flair button from Cocoa Vanilla's Hello Lovely collection. Then I've added s couple of assorted flowers to finish my layout. 

Thanks for visiting 
Till next week 

Fiona 
X

Photobucket
Products Used:
Cocoa Vanilla Free Spirit patterned paper - Eclectic
Cocoa Vanilla Free Spirit patterned paper - My Way
Cocoa Vanilla Free Spirit patterned paper - Wildflowers
Cocoa Vanilla Hello Sunshine patterned paper - Chill Out
2Crafty Chipboard Title - Good Friends, Good Times
2Crafty Chipboard
Cocoa Vanilla Hello Lovely Flair Buttons 
Cocoa Vanilla Hello Lovely Die-Cut Ephemera 
Green Tara Gardenia Pale Pink 

Monday, February 15, 2016

Echo Park - Little Man: Superhero and Puppy Adventure layouts by Rachel Lowe

Hello everyone Rachel here again.
I have two layouts this week for you using the super cute Little Man collection.
I have wanted to scrap this photo of my boys when they first started footy but never quite
 found the right papers to co ordinate with the colour of their jumpers, however as soon as I
saw this collection I knew it would be perfect (sports photos are the hardest to scrap in 
my opinion).
The primary colours make it so versatile and without the need to covert your photos to
 black and white.
I chose kraft as my base of tone down the greens in the jumper (white would have contrasted
 too much). 
I have sewn on the layout and used staples to add texture.
Sports photos can be challenging to scrap but I think this collection made scrapping this 
photo even with green (unattractive) jumpers easy!

Here are some close up photos of this layout.


Here is the second layout, showing you the versatility of this collection.

I love this photo of my boy and our fur baby when he was a puppy. This is a photo that
should not be converted to black and white as it would lose it's visual impact, finally papers
 that will work with this photo (and yes the bright striped child's T shirt!!!).


When using a dark background paper you need to ensure your other papers and
 embellishments are bright and varied for contrast.


Here are some close up photos of this layout.


There is lots of layering of different papers in this layout.
I have foam taped my photo and the puppy sticker on the 3x4 inch journal block.


I did not alter the 2Crafty Adventure word but I used Dimensional Magic to make it stand out.

Thanks for stopping by and happy scrapping.


Photobucket

Friday, February 12, 2016

Fri-Yay!
By Tammy Klingner

Hi Everyone
Well its FriYay, so it's my turn to share my latest creation. 
 
This time I've played around with some watercolours and some Basic Grey B Side. 
I love the effect of watercolours. And the best bit - it's so simple, and so forgiving. 
 
I started with my photo.  It was a selphie taken of us and friends on a recent weekend away.
  It was a bit of a challenge to fit all 10 of us in (no selfie stick)! and also a challenge to scrap,
 as there were so many colours!! So I printed it in black and white.  I really wanted to capture
 the fun, craziness of the moment so I went with a few bright colours and fun sayings, teamed
 with black and white.
 
 
It's important to remember when using your watercolours to apply a coat of transparent/clear
 gesso  to your cardstock first.  This creates a resist and allows your watercolour to sit 'on top' 
of the page, rather than soak in.  It makes a HUGE difference!!
 
I used my Prima Watercolor Pencils by applying a lot of water onto a small paint brush and
 then rubbing this onto the lead or 'color' of the pencil.  I then randomly applied this onto the 
page by both painting it on in 'blobs' and by flicking it on. 
 
 Lots of water is required for both of these techniques!  It really is a wonderful technique - just
 have fun with it, and go for it.  With this page, I felt like I had gone a bit crazy and added 
too much watercolour, but once I added my papers and photos, I actually decided to add 
a bit more. 
 
Once my page was completely dry I added lots of frames and paper scraps and Basic Grey die cuts. 
 I also used a lot of word stickers.  I love that they help create that 'fun' element.
 
 
I finished it off with some 2Crafty Chipboard. Man I love those triangles!!
I covered them in various scrap papers, and added in some hand drawn stitches and some
 hand-drawn triangles.
 
 
This was so fun to create, and I love that it has captured a happy fun moment in time!!
 
Thanks for joining me this week. I'll see you next week!
Luv Tam.
xx
 
Products used:
White Bazzill
Basic Grey B Side Die Cuts
Basic Grey B Side Paper - So Anyway
2 Crafty Triangle Set
Bella Boulevard Just Add Color Little Bits Stickers - Bell Pepper
Bella Boulevard Just Add Color Little Bits Stickers - Gulf
My Minds Eye My Story Enamel Shapes
Prima Watercolor Pencil Set - Spring & Fall
Simple Stories DIY Newspaper Paper
Simple Stories DIY Herringbone Paper
Simple Stories DIY Frames
Thread
 
Photobucket