HOMEABOUT USSHOP HERECROPDATESCURRENT CHALLENGESTIPS&TUTORIALS

Tuesday, February 10, 2015

Kaisercraft Shine Bright Collection by Fiona Johnstone


Hello everyone
 
Three new collections from Kaisercraft this month and today I am sharing with you a layout created using the fabulous Shine Bright collection. I love yellow, so bright and fun and this range has teamed it up with black and white to make a really striking combination.
 
For my layout today, I have used a black and white photo, I think this range really suits a dramatic photo.
 
You are my Sunshine:


I've created my background using Dylusions Ink in yellow and stamping in black ink, then I've layered a combination of yellow and white, and black and white patterned papers. I've used the collectibles and stickers from this collection to keep consistency with the gorgeous colour combination. Then I've finished my layout with a black and yellow Flutterby Designs flair and some 2Crafty Chipboard.
 
A couple of close-ups:


I've layered up some of the collectibles and stickers on alternate corners of my layout. I've also mirrored my inking and stamping top and bottom of the page.
Always love a cute Flair badge to finish off a layout and you can't go past a chipboard title to alter to compliment your page.
 
 
Till next week
Fiona
x
 
 
Photobucket
Products Used:
 
Kaisercraft Sunshine Bright Paper - Sunflower
Kaisercraft Sunshine Bright Paper - Daisy
Kaisercraft Sunshine Bright Paper - Sunbeam
Kaisercraft Sunshine Bright - Sticker Sheet
Kaisercraft Sunshine Bright - Collectibles
2Crafty Chipboard Title - You are my Sunshine
Flutterby Designs Flair Design 254
Dylusions Ink
Washi Tape
Kaisercraft Texture Stamp - Chevron
Kaisercraft Texture Stamp - Grid
White Paint
Black Paint


Friday, February 6, 2015

Webster's Pages "Beautiful Chic" By Linda Eggleton

Hello everyone....happy Friday!
 
This month I have a beautiful new collection to play with from
Webster's Pages - Beautiful Chic
 
It is full of gorgeous colours & patterns - pinks, teals, lime & mint green, black, white, brown & a hint of browny gold....so I'm sure there's plenty in this collection to suit a variety of themed layouts.
 
My first page for the month is based on sketch #132 at Sketchabilities
 
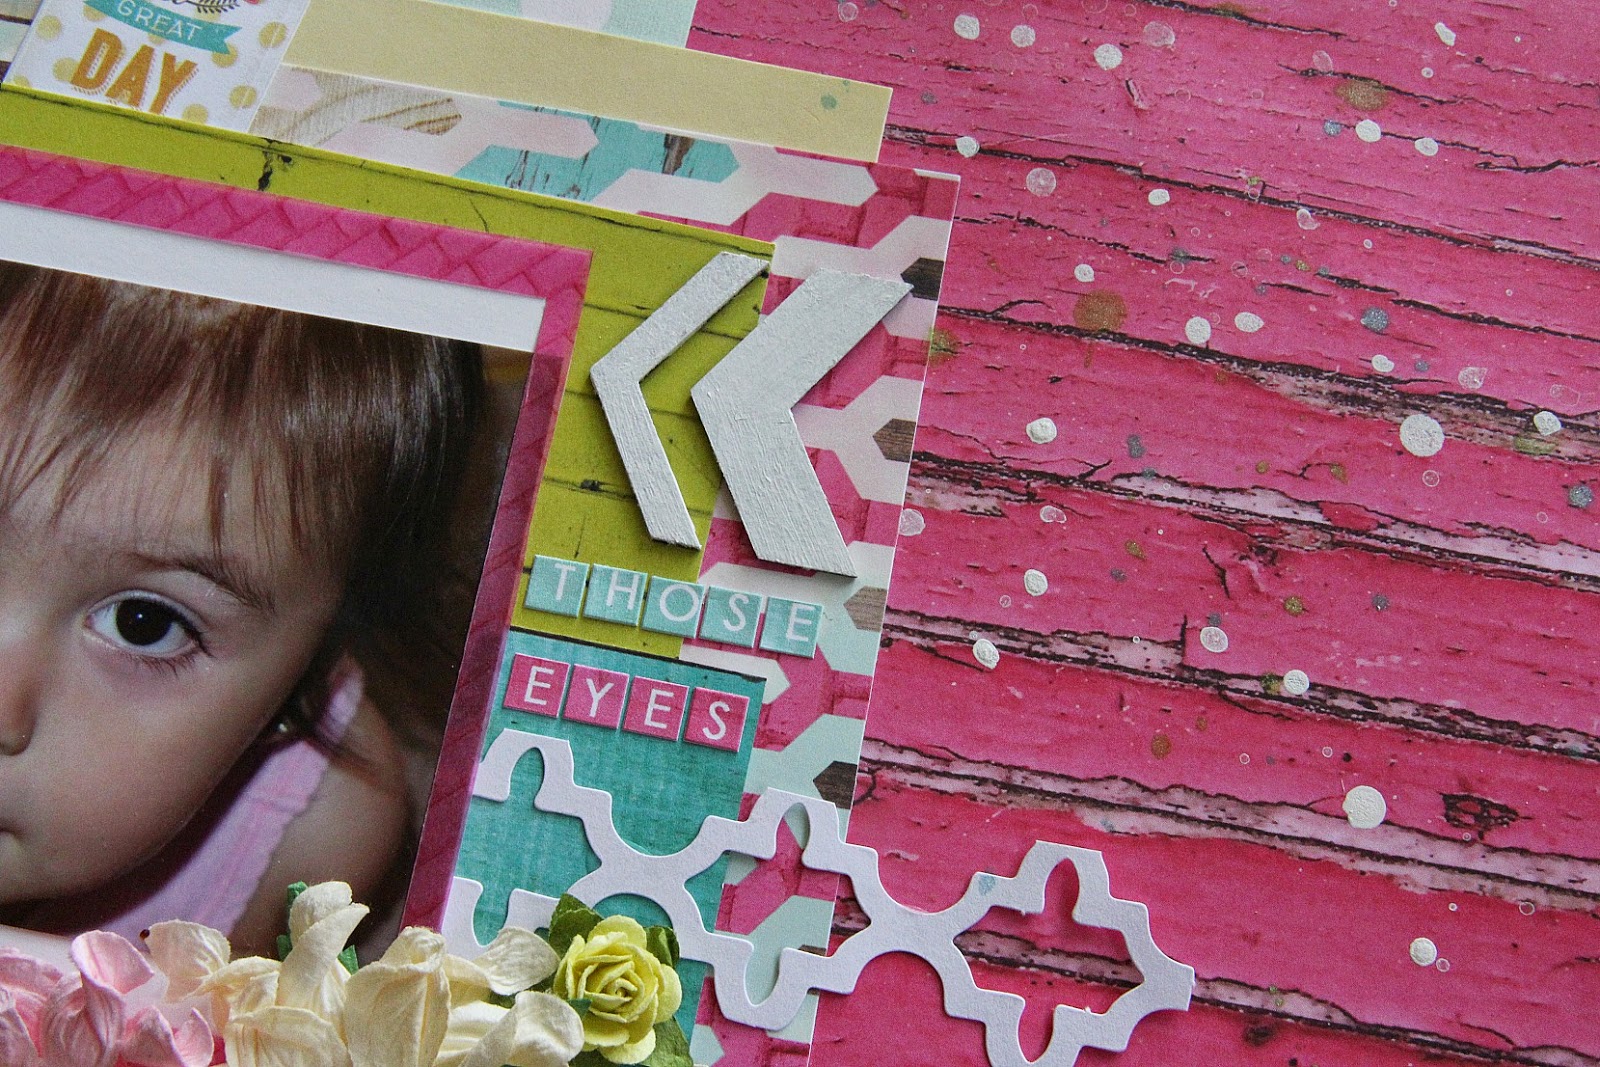
"Those Eyes"
 
I have used the reverse side of the Alphabetize paper for my background, with just a few splashes of a few different mists - White Linen, Trunk Bay & Key Lime Pie.  The peeling paint & revealed wood underneath is just so real looking in this paper - I love it <3


I have a cluster with a few Green Tara & Petaloo flowers, some die-cut leaves
& a flair from my stash.  The white lattice poking out above the cluster runs right through to the other side of the photo as well - it is a piece cut from the Jillibean Soup Lattice Placemat.


I have used a few tags from the sticker sheet - Tags & Prompts & also from the Frame & Icon Cards vellum sheet.  The gorgeous little butterflies are 2Crafty that I've painted white & topped with a Kaisercraft rhinestone.


Some more 2Crafty Chevron Bits - again painted white.
The alpha stickers are part of the Beautiful Chic collection,
there are 2 sticker sheets in both teal & pink.


Here I've made another small cluster to fit in with the sketch.
I've used one of the 2Crafty 6" Clock Frames that I've placed on top of a die-cut doily.  I first coated the clock frame in gesso, then coloured it lime green with one of my new Big Brush Pens.  There's also some more Green Tara flowers, a negative 2Crafty heart piece  & a Flutterby Flair, as well as one of the Beautiful Chic stickers & a small Prima rose from my stash.


For underneath the photo, I've cut  & layered a variety of patterned papers & then played around with their positioning until I was happy with it.  The pink frame piece around the photo is also cut from the Frame & Icon Cards vellum sheet.  I have used some of the offcut pieces of vellum to add my journaling .
 
So there you have my first layout for the month using this gorgeous collection.
I am looking forward to creating more with it during the coming weeks :)
I hope you have been inspired by it.
 
Until next time.... xx


Photobucket
 
Green Tara - Gardenia - Ivory
Green Tara - Apple Blossom - Pink
Green Tara - Cherry Blossom - Pink/White
Petaloo - Botanica Minis - Yellow
Petaloo - Botanica Minis - Teal
Kaisercraft - Rhinestones - Island Lagoon

Tuesday, February 3, 2015

WRMK Love Notes by Fiona Johnstone

 
Hello everyone
 
Can you believe we are already into the second month of the year? Crazy! But the good news is I have some gorgeous new paper to play with this month, We R Memory Keepers, Love Notes. Adore the colours, pink and green with some black and white. Just gorgeous.


First share for today, Cherish


  For this layout, I wanted to create a type of a water colour background to compliment the papers, particularly the Tulip paper.  I have used the new Tim Holtz Distress spray Stain in Picked Raspberry - love these sprays, fabulous colour!! Also my other favourite spray - Dylusions Ink Spray in Fresh Lime. I combined these with water to create a paler background, then added some stamping in black for dramatic contrast. I've then layered several of the papers and used predominantly the same coloured embellishments to finish off.
Some close ups:
 
 
 I've used a large Maya Road transparent doily and a hot pink heart from my stash to keep the complimentary colours. I've then added a  touch of silver with some Heidi Swapp Glitter Stickers. 


On this close-up, you can see the mix of watercolour background, I have also used this on the document tag that I cut from one of the patterned papers.  My title Cherish I simply inked in black to make it pop!


My final close-up, some pretty Green Tara flowers and skeleton leaves to soften the layout and finish it off.

  My second share this week, Roller Sk8's
 
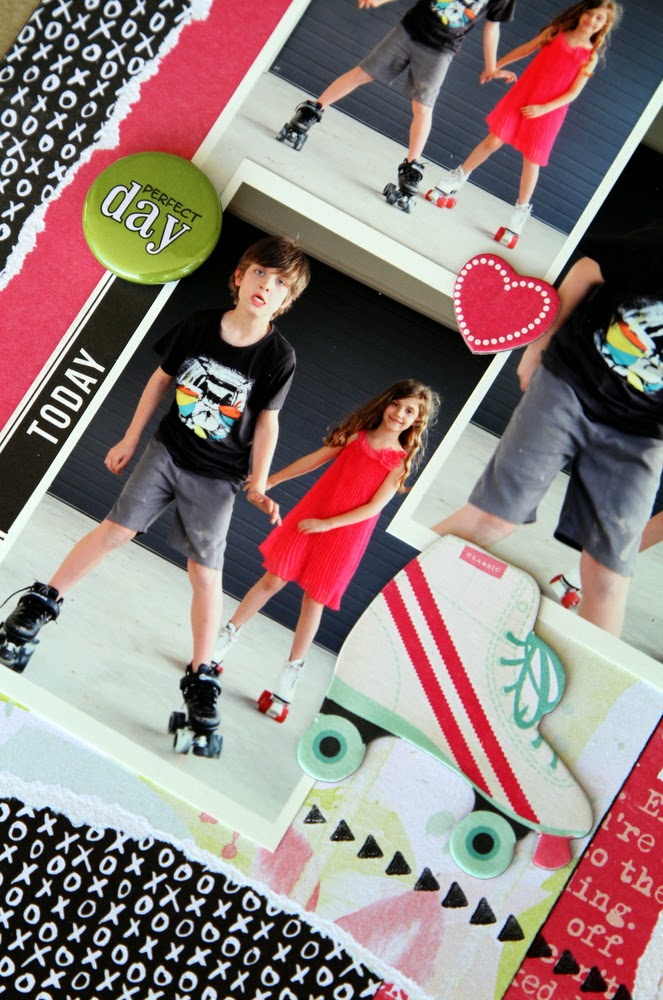
Love this sequence of photos of my two having a ball skating out in the front yard. They were having so much fun, as Zane was getting the hang of his new rollerskates. The colours inthe Love Notes range were just perfect with the black and pink, and I love the contrast of the green paper. which has a bit of a whitewash already through it. I've added just a touch of stamping to bring in a bit more black to the right side of my layout for some balance.


  Some close-ups:
A cute rollerskate (and matching heart) that I just had to use - thankfully it contained the colours of the paper! A small piece of journaling is hidden under the today tag, and a Flutterby Design Flair to add an extra pop of green.

 
I've finished this one off with a pink and black title, and you can see a little more of the stamping, including the super cute xoxo stamp I found recently after a stash cull. 
 
Thanks for stopping by, I hope you've been inspired to get creating with this gorgeous range.
 
Fiona
x
Photobucket 
Product List:
 
Cherish
WRMK Love Notes Paper - Tulip
WRMK Love Notes Paper -  Sweetheart
WRMK Love Notes Paper - Weekending
WRMK Love Notes Paper -Wild Love
Heidi Swapp Glitter Stickers Silver Love
2Crafty Chipboard - Cherish
Simple Stories DIY Enamel Dots
WRMK Enamel Dots - Neutrals
Green Tara Apple Blossoms - White
Green Tara Cherry Blossoms - Pink 
Green Tara Skeleton Leaves
Maya Road Transparent Doilies
Dylusions Ink Spray - Fresh Lime
Tim Holtz Distress Spray Stain - Picked Raspberry
Bo Bunny Stamp
Crafters Workshop Stencil - Tattered Lace
Black Ink
White Cardstock
Roller Sk8's
WRMK Love Notes Paper - Weekending
WRMK Love Notes Paper - Count the Ways
WRMK Love Notes Paper -  XOXO
WRMK Love Notes Paper - HeartBeat
Crate Paper Oh Darling Chipboard Die-Cuts
AC Thickers Amy Tan Plus 1 Black Foam
Flutterby Designs Flair
Kaisercraft Mr Fox Collectibles
October Afternoon Mini Market Stickers
Kaisercraft Texture Stamp - Edges
Black Ink
 

Friday, January 30, 2015

Final Epiphany layout & Kaisercraft XO - By Linda Eggleton

Hi everyone!
I am back for my usual Friday share, with one last layout for the month,
using the beautiful Prima Epiphany collection.
 
This time I've scrapped one of my holiday snaps from Tasmania a few years ago...I thought the colours in the photo went well with the colours in the papers & embellishments.
 
"Binalong Bay"
 
I have used the Prima Stone Wall 1 stencil on the background with some modelling paste, followed by a few sprays of TA Crushed Shells glimmermist....then finished off with some stamping using Kaisercraft Honeycomb stamp and a few splashes of mist flicked around as well. 
The background paper used is - At this Moment.


I've created a cluster using a few Prima flowers from my stash, mixed with some Green Tara from AAS...along with one of the 2Crafty Fancy Damask pieces that I cut in half & used at either side of the photo....a Prima metal zipper & Teresa Collins brad.


Much the same in the top cluster too, with the addition of a Prima wood icon, & Flutterby flair.


Here you can see some of the background work using the Rock Wall stencil & random stamping using Kaisercraft Honeycomb stamp.


And more background work again.
I coloured the 2Crafty chipboard by coating it in Gesso first, then lightly painting it with Trunk Bay glimmermist


I added some strip journaling across the top of the page about my thoughts on this beautiful place.


And here is a close up of the main area of the page :)
 
 
 Next is some Kaisercraft DT work using one of the January new releases, which is a Valentines themed collection called XO
 
I have gone for a non Valentines themed layout.....
 
"So Sweet"
 
The pinks & blues of this collection went so well with Olivia's cute little knitted jumper...hence the reason why I've chose this photo :)

The word "sweet" that forms part of the title is from the Collectables pack...and there are heaps of other Valentine's related words in the pack as well, plus LOTS of other pieces, as always.


I've used some paper blooms, collectables pieces & some 2Crafty chipboard, Funky Heart Swirls, for my cluster....oh, and there's a flair button in there as well.


Here's some more of the Collectables pieces...the heart arrow, love stamp & the 'Love You' circle at the top....as well as another 2Crafty piece, Silhouette Heart that I've coloured black.


I've also used some of the "Be Mine" 4x6 Captured Moments cards in amongst the paper layers in various spots on the page.


The white circles are 2Crafty Circular Panel that I've cut into pieces & placed
at the sides of the photo, and they are simply coated in Gesso.
 
XO - Madly P1699, Cuddles P1701, Kisses P1694, Deeply P1700, Paper Pad PP956, Sticker sheet SS266, Collectables CT813, Be Mine Captured Moments 3×4 cards CM121, Coral alpha stickers AS256, Coconut paper blooms F627, Sage paper blooms F632, Black pearls SB793
 
Other – 2Crafty chipboard, Flower, Flair, Doily die, Gesso, Button, Gelatos
 
 
Now for a couple of cards....
 
"My One & Only"

Again using some of the Captured Moments cards...collectables pieces & papers & cut-outs from the XO paper pad...along with some gorgeous paper blooms


XO - True Love P1695, Kisses P1694, Be Mine P1696, Paper Pad PP956, Collectables CT813, Be Mine Captured Moments 3×4 cards CM121, Fairy Floss paper blooms F640, Coconut mini paper blooms F644, Iceberg mini paper blooms F647
 
Other – Paper doily, Leaf punch
 
 
"Ps. I love You"

More layers of pieces from the paper pad, Captured Moments cards & collectables pieces, with more blooms, flower & flair button. The word 'Love" is from the collectables pack & is mounted up on some foam tape.


I traced a heart onto one of the Captured Moments cards & then cut it out, using the negative piece as the top layer on my card.
 
XO - Be Mine P1696, Deeply P1700, Cuddles P1701, Collectables CT813, Sticker Sheet SS266, Be Mine Captured Moments 3×4 cards CM121, Fairy Floss paper blooms F640, Pearl Pearls SB713
 
Other – Flower, Flair, Butterfly punches
 
 
I hope you have enjoyed seeing my creations and have been inspired by
both of these gorgeous collections.
 
You can find the Epiphany collection in the AAS store HERE
And the Kaisercraft XO collection HERE
 
 
Thanks so much for visiting today! xx
 
  
Photobucket
 
Products used for Binalong Bay layout
 
Prima Marketing - Epiphany paper - At this Moment
Prima Marketing - Epiphany paper - Manifestation of Love
Prima Marketing - Epiphany paper - Words to Live by
Prima Marketing - Epiphany paper - Divine Exposure
Prima Marketing - Epiphany - Ephemera
Prima Marketing - Epiphany - Wood Icons
Prima Marketing - Stencil - Stone Wall 1
Prima Marketing - Flowers
Prima Marketing - Alpha's
Prima Marketing - Zipper
Kaisercraft - Texture Stamp - Honeycomb
Green Tara - Apple Blossoms - Pink
Green Tara - Cherry Blossoms - Cream
Green Tara - Cherry Blossoms - Soft Pink
2Crafty Chipboard - Fancy Damask
Teresa Collins - Memorabilia - Decorative Brads
Tattered Angels - Glimmermist - Crushed Shells
Tattered Angels - Glimmermist - Trunk Bay
Tim Holtz - Distress Spray Stain - Tattered Rose
Flutterby Designs - Flair - Design 181
Tim Holtz - Distress Ink - Walnut Stain
Mont Marte - Modelling Paste
Mont Marte - Gesso
JoyCrafts - Leaf Die
Paper Doily


Tuesday, January 27, 2015

Pink Paislee Bella Rouge by Fiona Johnstone


Hello everyone
 
I hope you all had a wonderful Australia Day weekend. My weekend started off great with our regular crop day, held monthly at Gymea. I taught a class in the morning using the lovely Bella Rouge collection by Pink Paislee, then enjoyed an afteroon of scrapping.
 
Today I am sharing with you the layout I taught for class, a double page layout (rare for me). 
 
Fabulous:


Love the yellow, pink and black colour combination in these papers, I've combined them with some stamping in black and splashes of pink and yellow to tie my background in with the papers. Then I've created a complimentary page either side to allow me to share a bigger selection of photos. 
 
While this is a double layout, it can just as easily be two singles, with some different photos, as I've used stickers on both sides of the layout that could be separate titles. 
 
These fabulous word stickers are from Kaisercraft, you get a whole bunch of great words on a 6x12 sheet as you can see here:


I've used a Bo Bunny stamp to stamp some random doily shapes on my white cardstock before using some yellow Dylusions ink and Heidi Swapp Colorshine in Pink to splosh a few bits of colour. 

The other side of the double:


with some more of these cool word stickers, and more stamping and ink splattering!!

As the paper is quite busy and there are lots of photos, I have kept the embellishments to a minimum, creating a cute little flower cluster on one side with some Green tara flowers and some 2Crafty chipboard leaves.


And on the other side I have added a silver doily and a scattering of the matching flowers:


 This has been a hugely popular range, so be sure to head on over to the store to grab some while it's still available, here. 

Thanks for stopping by
Till next week
Fiona
x


Photobucket 
Products Used:
 
 Pink Paislee Bella Rouge Paper - Bloom
Pink Paislee Bella Rouge Paper - So Lovely
Pink Paislee Bella Rouge Paper - Shine
Pink Paislee Bella Rouge Paper - Rainbow Bright
Kaisercraft Clear Stickers 
Green Tara Flowers
Bo Bunny Stamp
Dylsions Ink Spray
Heidi Swapp Colorshine - Blush
White Cardstock
StazOn Ink - Jet Black
Doily


Friday, January 23, 2015

Prima "Epiphany" & Kaisercraft "Blue Bay" by Linda Eggleton

Hi everyone, and happy Friday to you all.
Yay it is almost the weekend....and a long one at that!

Happy Australia Day for Monday to all the Aussies :)

I am back this week with another layout created with the Epiphany collection from Prima.
I have really LOVED working with this collection...and feel that it pushed me a little outside of my normal scrapping style/zone.

My layout is based on this months Prima BAP


"Yesterday's Memories"

I started off with the Manifestation of Love paper and gave it a light dab with a sponge & some Gesso around the centre area of the page...just so that the writing & images on the paper were a little more subtle.  I then added some texture using Prima Flourish stencil & some modelling paste.  After that was dry I added some blobs of mists (one colour at a time) and held the page up so that they ran down the page....I then finished the background off by dabbing more mist randomly over the page with some clingwrap.


I've used the gorgeous flowers that are part of the Epiphany collection....as well as some oldies from my stash.


I've also used more of the Epiphany wood icons - which unfortunately have now sold out....BUT there are other Prima Wood Icons available in the online store that would work & look just as good!


Here is a shot of the gesso covered background & the runs of mist & stain


The "Dream" wood icon at the top of this pic....I lightly dabbed over it with gesso so that it wasn't so black....and the little round frame I coated in TH Distress spray stain - Tattered Rose.


These gorgeous little bird cages are fussy cut from the "At this Moment" paper and I have coloured them with a spray of Glimmermist.


The squares in under the photo area are stamped with Prima Stiched Squares stamps that I cut out from various Epiphany papers....and then I have added some more stamping on some of the squares using a variety of Prima background stamps, plus coloured them with mists as well as adding a few splashes here and there too.

I used a few strands of plain brown twine to create the circle frame around the photo & then used some of the black & white twine that comes in the Ephemera pack to wind around it & hold it all together nice & tight.

The pic is of my mum when she was a little girl about 2-3 years old.
I will be adding some journaling to the back of the page (when I get time!)


Next up I have some of my Kaisercraft DT work using the beautiful
First is a layout...

"This is Me"

This collection comes with quite a few papers that I just loved to cut up to use in my layers around the photo....All the doors that you can see come from the Sky Blue paper....which is covered in all these fabulous looking doors - all different sizes & colours <3 And also one of the specialty papers, having heaps of beautiful frames on it...some with verses inside them, and others just blank. Well, I cut some of those up too, to add in the layers as well....oh such fun! Some of the collectables pieces are doors & frames also.

I've used the Lattice template with modelling paste on the background....with some stamping using Rocks, Grid & Tiny Dot stamps


See how Kaisercraft paper blooms ALWAYS match with their paper collections?!
I think that's so cool...and so very clever! It's not like they produce new flowers to compliment each new paper collection....their paper collections just always go with their existing blooms....way cool!


I absolutely LOVE that ornate clock face that is in the Collectables pack....all that fine detail makes it look so real....and 3D - just magical.


Here you can see some of the frames & doors that I cut out, and a few of the diecut collectables pieces....I also used some of the Sea Breeze Captured Moments cards in my layering as well.


Here's a bit of a close up of the background stencil work & stamping...and one of the new Butterfly clear stickers that I've mounted on to white cardstock.


Blue Bay - Baltic P1736; Sea Breeze P1732; Sky Blue P1730; Azure Specialty paper PS386; Collectabales CT817; Sea Breeze Captured Moments 3×4 cards CM123; Sticker Sheet SS270; Blue Bay clear stamps CS203; Honey paper blooms F628; Sage paper blooms F632; Coconut paper blooms F627; Balloon wooden flourish FL437; Monochrome epoxy stickers ST911; Butterfly clear sticker ST915; Lattice template T610; Rocks clear stamp CS875; Tiny Dot clear stamp CS151; Grid clear stamp CS755

Other – Machine stitching; Twine; Cardstock; Archival Ink; vinyl button; Leaf die & punch; Butterfly punches


Next I have a beachy little mini album.....
"Kioloa 2013"
The cover is just a few layers of paper, with more layers using the Sea Breeze Captured Moments cards...then topped off with a few blooms, Collectables pieces & some punched leaves...and Kaisercraft alpha stickers for the title :)


Now for the inside of the album

I stuck to having photos only on one side of each page.... keeping the other side for journaling etc


I have mostly used papers from the Blue Bay paper pad....and on the journaling side of the page, I've used more of the Captured Moments cards


Some quick & easy journaling strips in a few different colours, helps to keep the page from looking so bland if I'd just used one colour.


Here I've used more of the doors & frames...the doors are cut from the Sky Blue paper & the frame is from the Collectables pack.


More use of the Sea Breeze Captured Moments cards...on both pages.  The photo side I've added the same card in behind the photo, that is used on the journaling side, where I've mounted it on a paper doily & embellished off to the side.


It doesn't take much to embellish the pages in a mini album like this...just a few little flowers (I found flat ones best, as they then didn't bulk up the page & make it difficult to  close), diecuts, chipboard pieces...such as the cute little 2Crafty butterflies, some stickers, and you're done :)


Here's some more 2Crafty chipboard...the circles are cut from the Circular Panel & I've placed them either side of the photo.


Again, using a few flat flowers to create a little cluster...and the butterfly is another from the
Butterfly clear sticker sheet.  I've added one of the Collectables pieces (a key lock), on top of the butterfly with a mini paperbloom on top of that to give the butterfly a bit more depth & definition on the page.


And this is the last page...using pretty much the same embellishments as previous pages, just arranged slightly different on the page.

You can see more closeups of the mini album over on my blog HERE
  
Blue Bay - Baltic P1736, Dew Specialty paper PS385, Paper Pad PP959, Sea Breeze Captured Moments 3×4 cards CM123, Collectables CT817, Sticker Sheet SS270, Blue Bay clear stamps CS203, Butterfly clear stickers ST915, Latte Pearls PL505, Coconut mini paper blooms F644, Iceberg mini paper blooms F647, Honey mini paper blooms F645, Sage mini paper blooms F649, Black mini paper blooms F661, Terracotta paper blooms F635, Black pearls SB793, Black rhinestones RS452
Other – 2Crafty chipboard, Flowers, Flair button, Wooden veneers, Paper clips, Paper doily, Vinyl buttons, Leaf die & punch, Butterfly punches, Skeleton leaves, Buttons, Kraft mini album

The Prima Epiphany collection is available in the AAS store HERE  
and the Kaisercraft Blue Bay collection can be found HERE 
 
I hope you have been inspired & thanks so much for visiting today!
Until next time... xx
 
 
Photobucket
 
Prima Marketing - Alphabet Letters
Prima Marketing - Stamps - Stitched Squares
Prima Marketing - Background Stamps - Various
Martha Stewart - Punch - Frond
Mont Marte - Gesso
Mont Marte - Modelling Paste